 3965 views
 The GSTR-1 Filing module in Munim GST allows you to prepare, review, and file your outward supply returns seamlessly.
With this feature, you can ensure that all your sales invoices, debit notes, and credit notes are accurately reported to the GST portal.
This module helps you manage filing across monthly or quarterly returns, track filing status, and avoid errors or mismatches during submission.
Here, you will get a step-by-step guide to file GSTR-1 in Munim GST software.
Video Tutorial:
Select GSTR-1 option from My Clients page:
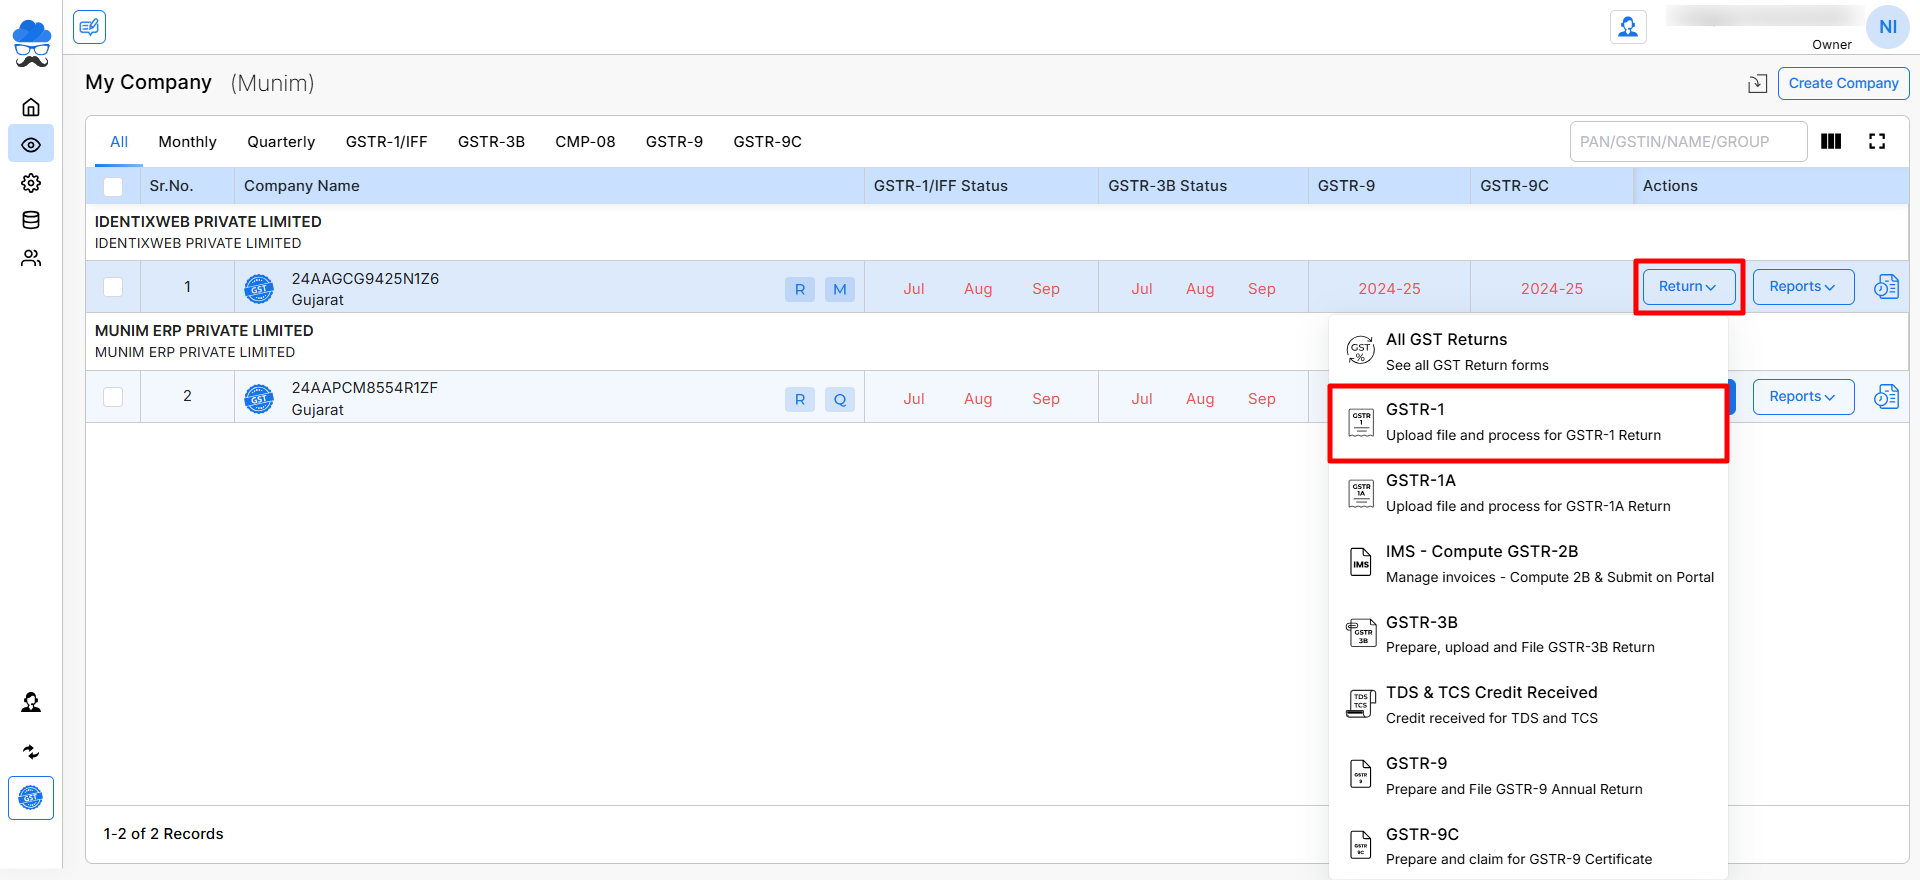
- Once you have created the client company, it will appear on the My Clients page. Here, click on the Return button.
- Now select GSTR-1 from the list of options.
GSTR-1 Filing Steps:
GSTR-1 filing in Munim GST is completed in 4 simple steps:
Flow: Prepare → Verify → Upload → File
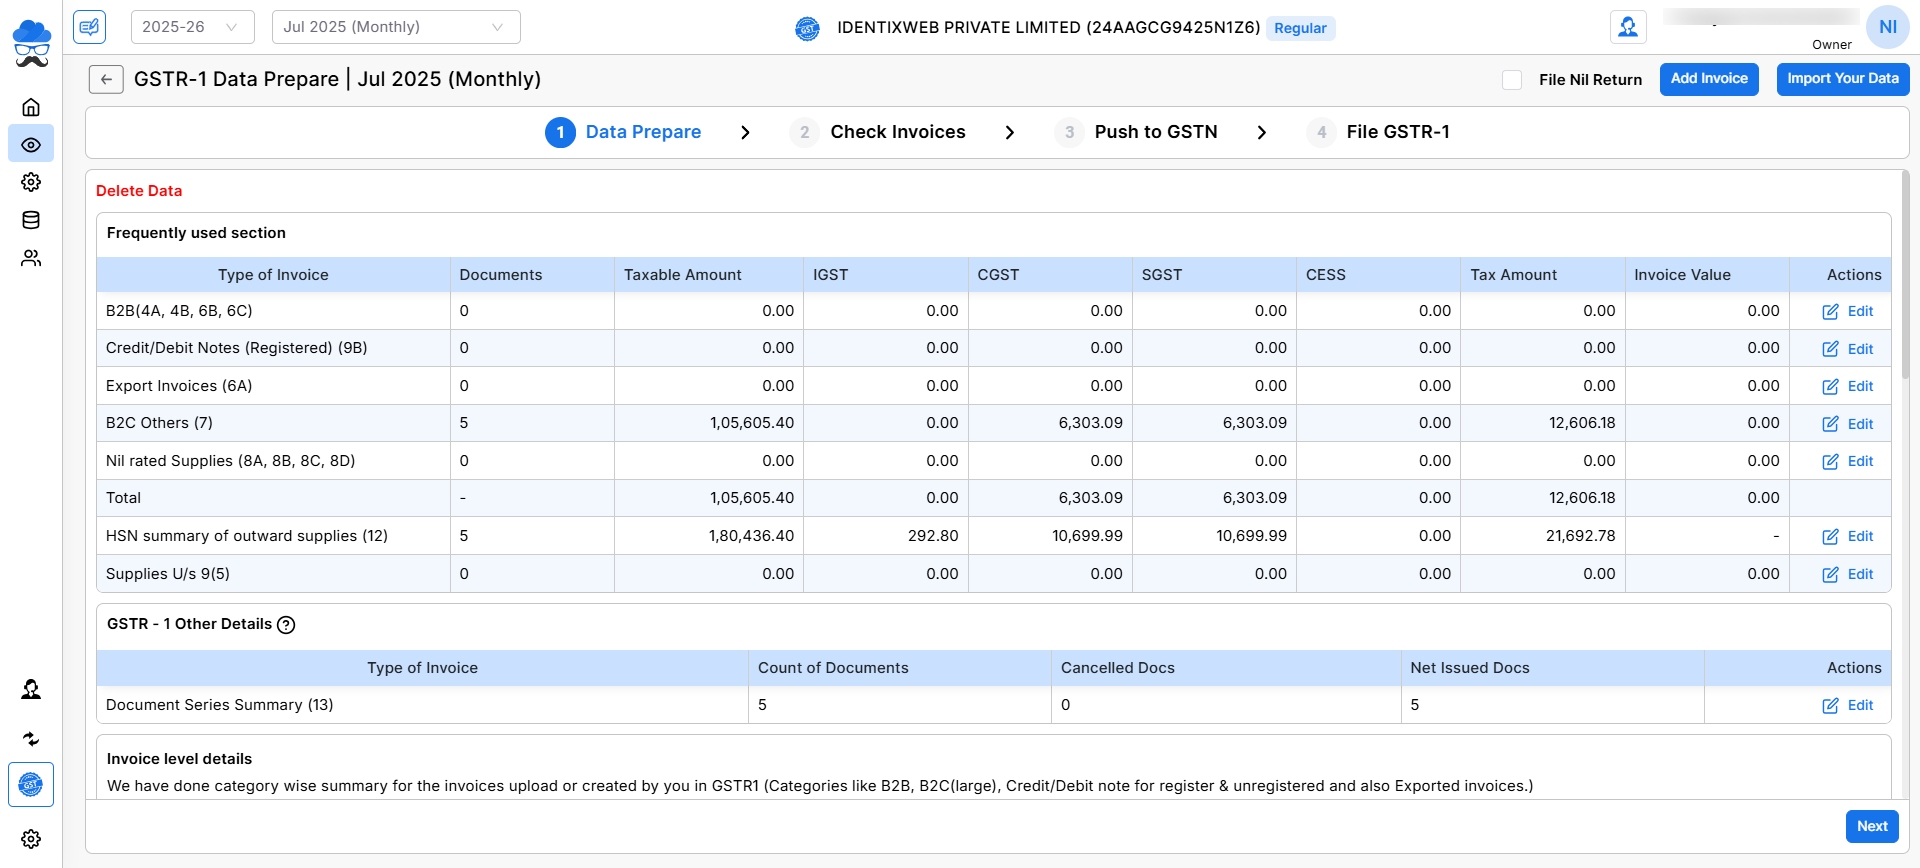
- Data Prepare – The system collects and displays your imported sales data for the chosen period. Review the summary here.
- Check Invoices – Verify invoice-level details like GSTIN, amount, and tax to avoid errors.
- Push to GSTN – Upload your data to the GST portal and resolve any validation errors if shown.
- File GSTR-1 – Preview and submit your return using the EVC option.
Let us examine the process in detail.
1) Data Prepare:
- Prepare your data by adding invoices Manually or Importing data through various options.
- Once you prepare the data, here you will be able to check data of the data added.
Add and prepare data for filing:
- To add invoice data manually, click on the Add Invoice option from the top right corner.
- Or, to add data in bulk, click on the Import Your Data button.
- Choose from options like Government Excel/CSV, Munim Excel template, JSON file, Munim Connector, copy/paste/write, Tally Connector or Ecommerce Excel Template.
- To learn the process of data importing in munim GST, check this Import data helpdesk link.
- To use the Munim Connector or Tally Connector option and check its process, please check out this helpdesk. Munim connector option, Tally Connector option

E-Invoice/E-way Reconciliation:
- To proceed, ensure the relevant option is enabled for the client company within the Client Setting module.
- Following the preparation of GSTR-1 data, you may utilise E-Invoice data for reconciliation purposes on the Data Prepare page.
- You can review the comparison of GSTR-1 vs E-Invoice here, and further, you may click on the “View Detail” option to either download or reconcile the data Invoice-wise and HSN-wise.
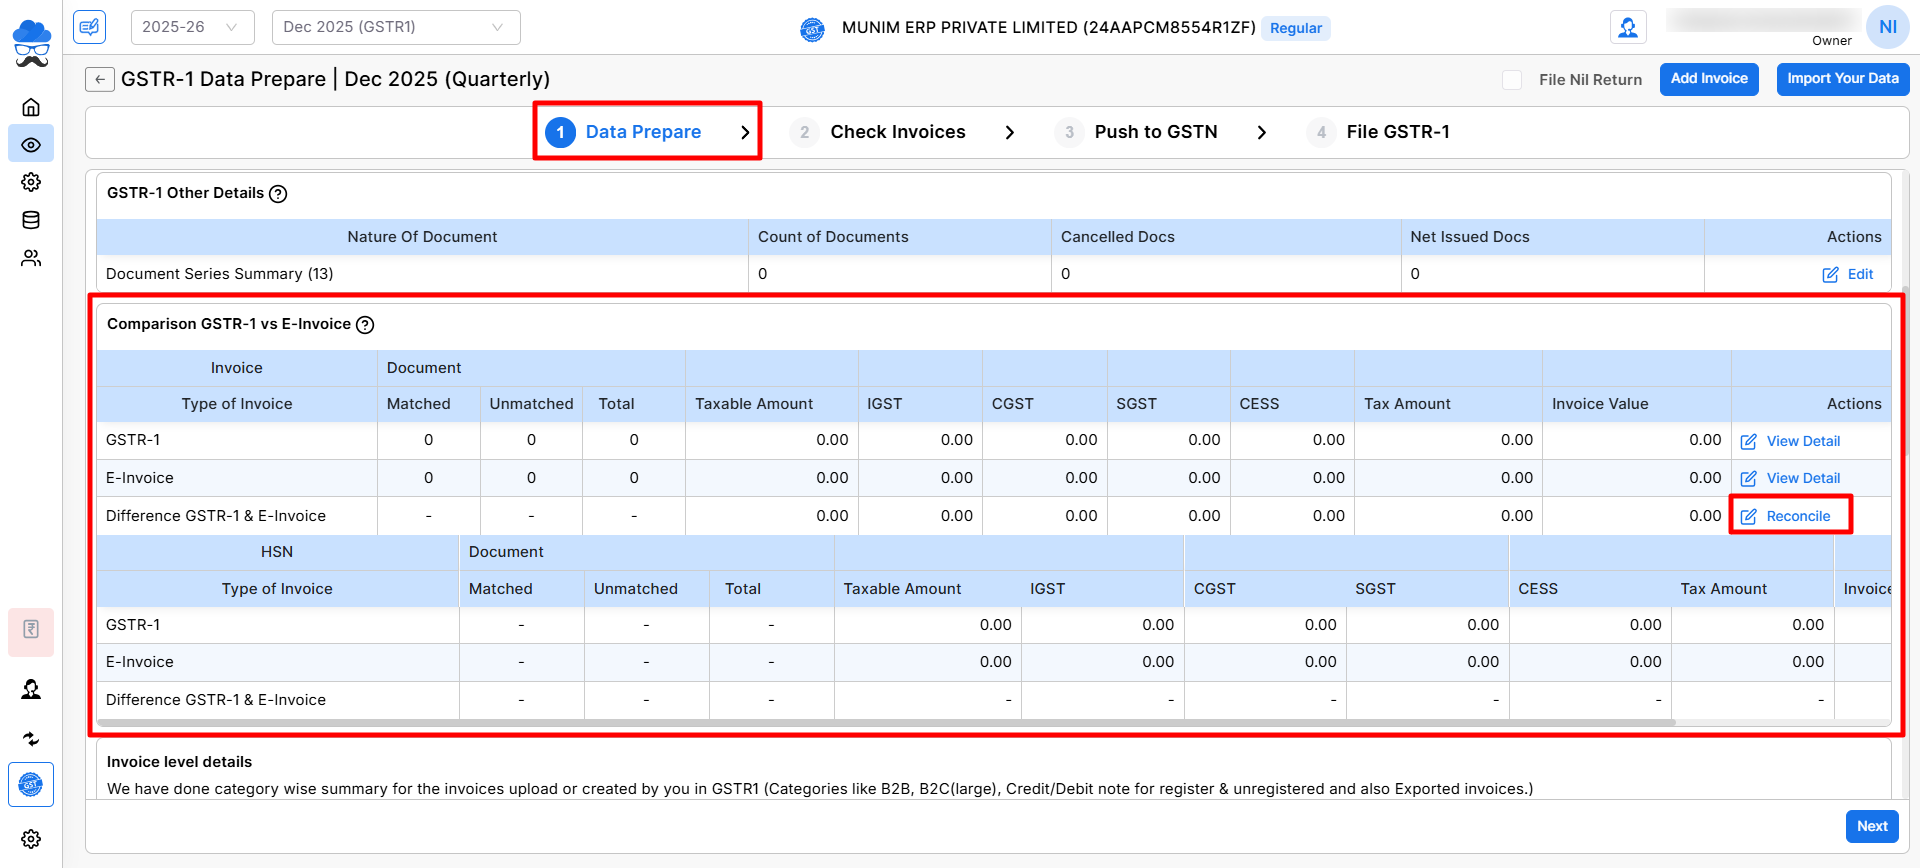
- The Reconcile option can be accessed by scrolling to the right within the Comparison of GSTR-1 vs. E-Invoice section.
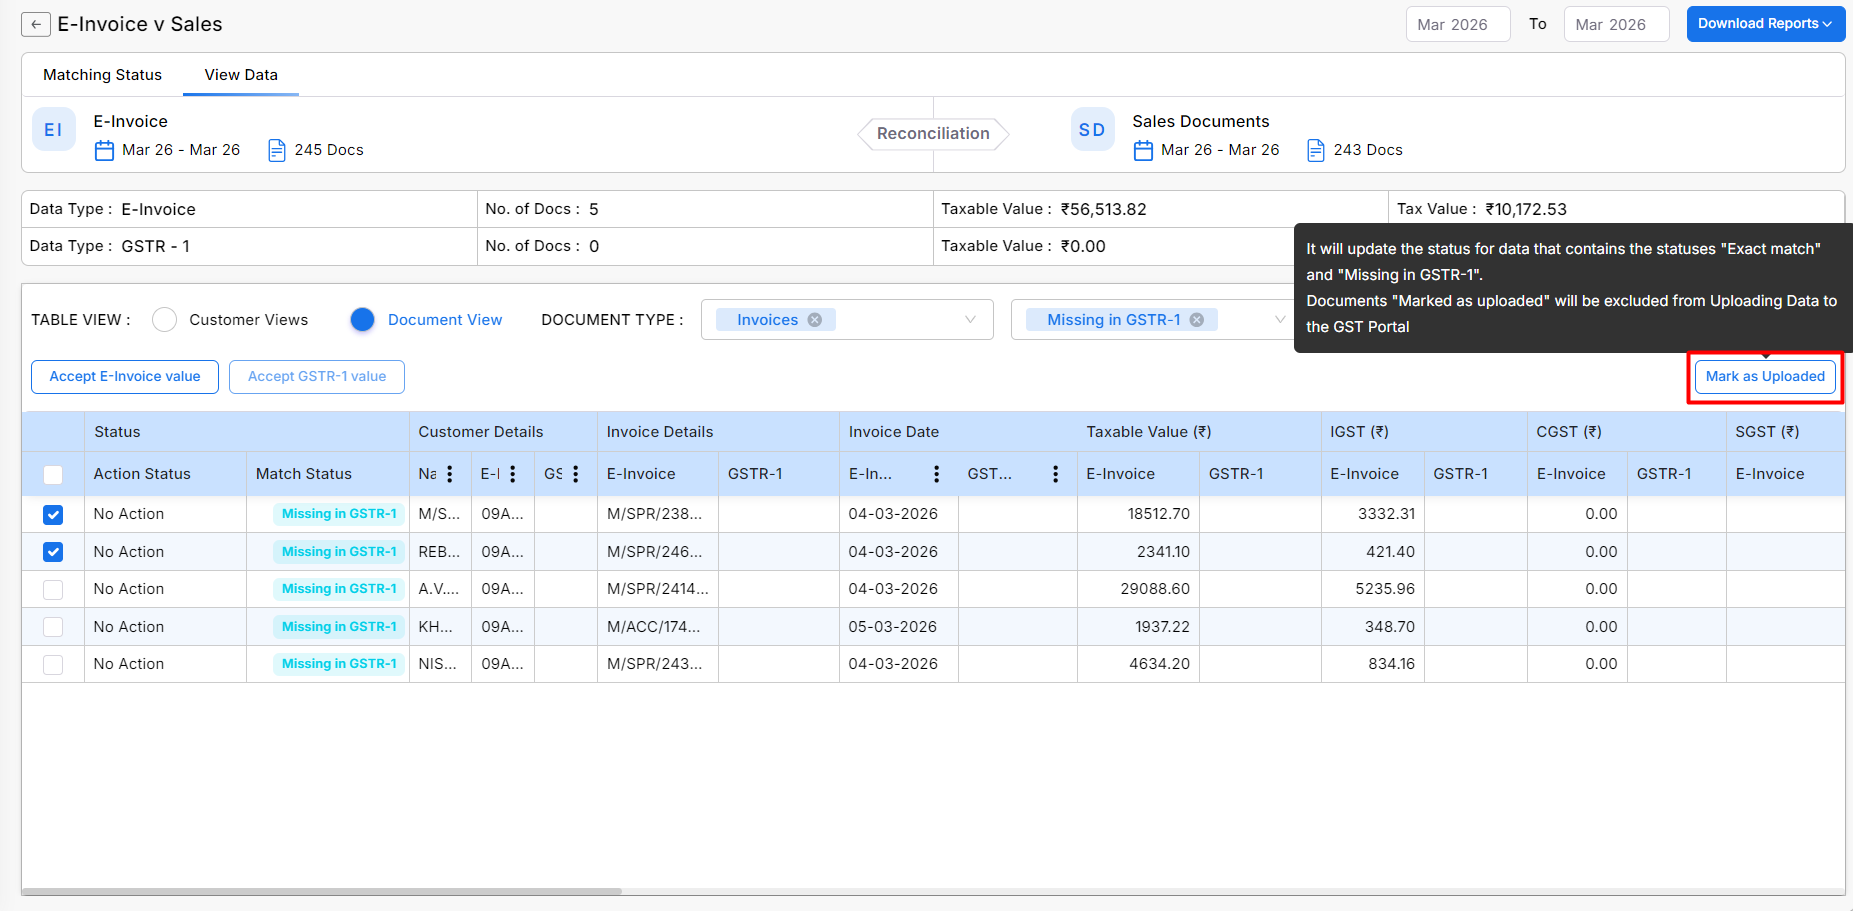
- On the Reconciliation page, navigate to the Document view and select the specific invoices to Mark as Uploaded.
- This will prevent Exact Match and Missing in GSTR-1 invoices from being uploaded to the portal again.
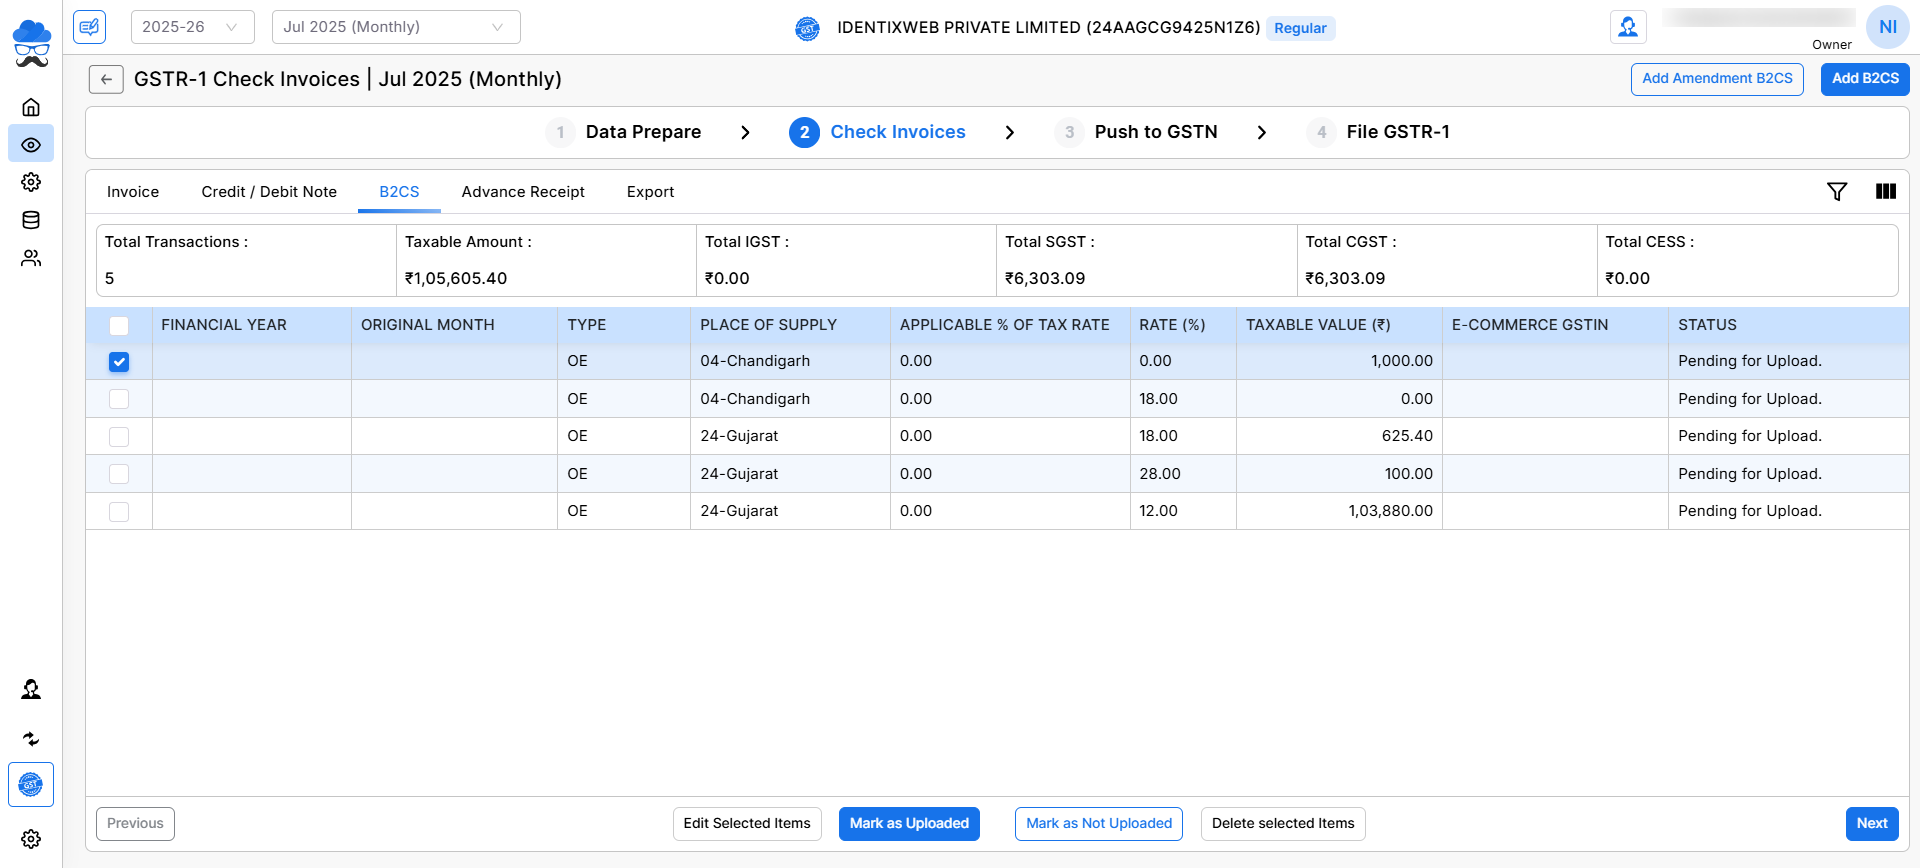
2) Check invoices:
- After preparing your data, verify the invoices in the second step. Where you can check and edit invoices.
- If some of the Invoices are already uploaded to the portal, you can select them and click Mark as Uploaded. You can check their statuses in the status column.
- Also, you can edit or delete any entries by selecting them here. Once done, you can click the Next button to proceed.
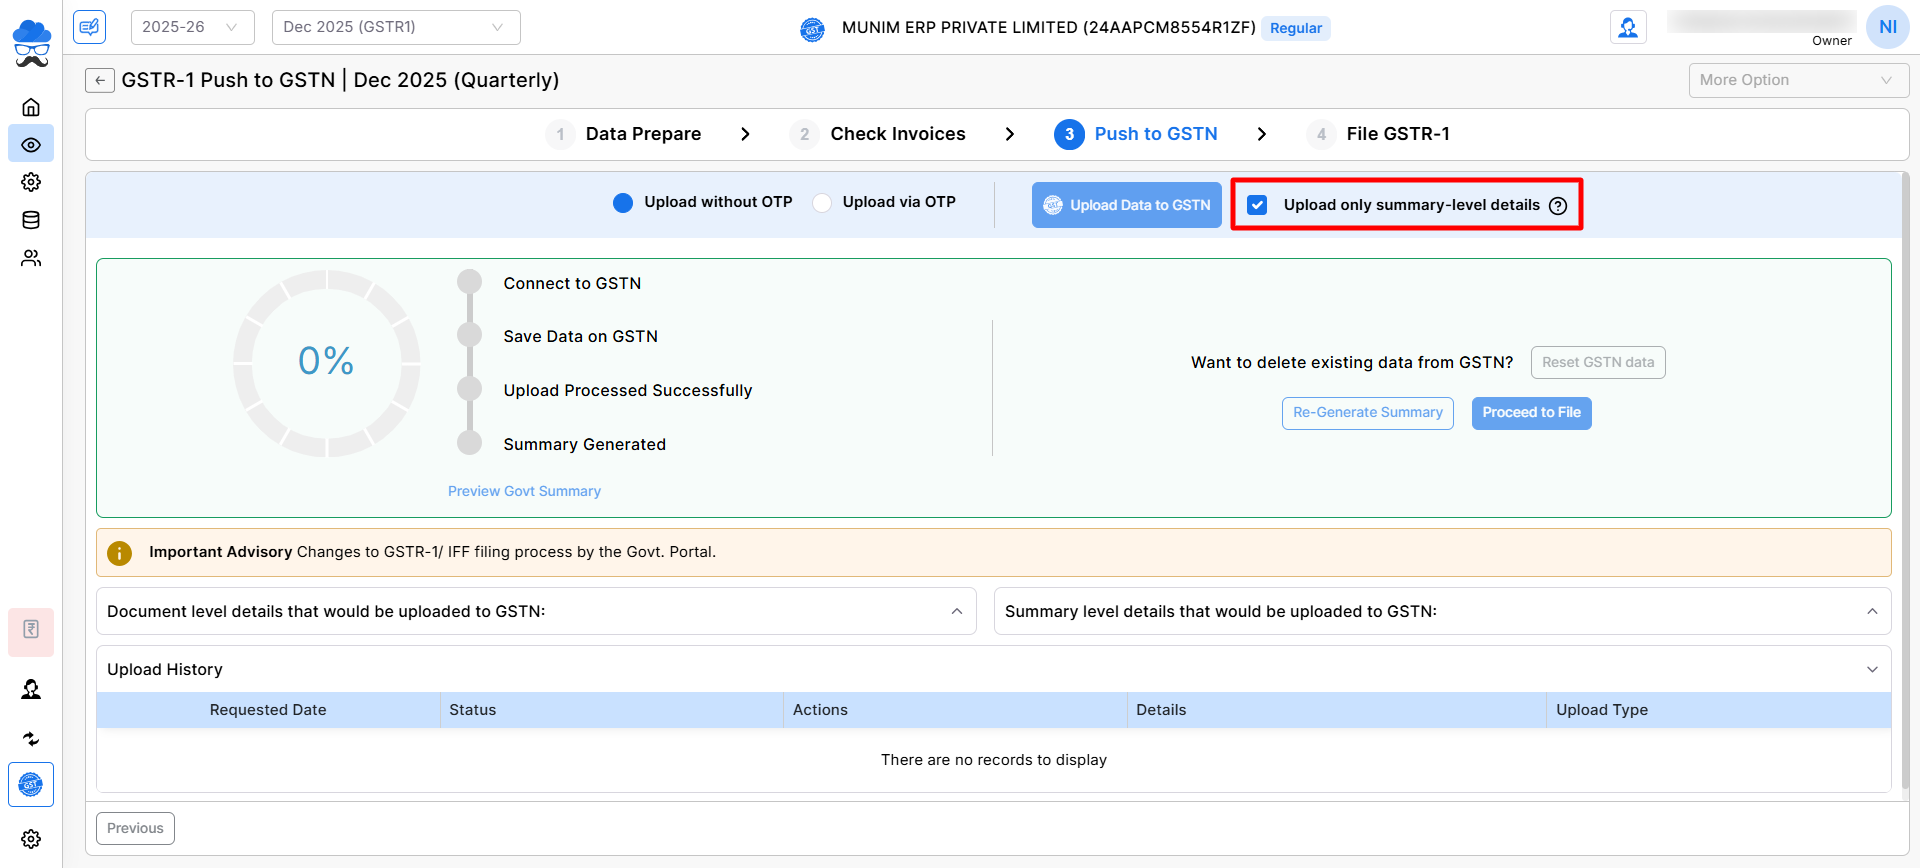
3) Push data to GSTN portal:
- In the third step, select either Upload without otp or Upload via otp.
- Now, click on Upload data to GSTN and wait for the summary to be generated.
- Upload only summary-level details – This option uploads only the summary data to GSTN instead of full invoice-wise details.
- After the summary is generated, you can check for any errors below it.
- Once the summary generation and checking are done, click the Proceed to File button to continue the process.
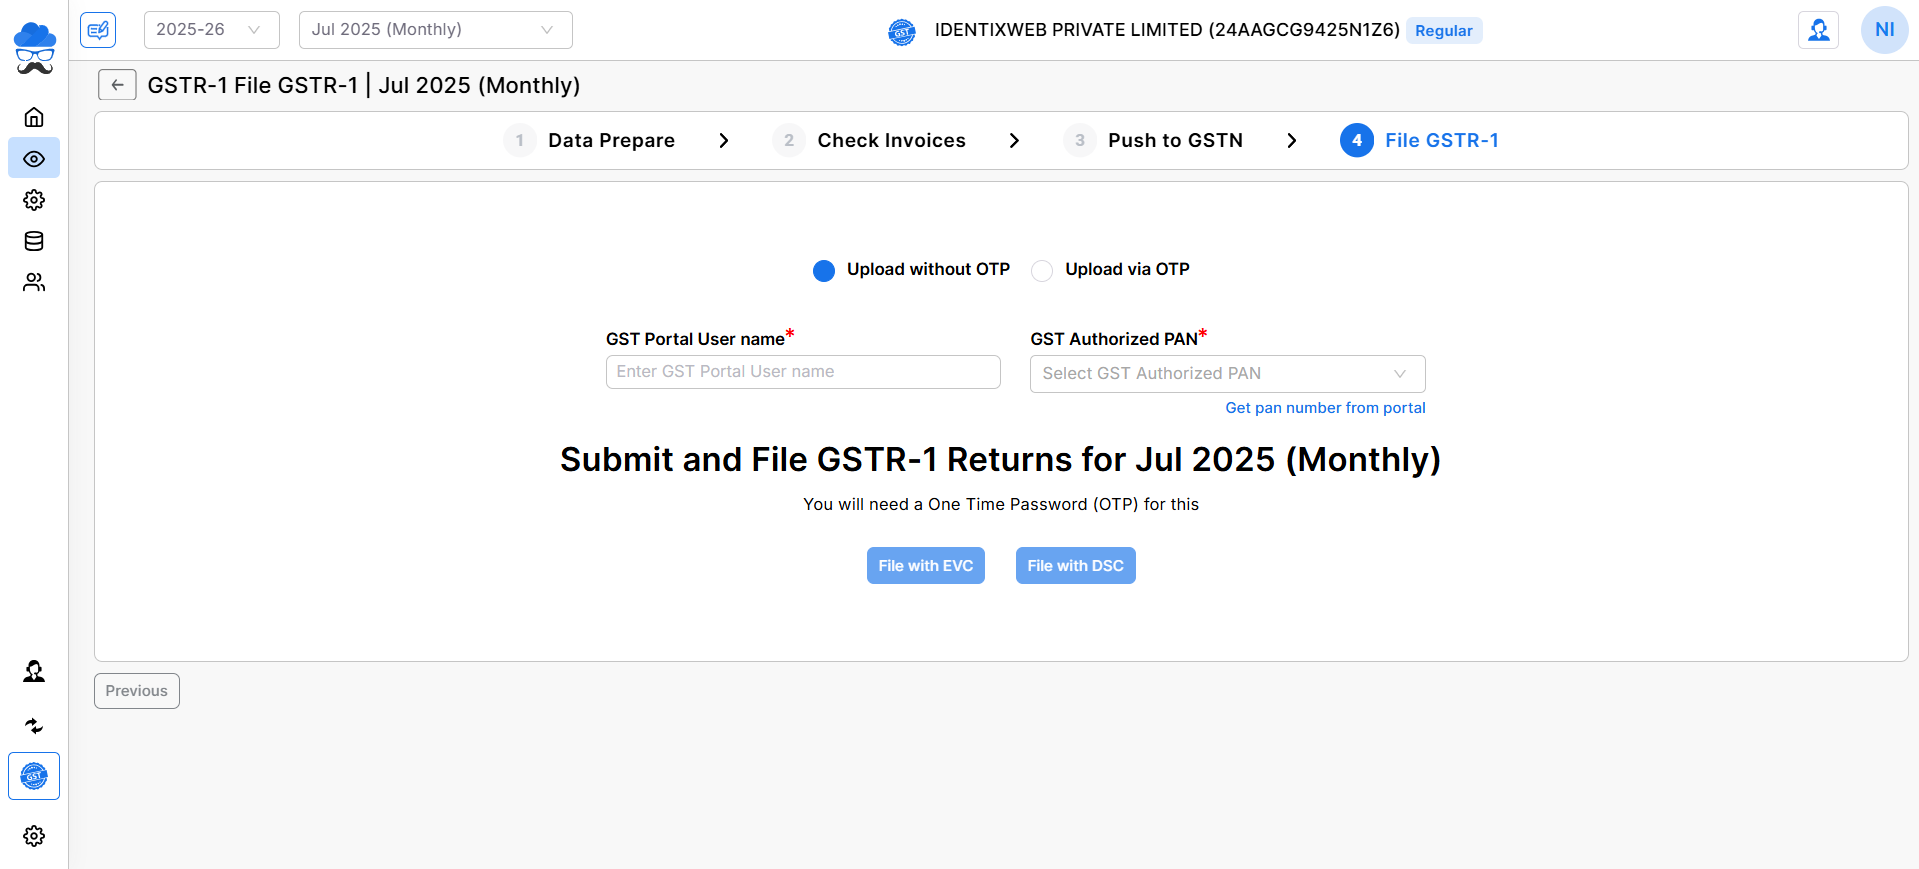
4) File GSTR-1:
- In the fourth step, file GSTR-1 using the File with EVC. (DSC method coming soon).
- Enter the required GST Portal Username, GST Authorised PAN and otp to Proceed.
- Once done, a Success message page will appear.
By following these steps, you can easily file your GSTR-1 using Munim GST Return Filing Software. For further assistance, please contact our support team.


