
 357 views
 Overview
E-mail Configuration allows you to add and connect an e-mail account to your organization and use it as the sender for e-mail-based reports and communications.
Benefits
- Configure e-mail accounts centrally for your organization.
- Assign a configured e-mail account to a client.
- Send reports through the selected sender e-mail.
How to Configure E-mail
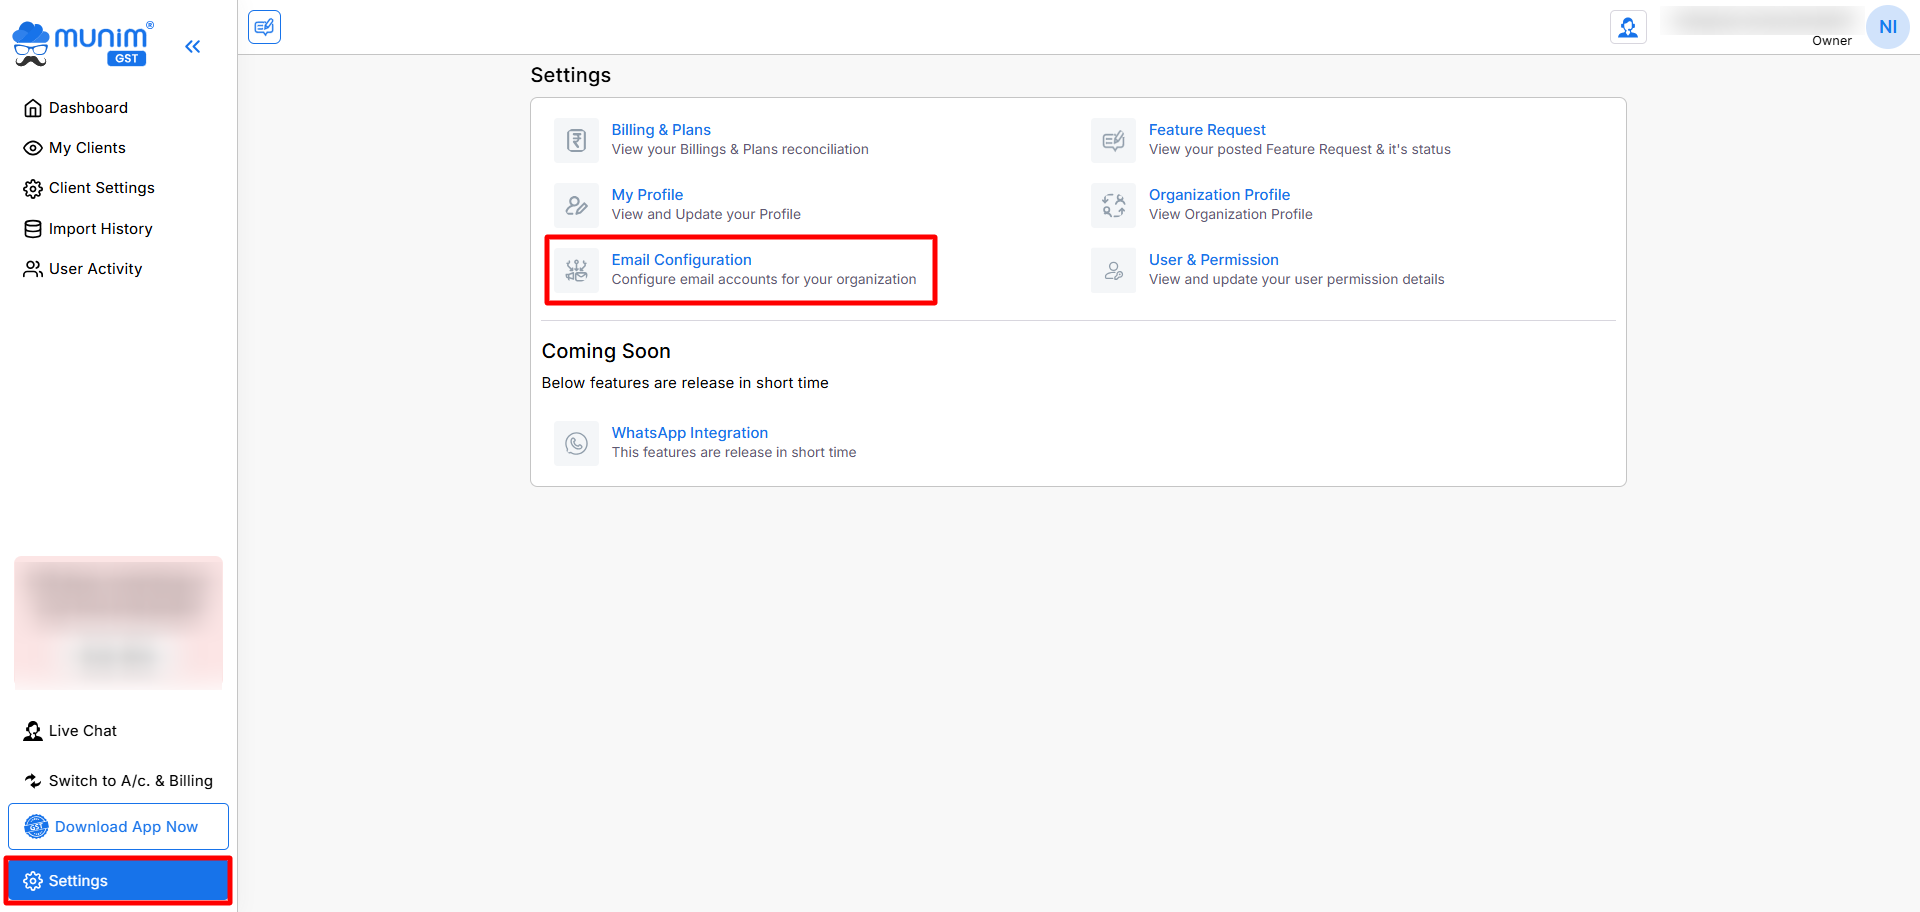
- Go to Settings. Click Email Configuration.
- Click Add Email.
+−⟲
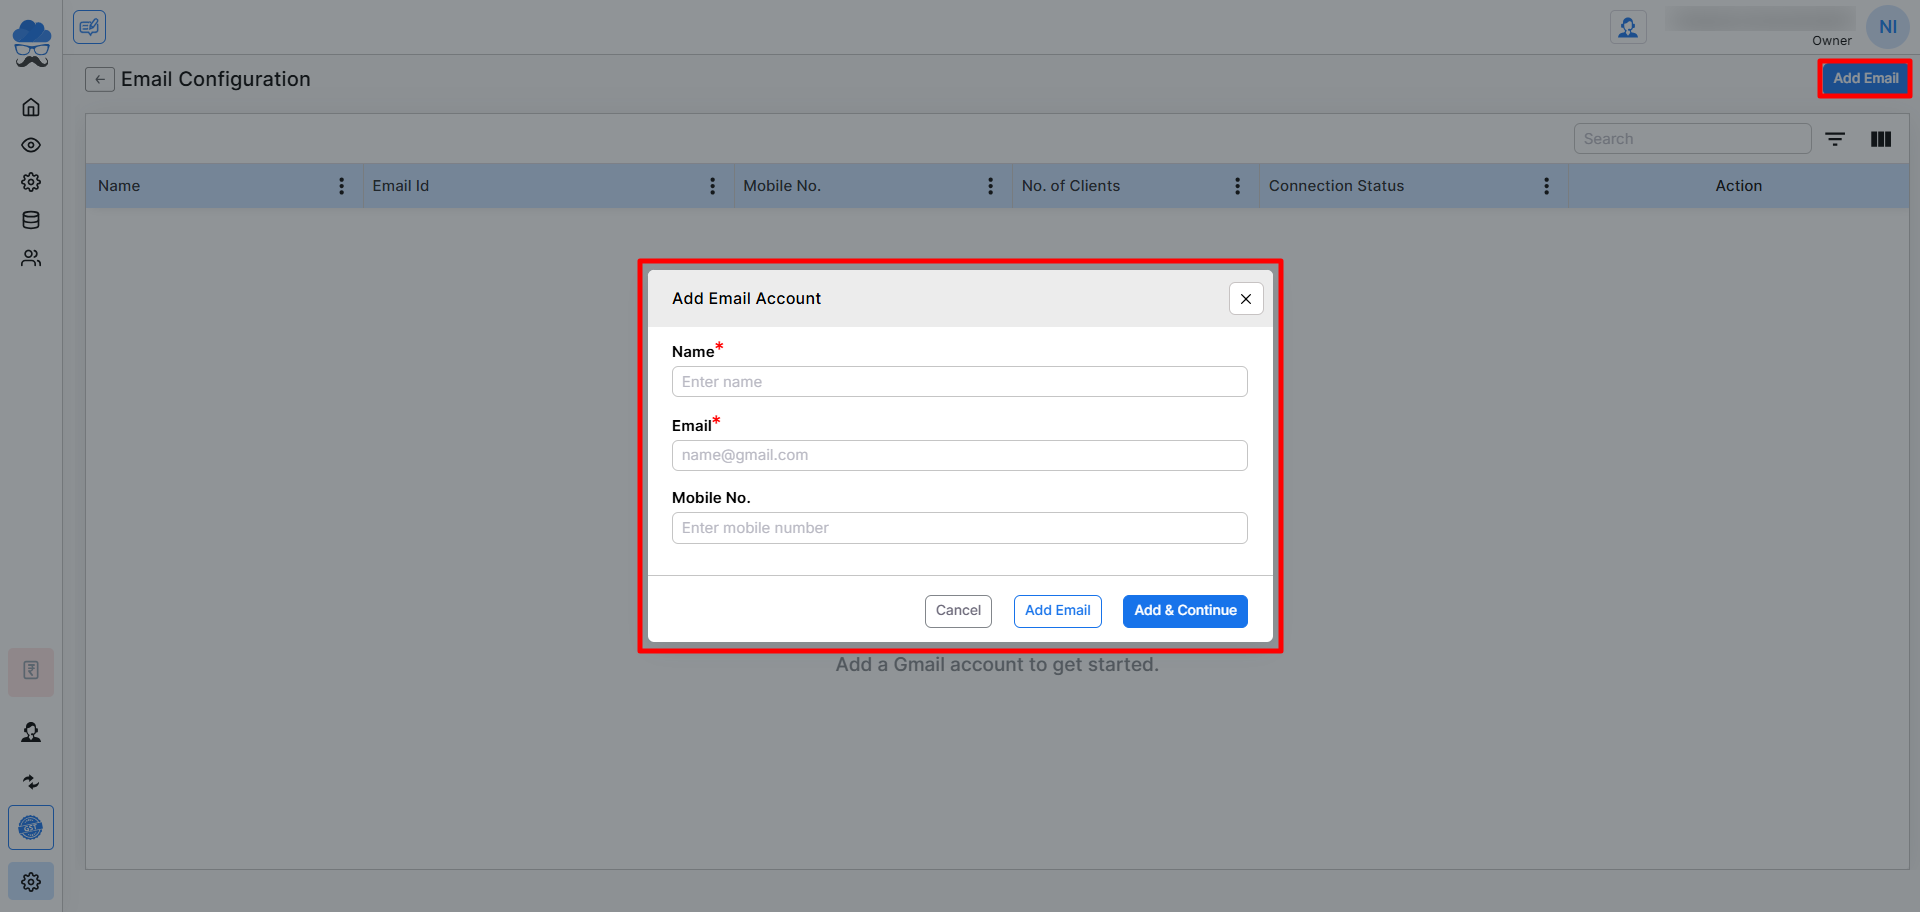
- Enter the following details:
- Name – Enter the name for the e-mail account.
- Email – Enter the e-mail address.
- Mobile No. – Enter the mobile number.
- Click Add Email to save, or Add & Continue to add and continue with the setup.
+−⟲
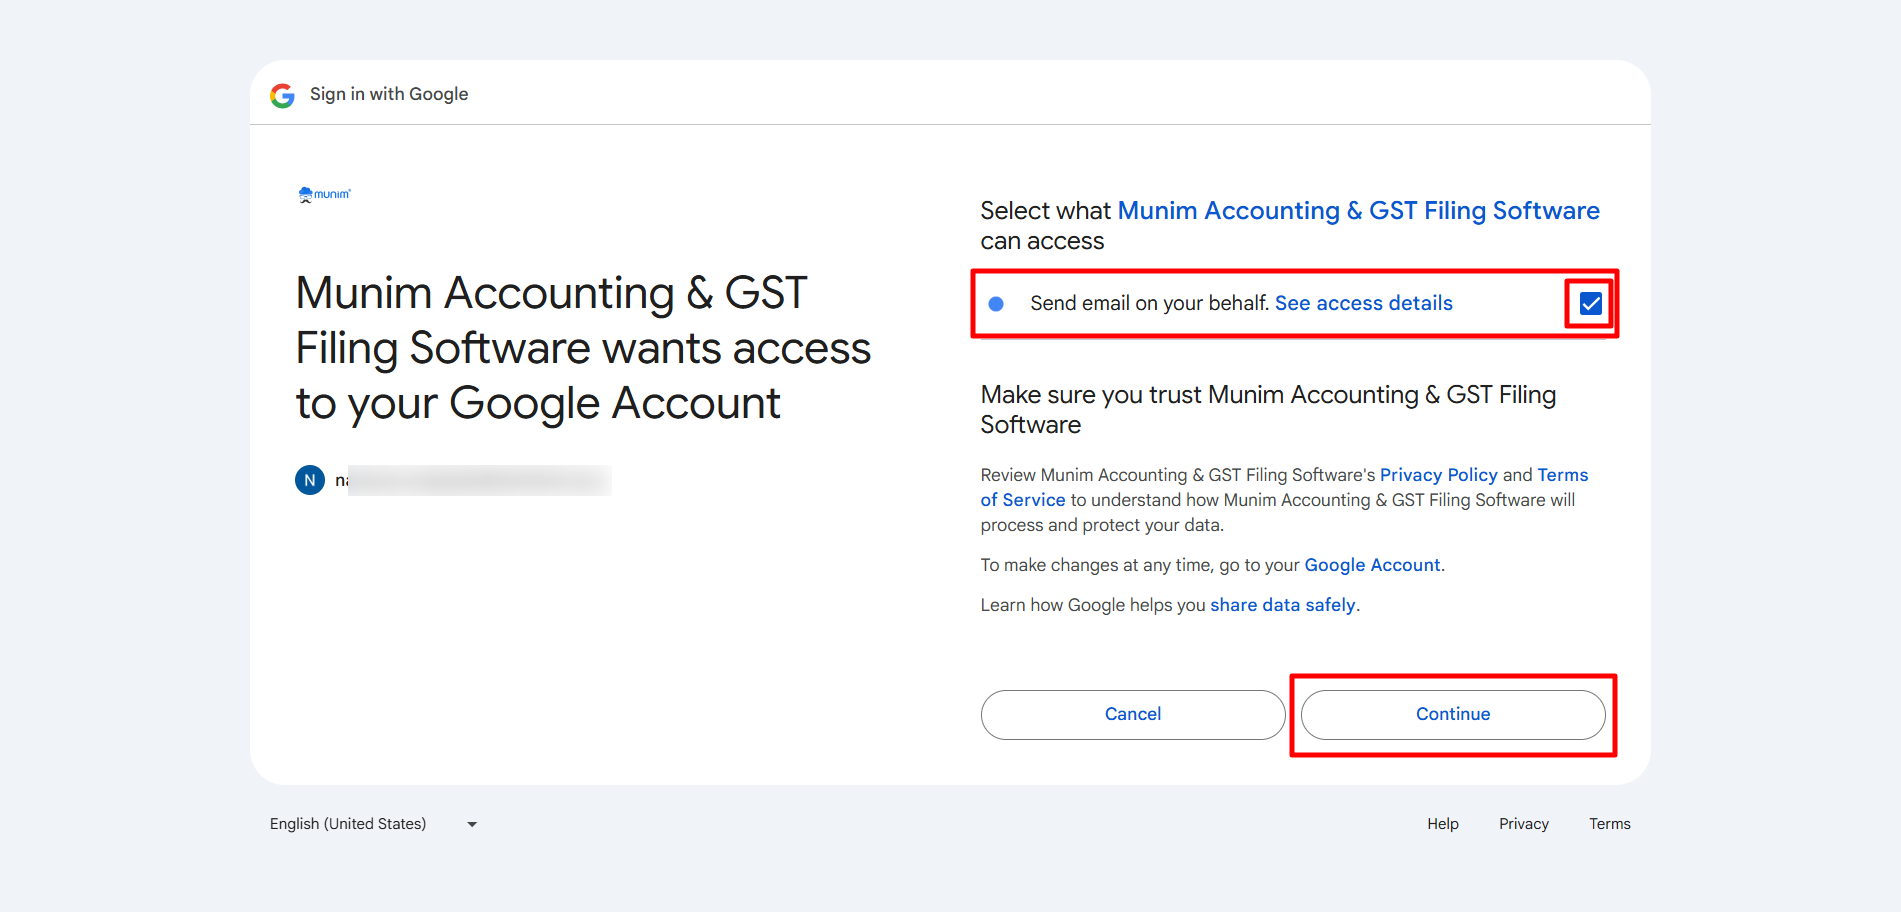
- Upon clicking “Add & Continue,” an email verification process will be initiated for authorization purposes.
- While authorising the connection request, please select the “Send E-mail on your behalf” option to continue and connect.
+−⟲
- Once connected, the e-mail account will appear in the Email Configuration list with its Connection Status.
Assign Sender E-mail to a Client Authorised Person E-mail
- On the E-mail Configuration List page, you can see all the sender E-mails you have added.
+−⟲
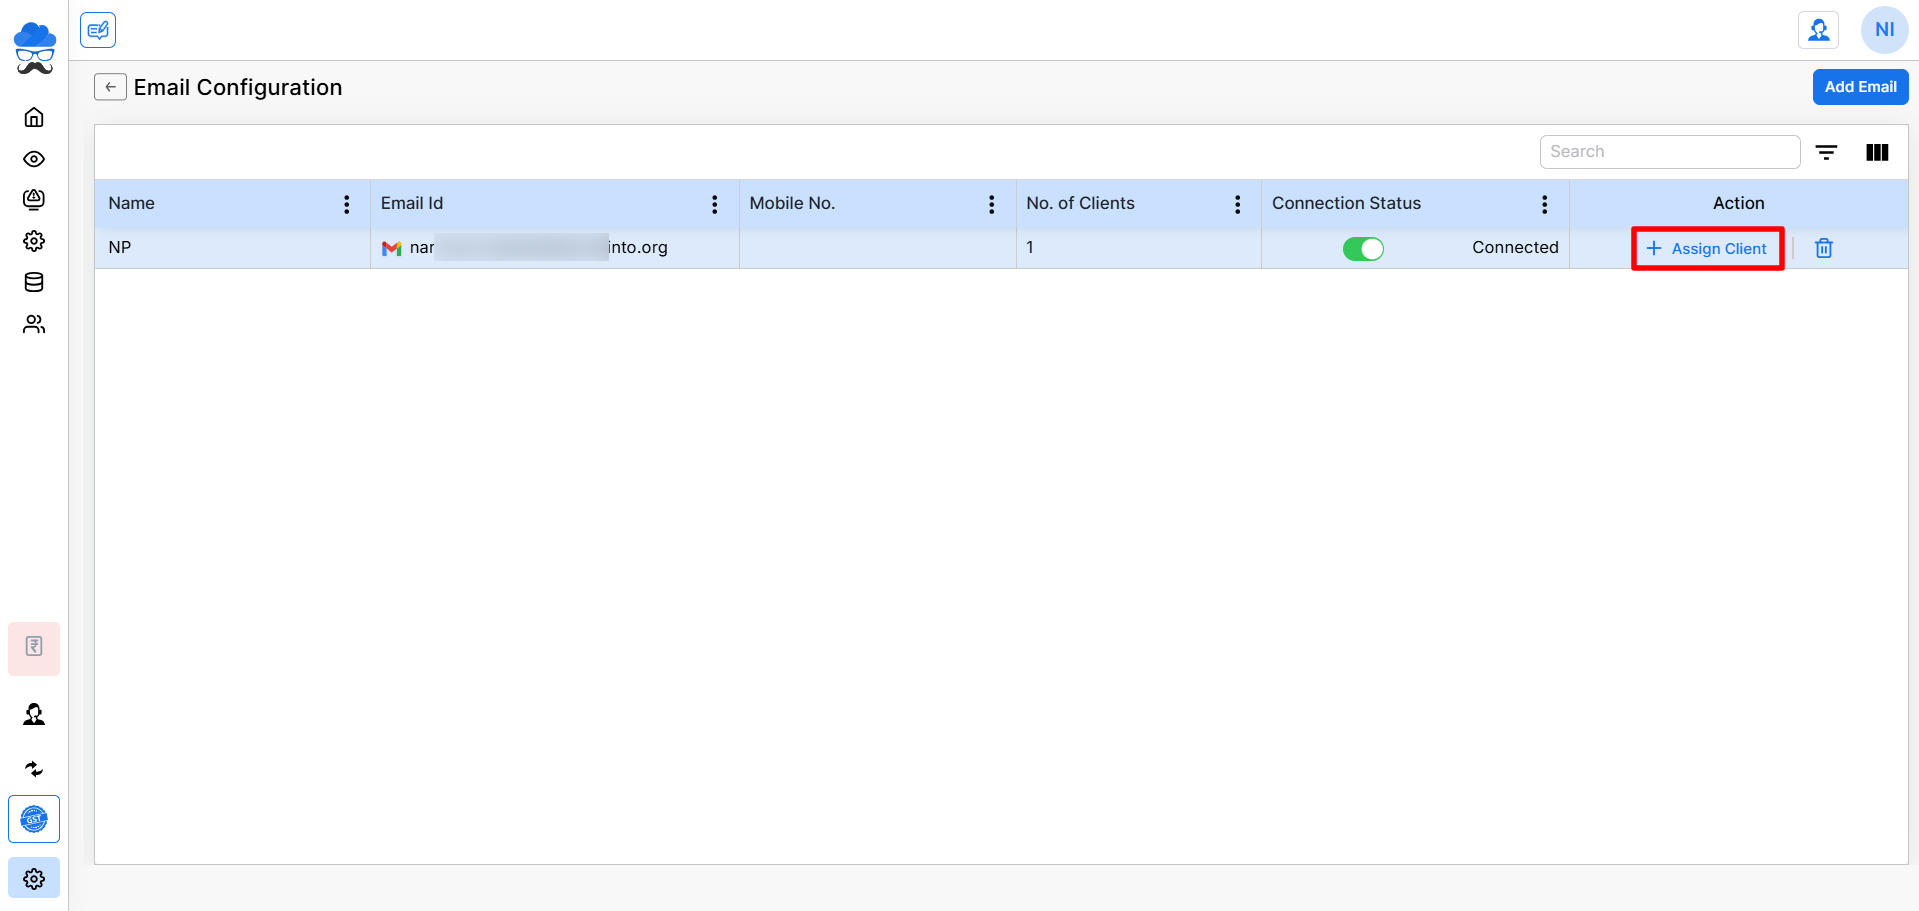
- Select the “Assign Client” option to designate the sender email address for the authorised personnel of multiple companies at once.
+−⟲
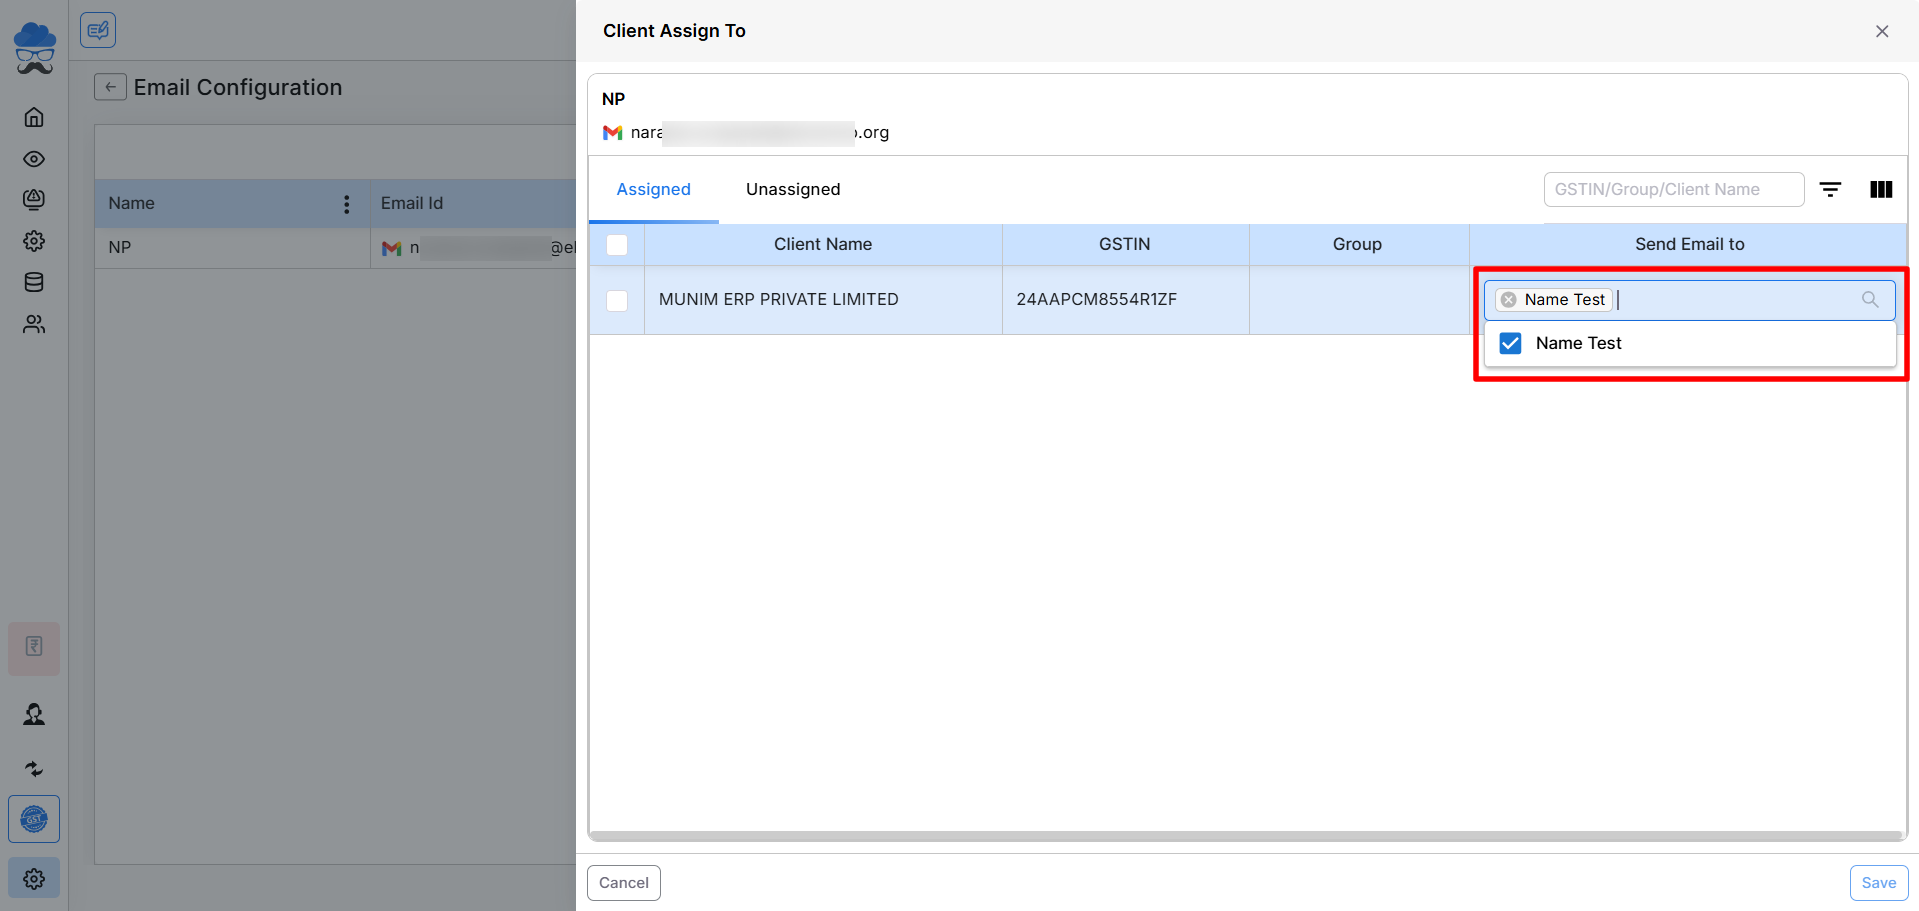
- Additionally, you may configure the sender email address for a company’s authorised representative directly through the Client Settings menu.
- Navigate to Client Settings and click Edit for the client company for which you wish to configure the default email.
+−⟲
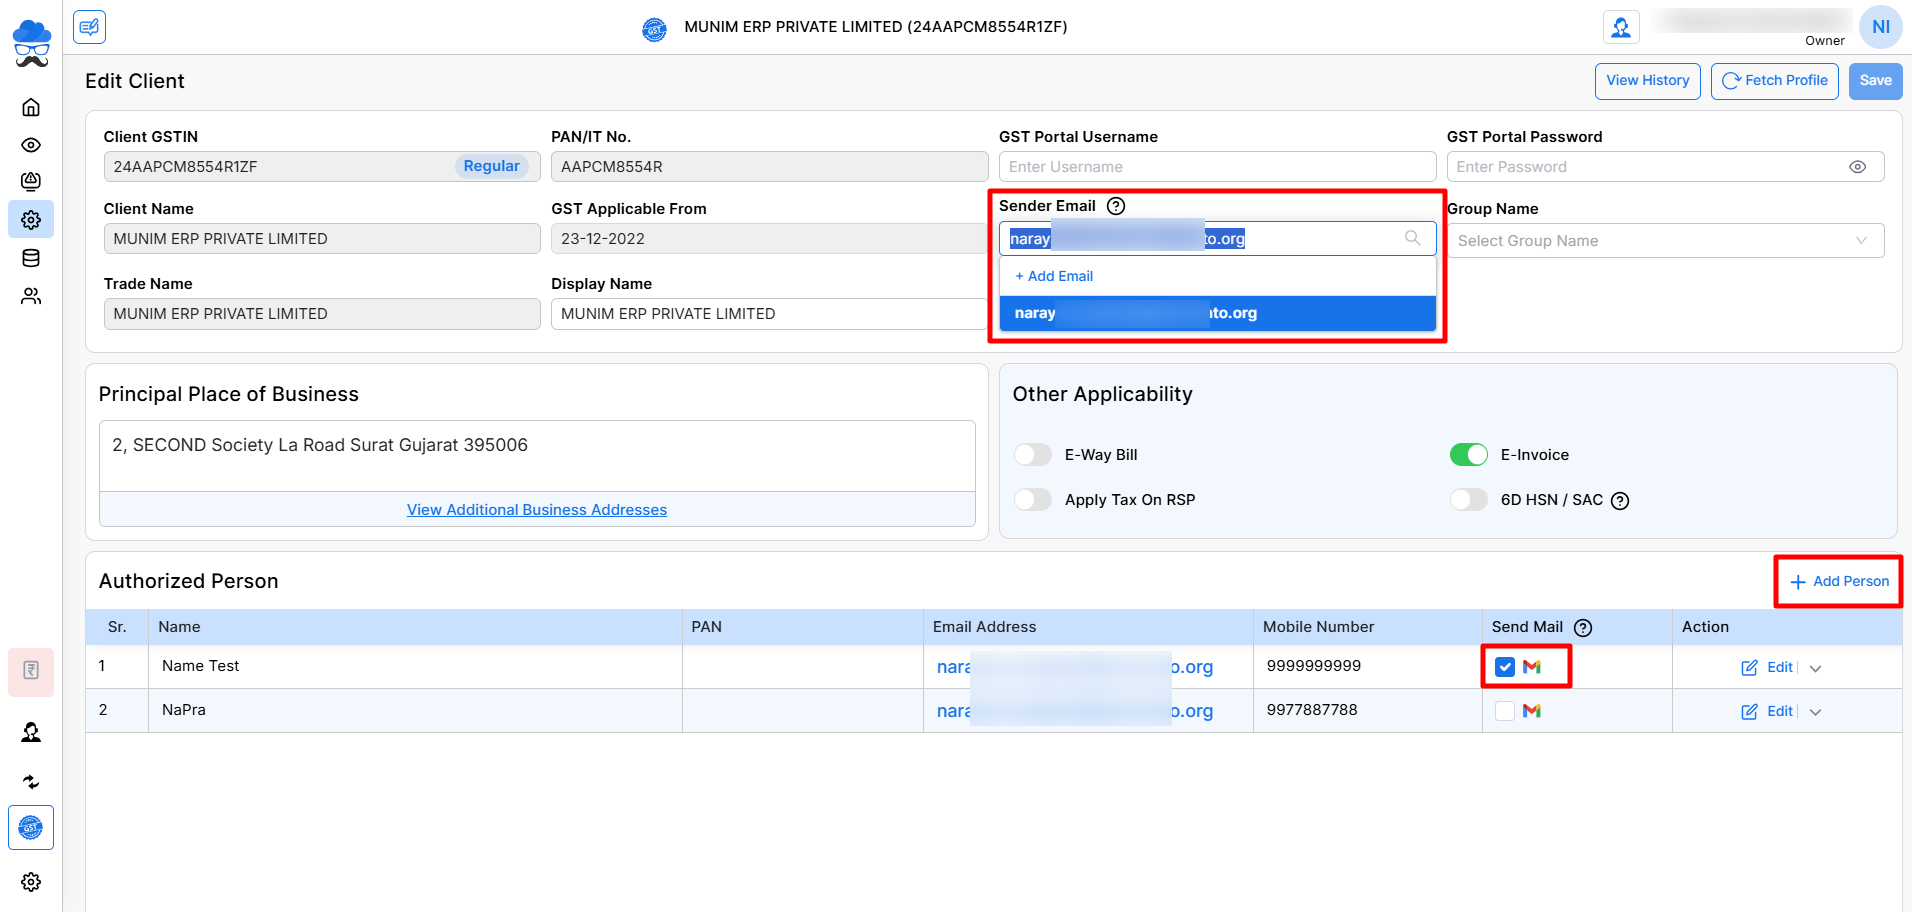
- On the Edit Client page, In the Sender Email field, select the configured e-mail account as sender for this client.
- At the bottom in the Authorised Person section, client’s company’s authorised person’s email details are present.
- If they are missing, you can add them by using the “Fetch Profile” at the top right or adding manually by Add Person button.
- You may designate a default authorised person for correspondence by selecting the Mail icon located within the “Send Mail” column.
- After selecting, click Save.
Usage / Reference
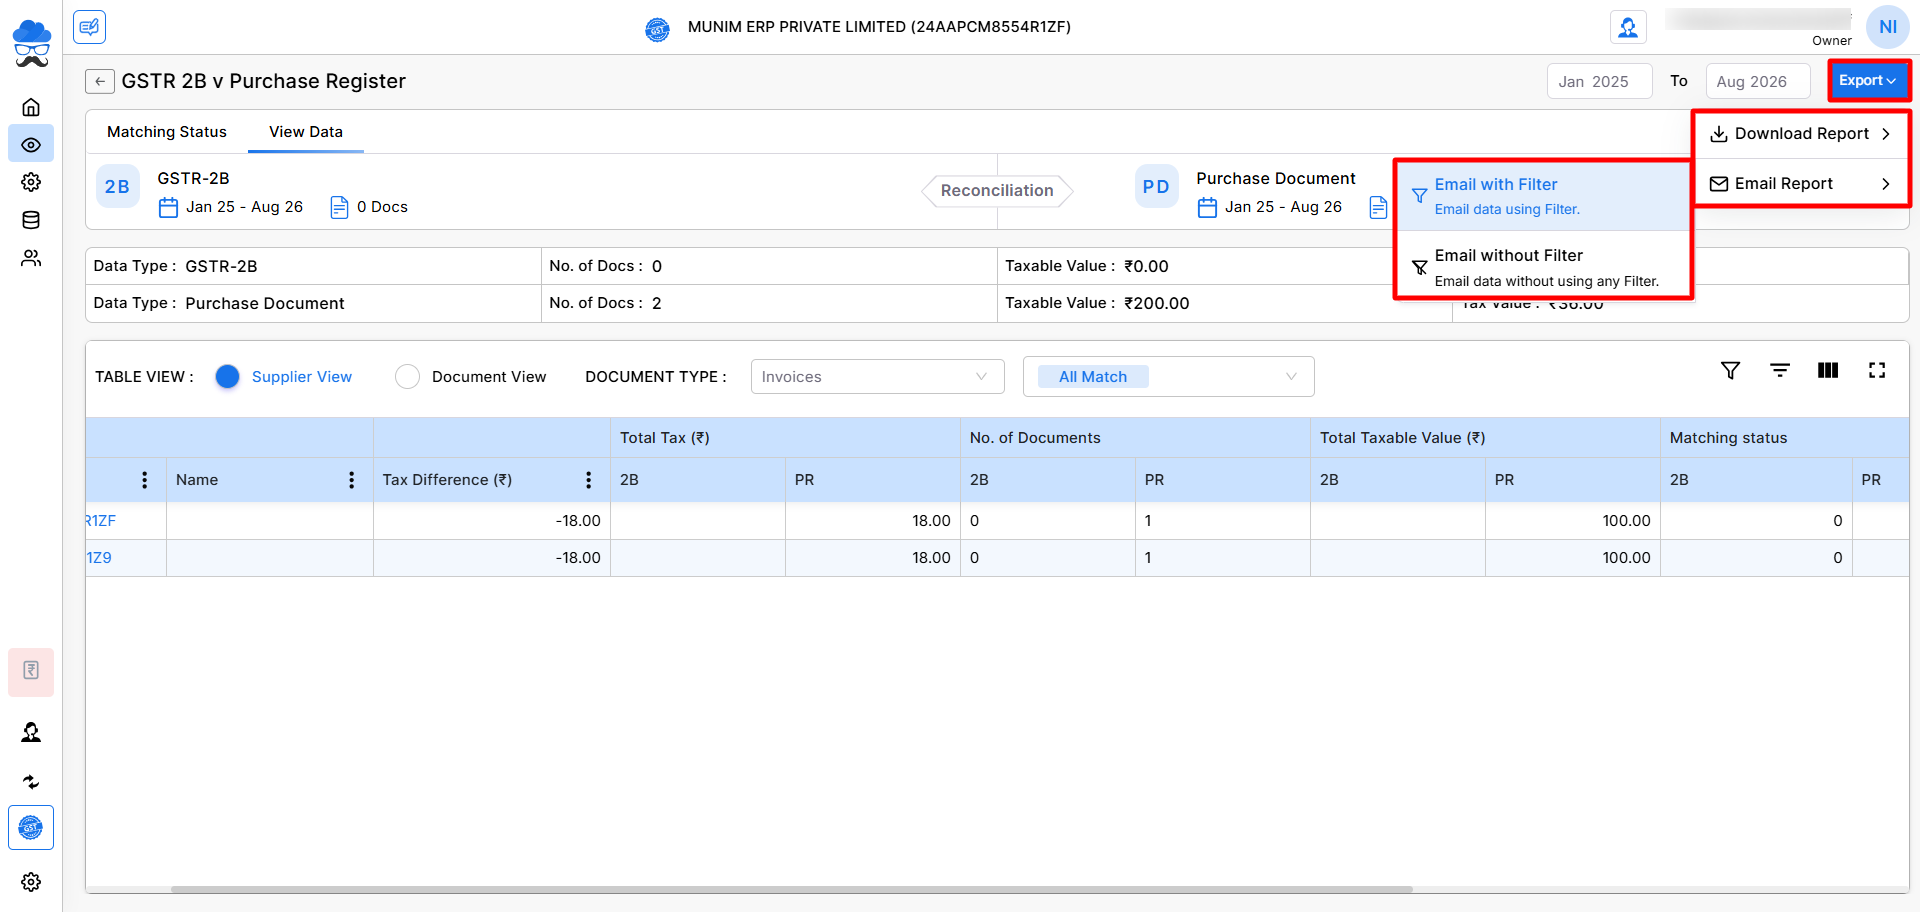
- The configured sender e-mail can be used while sending reports, such as GSTR 2B v Purchase Register reports through:
- Export → Email Report → Email with Filter / Email without Filter
+−⟲
Option Availability:
The email feature is compatible and available with the following reconciliation reports:
- Purchase vs. 2A
- Purchase vs. 2B
- Purchase vs. 8A
- GSTR-3B vs. GSTR-2A
- GSTR-3B vs. GSTR-2B
- GSTR-1/1A Filed vs. E-Invoice
- GSTR-3B vs. GSTR-1/1A
- Sales vs. E-Invoice
- Purchase vs. IMS
- Purchase vs. GSTR-4A
Important Note
- Only a configured e-mail account can be selected as the Sender Email for the client.
- Client company email for each client can be updated or fetched directly from the Client Settings page.
- Select “Send E-mail on your behalf” during authorisation to successfully connect your account.
Need Assistance?
If you face any issue while configuring or connecting your e-mail account, contact the Munim Support Team for assistance.


