
 4468 views
 Overview
This feature transfers the previous financial year’s closing account balance to the opening account balance of the next financial year. Users can choose Manual or Auto transfer.
Why Use This Feature?
- Carry forward balances to the new financial year.
- Avoid manual opening account balance entries.
- Keep records and account balances accurate.
- Supports both Manual and Auto transfer.
Create the Next Financial Year
Steps
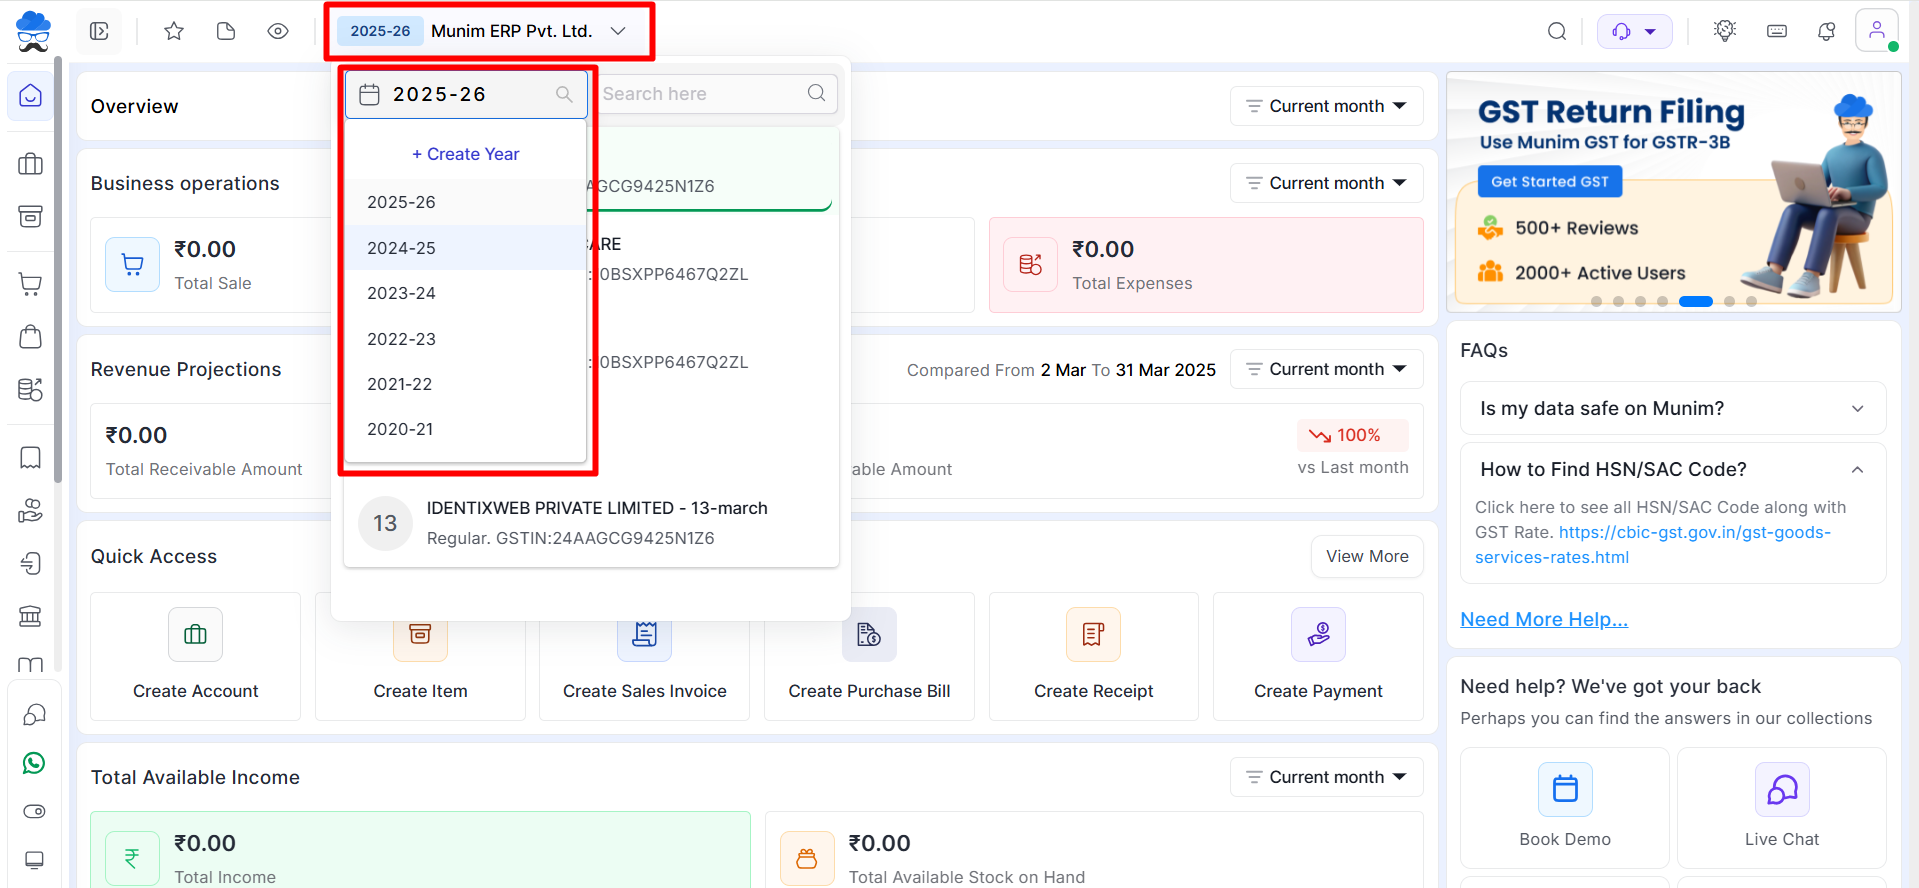
- Open the Financial Year dropdown from the dashboard.
- Click Create Year. Select the New financial year. Click Create Year.
Configure Next Year Transfer Settings
- Switch back to the previous financial year.
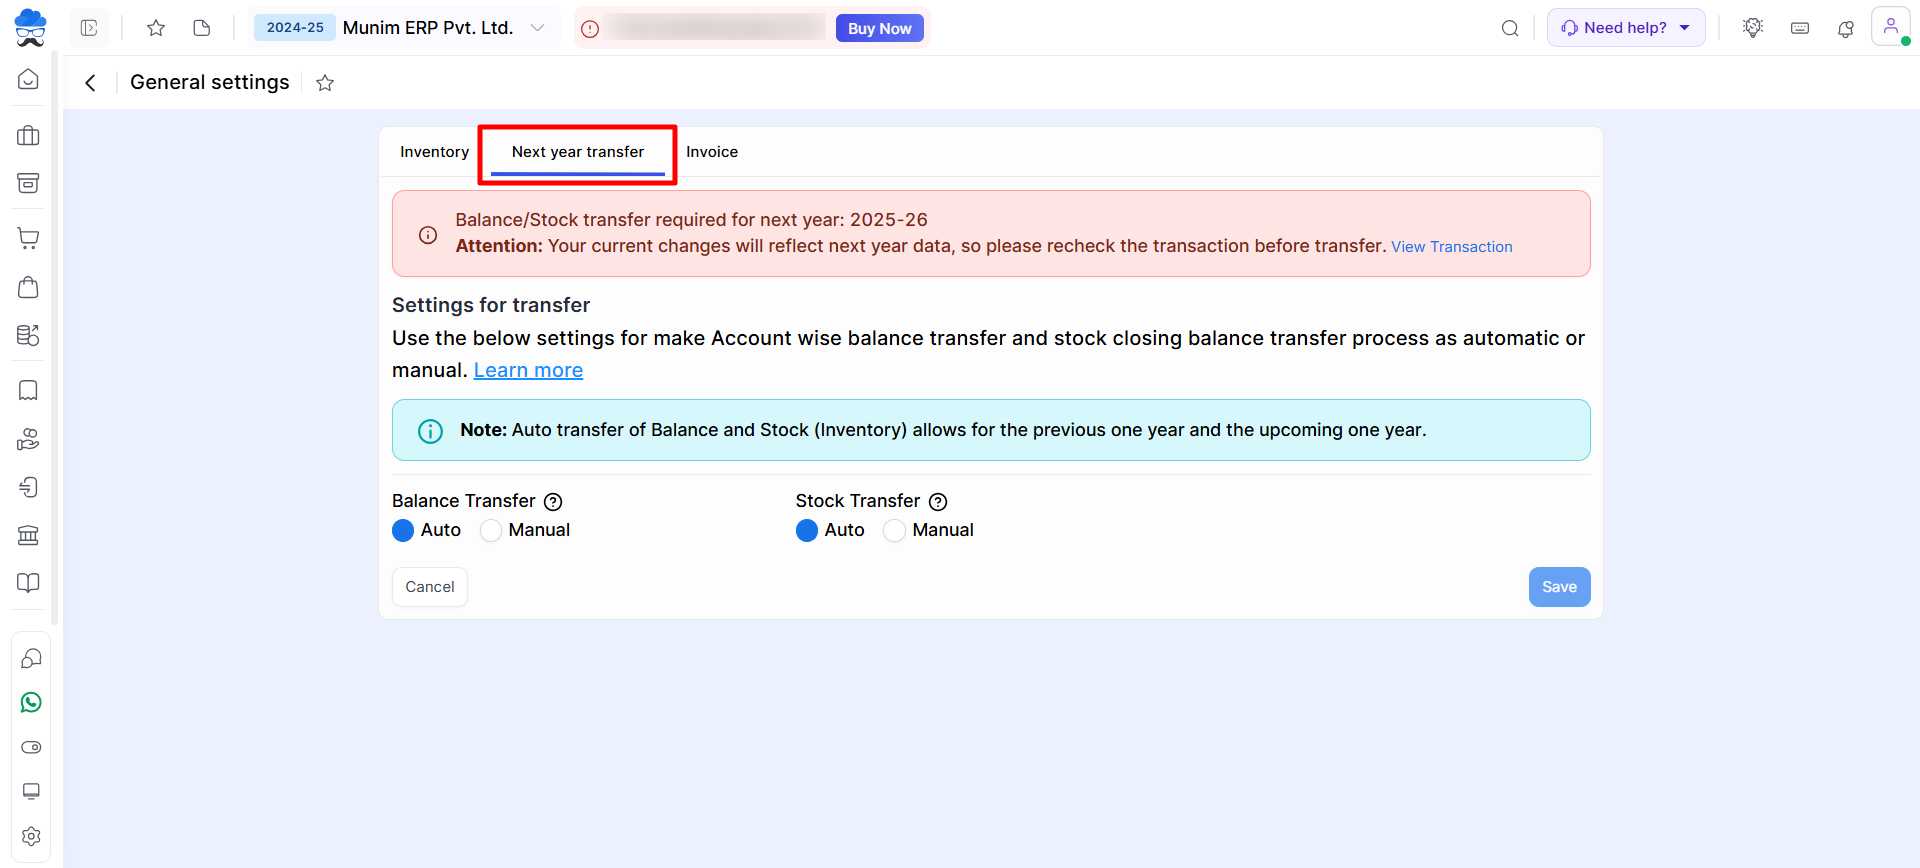
- Go to Settings → General Settings.
- Open the Next Year Transfer tab.
- Choose either:
- Auto
- Manual
- Save the settings.
Important Note: For the first transfer, balances must be transferred manually. After that, you can use Auto or Manual mode whenever required.
Manual Balance Transfer options
The manual transfer option is available from:
- Dashboard
- Item Master
- Next Year Transfer in General Settings
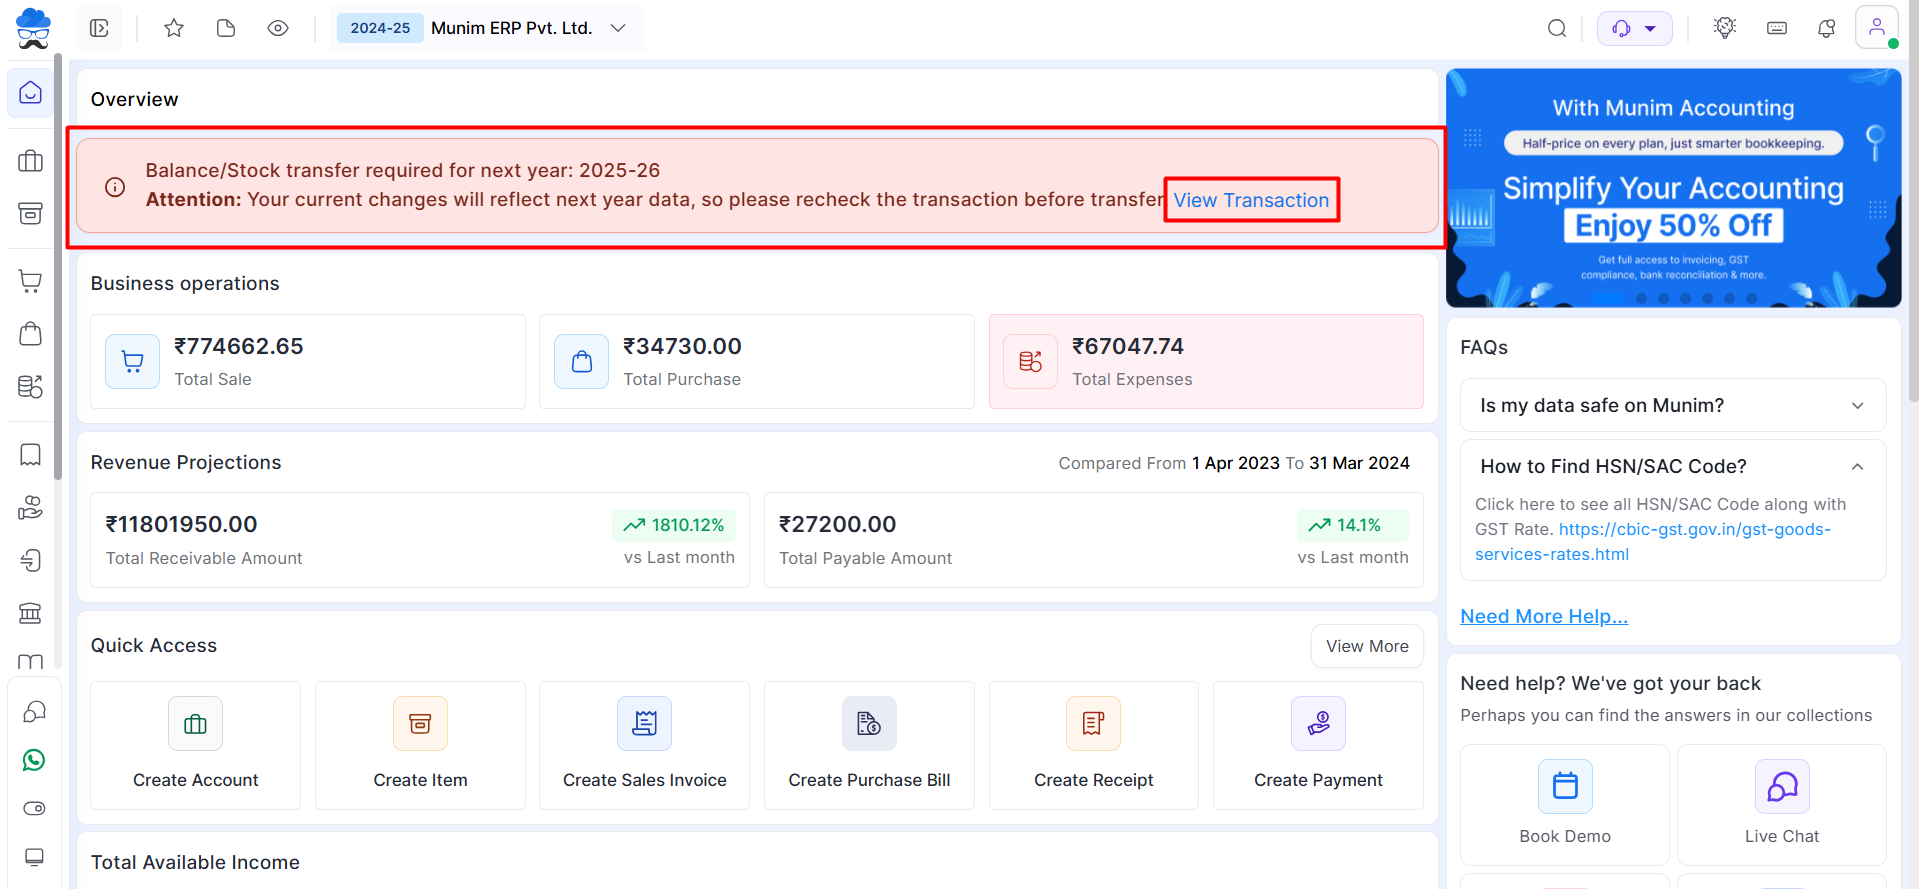
Method 1 – Dashboard
- Open the previous financial year. Click View Transaction from the dashboard notification.
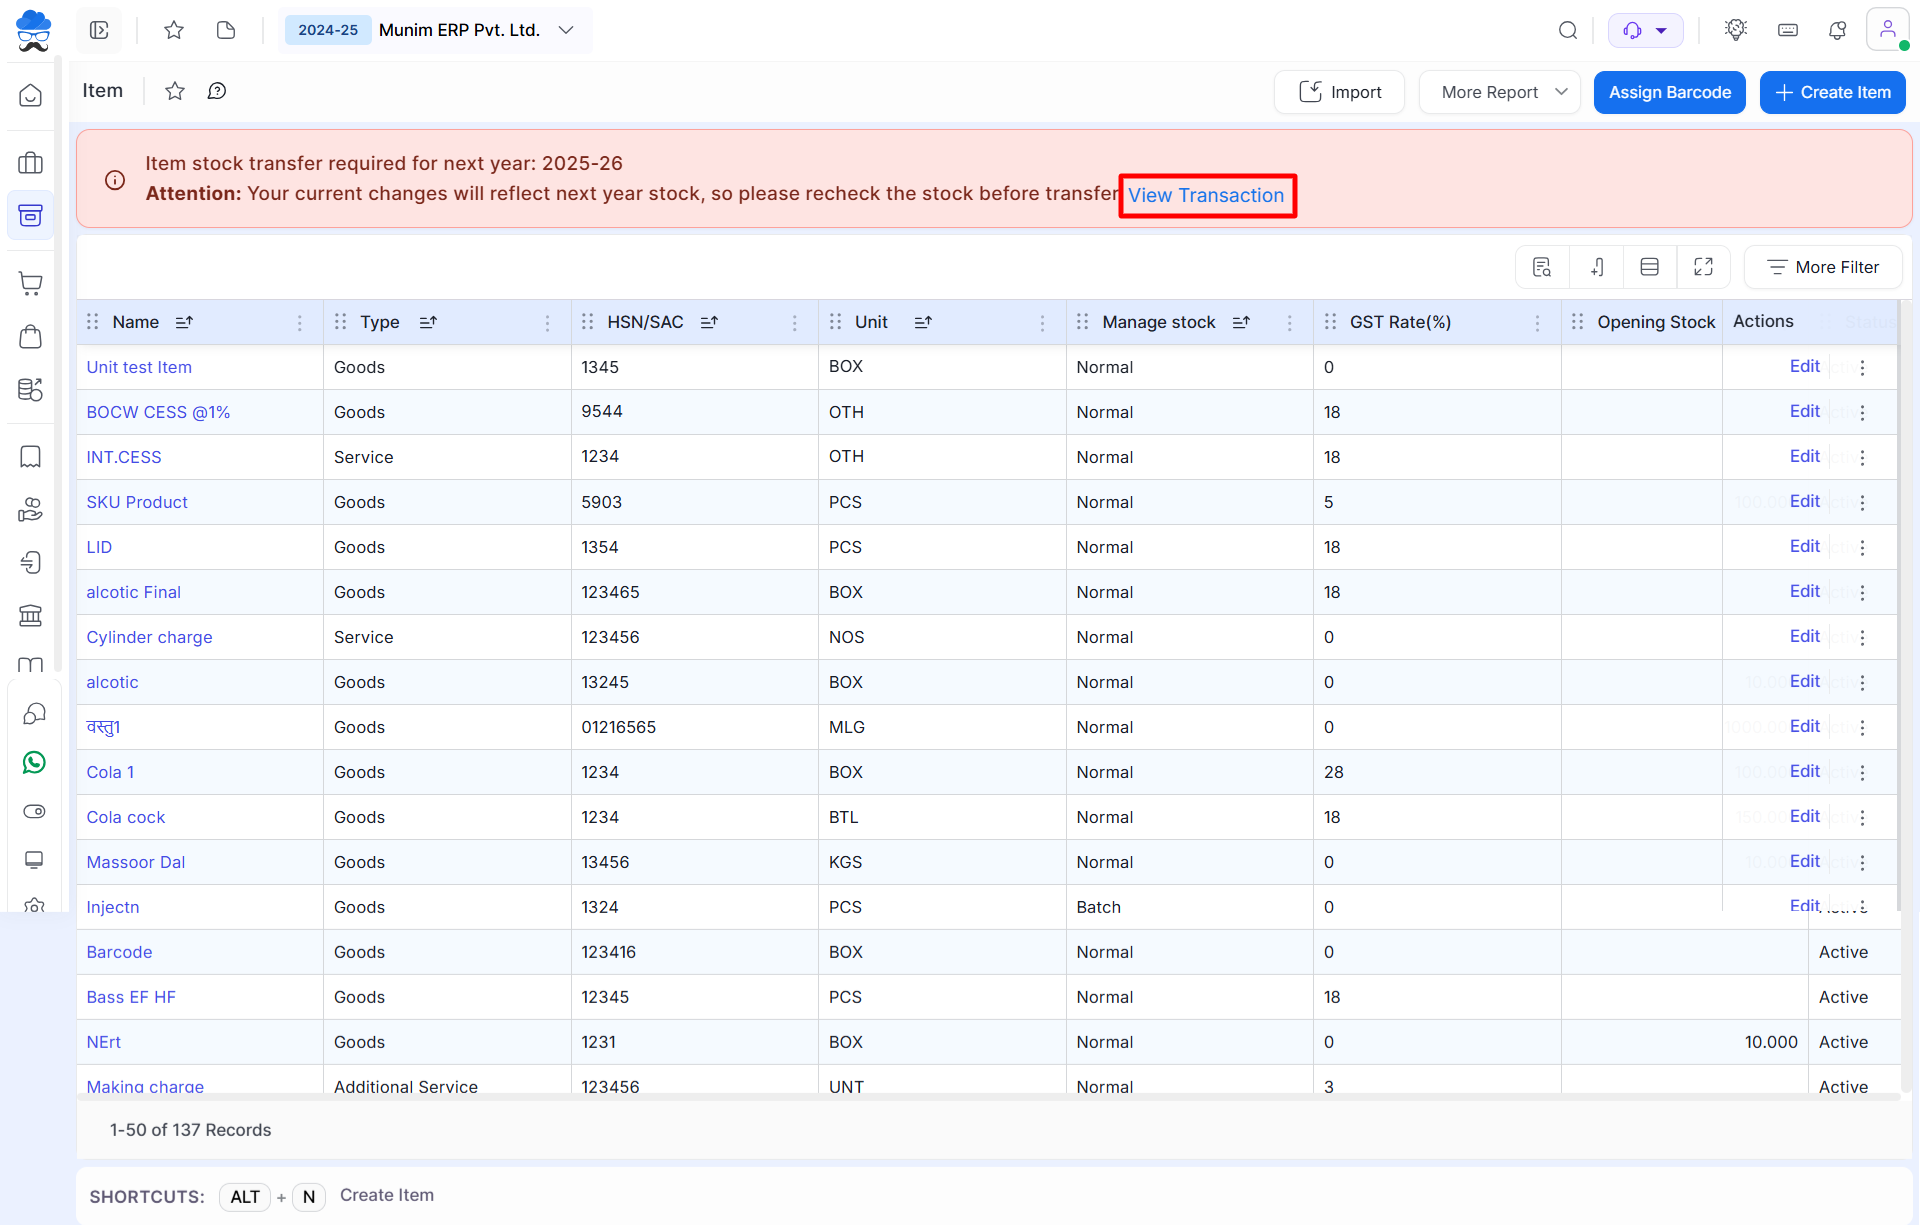
Method 2 – Item Master
- Open Item Master. Click View Transaction.
Method 3 – General Settings
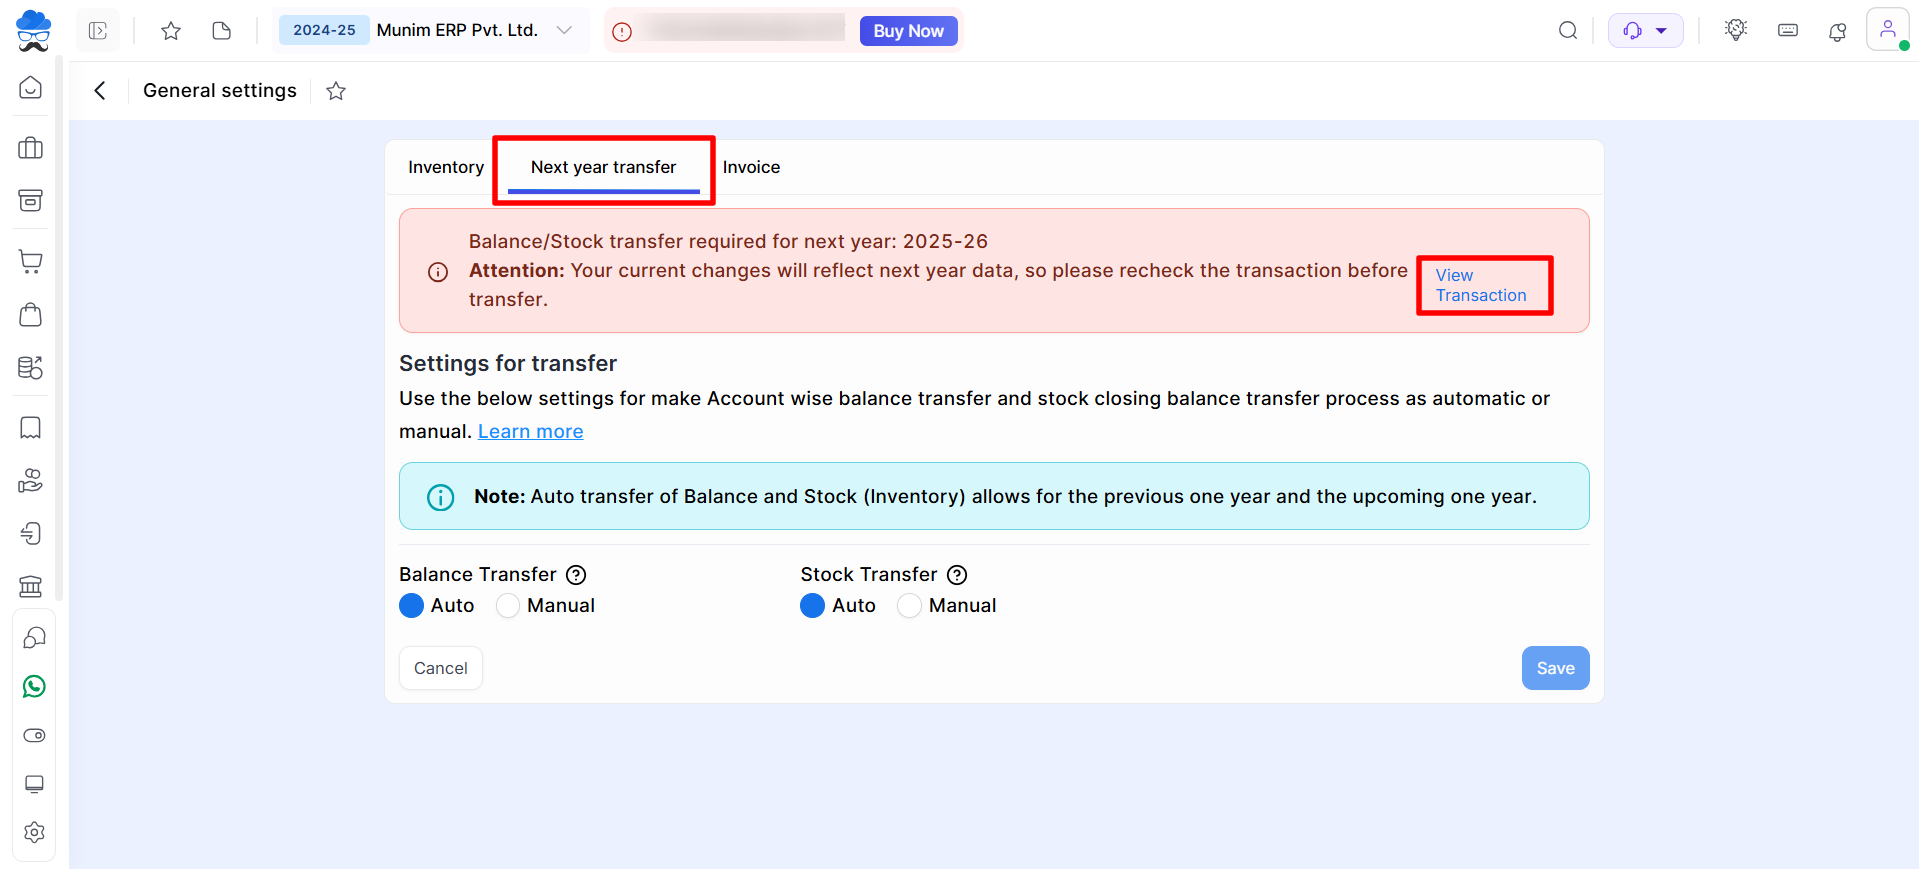
- Open Settings → General Settings → Next Year Transfer.
- Click View Transaction.
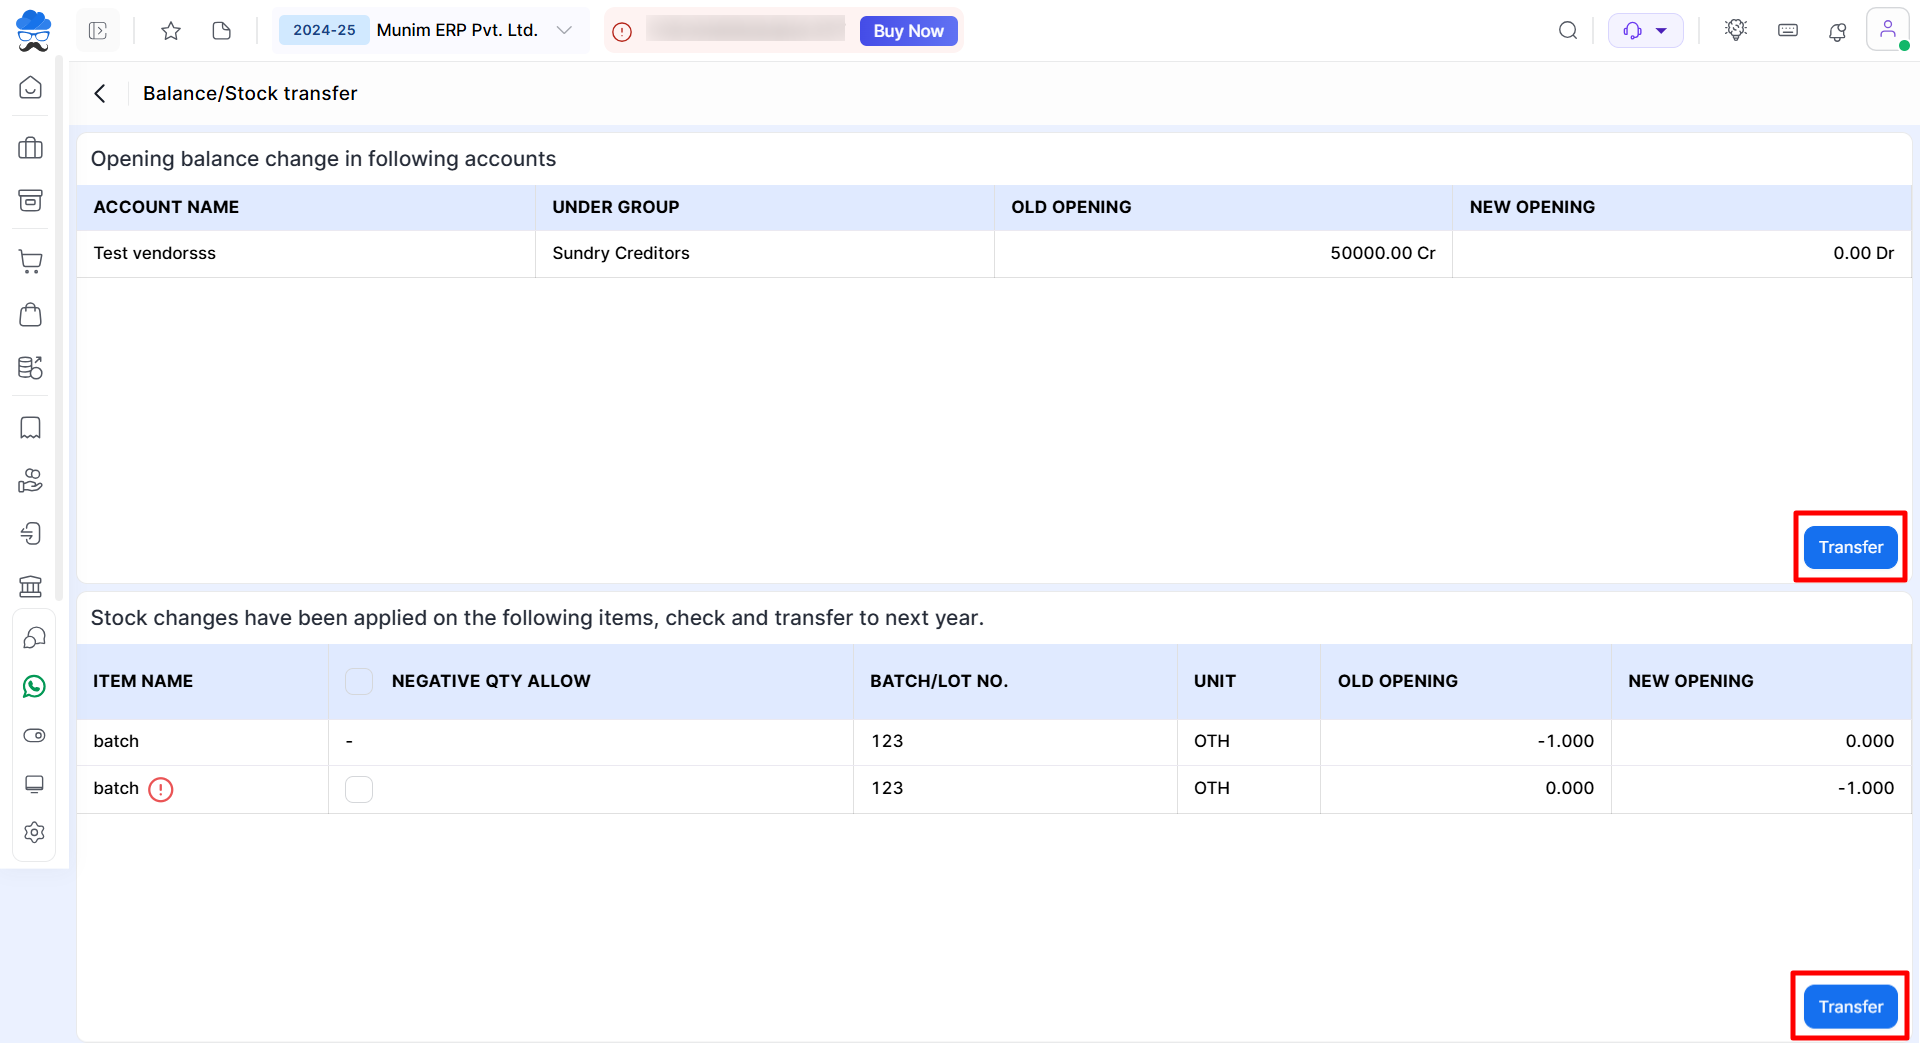
Transferring the Balances on the transfer page
- Compare Old Opening and New Opening balances.
- Review Balance Transfer and Stock Transfer sections.
- Click Transfer.
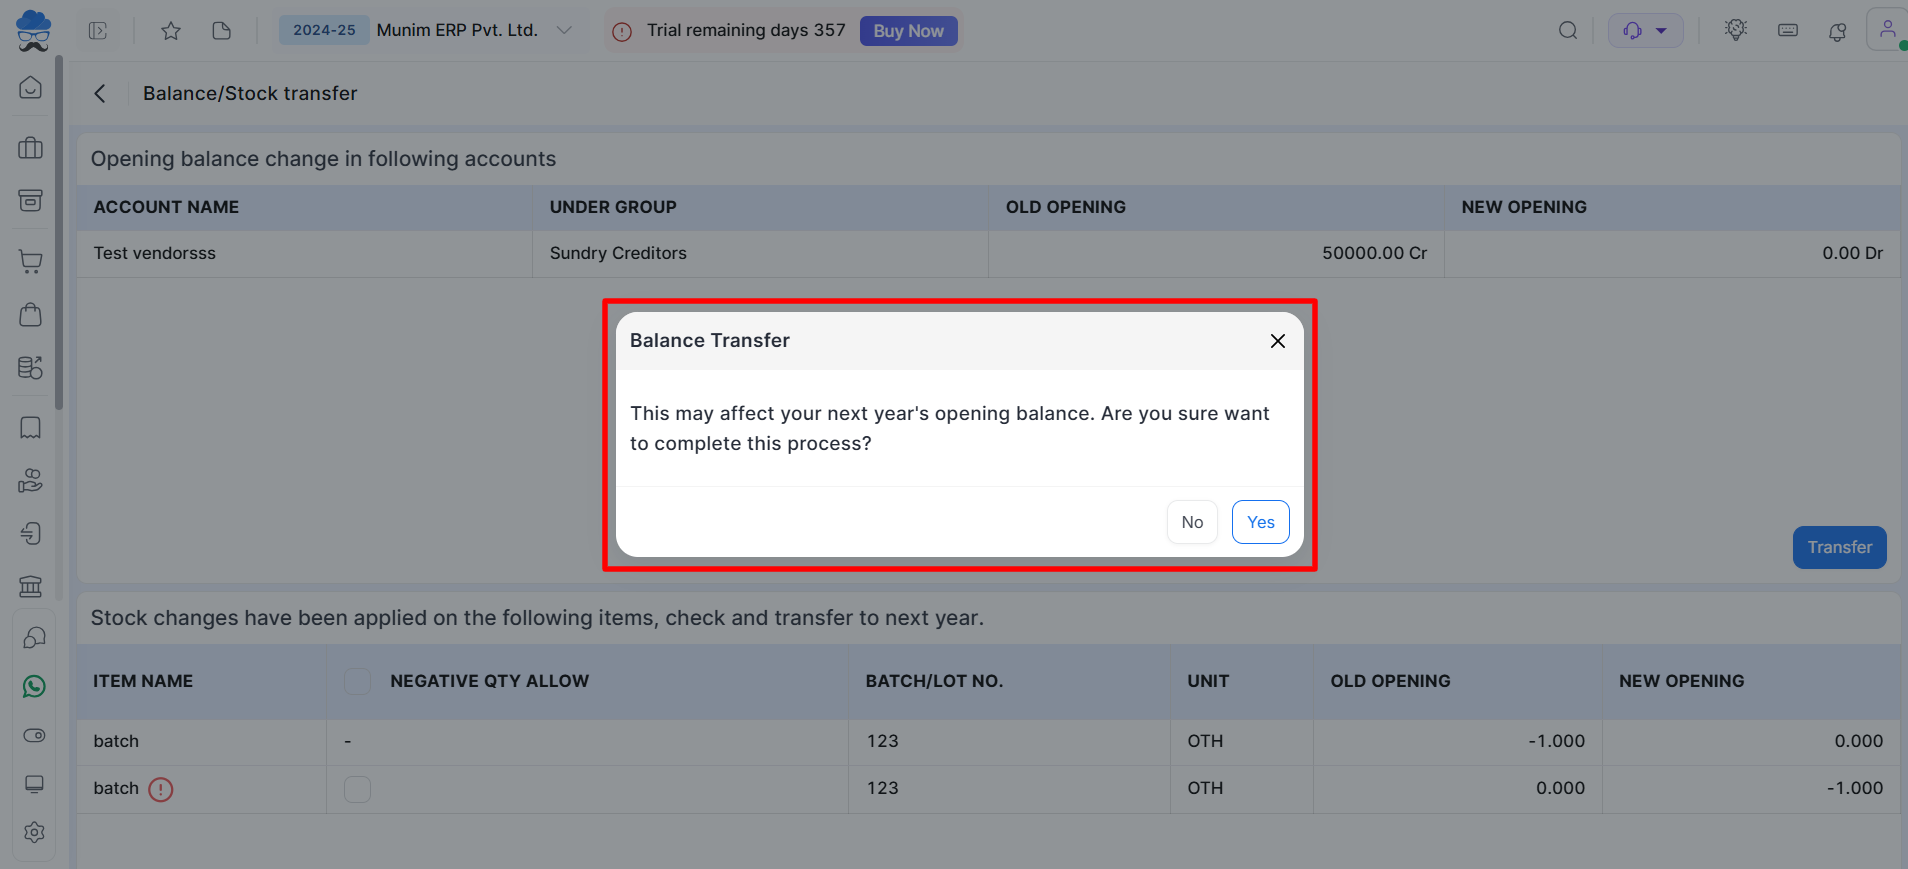
Confirm Transfer
- A confirmation pop-up appears. Click Yes to transfer the balances.
- Your balances have been transferred, and you can compare the previous year’s closing balance with the new year’s opening balance for verification.
Auto Balance Transfer
To enable automatic balance transfer:
- Go to Settings → General Settings.
- Open the Next Year Transfer tab.
- Select Auto for Balance Transfer. Click Save.
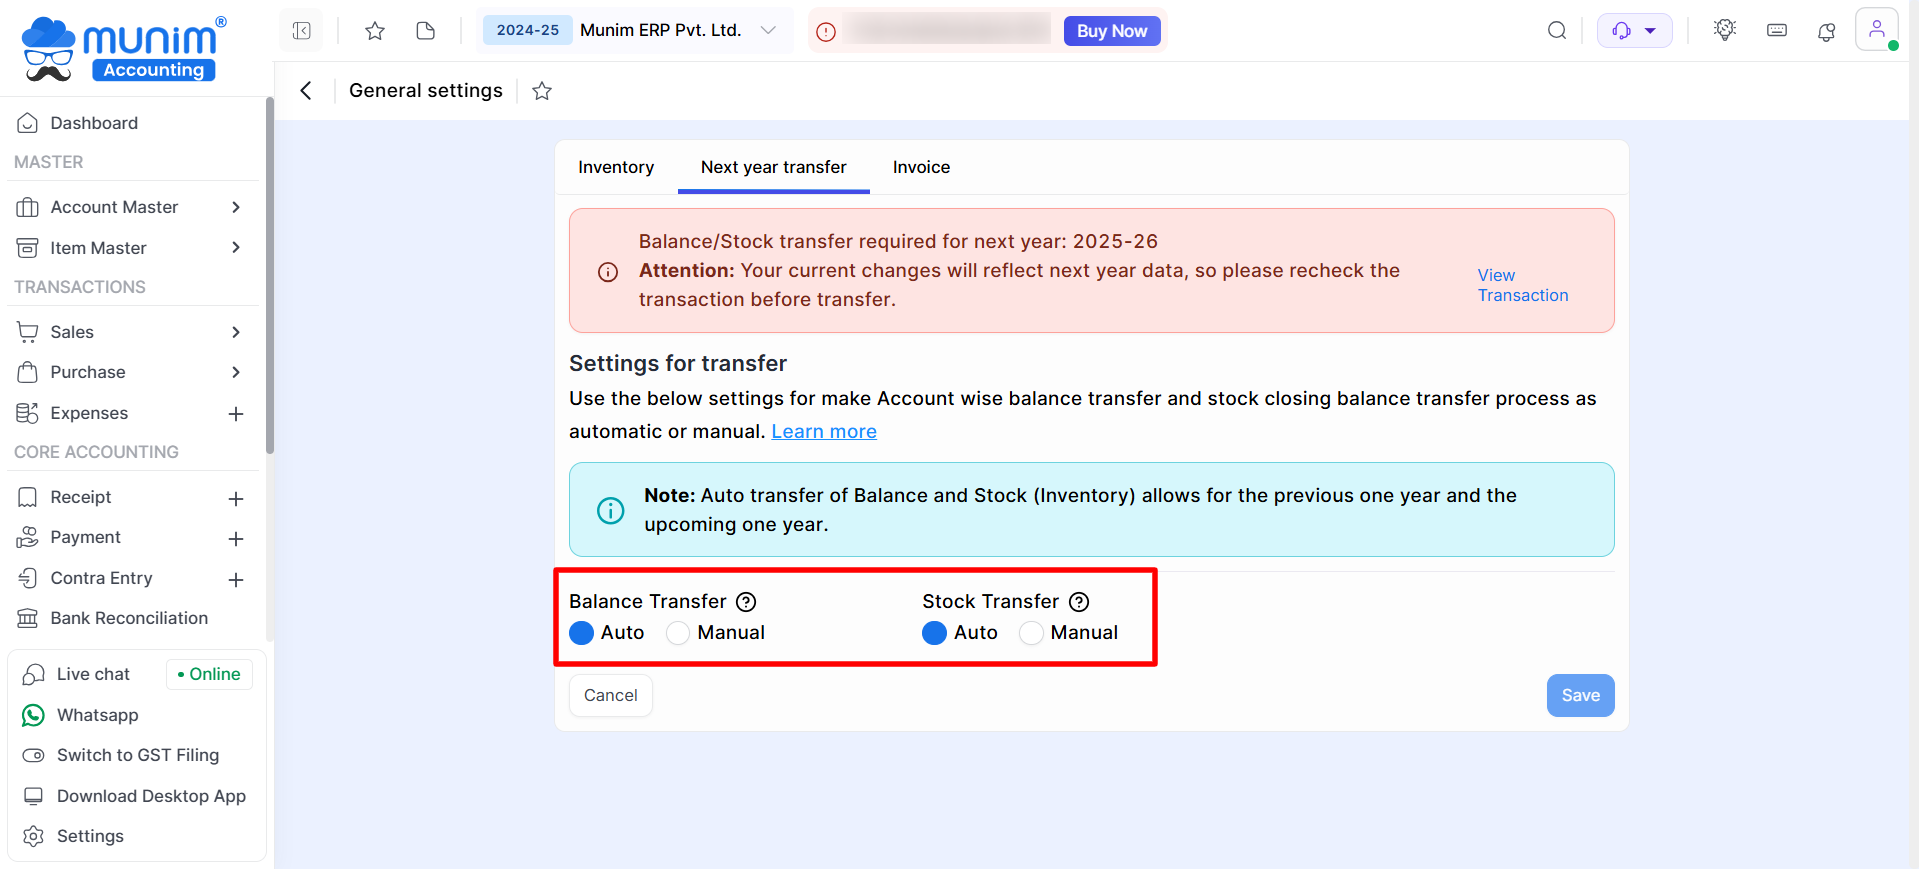
Note: For the first time, you need to transfer data manually to the next year; after that, you can transfer using the auto option on every new transaction in the previous year.
Opening Balance Validation in auto mode when creating transactions
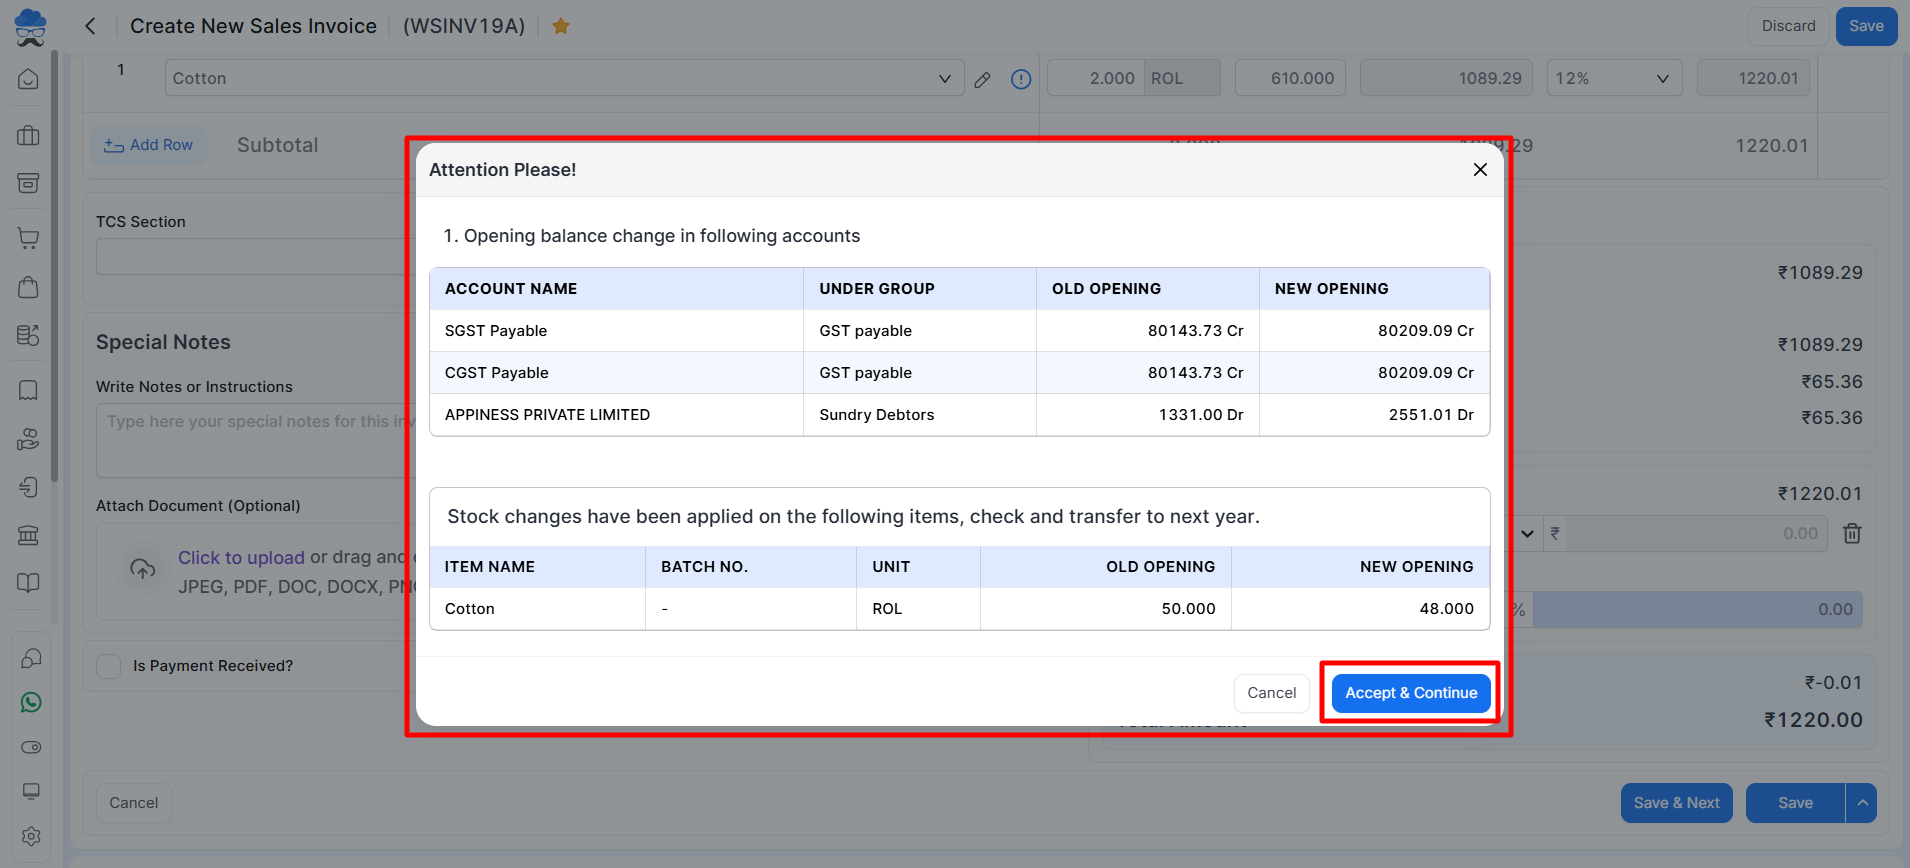
When saving a Sales Invoice after balance transfer, an Opening Balance Change popup appears.
The popup displays:
- Old opening of account balance and stock qty that are used in this transaction.
- New opening of account balance and stock qty going to update after saving this transaction.
Click Accept & Continue to update balances accordingly.
Verify the Transfer
- You can verify the transferred balance through various reports.
- For example, you can verify the transferred balance using the Ledger Report.
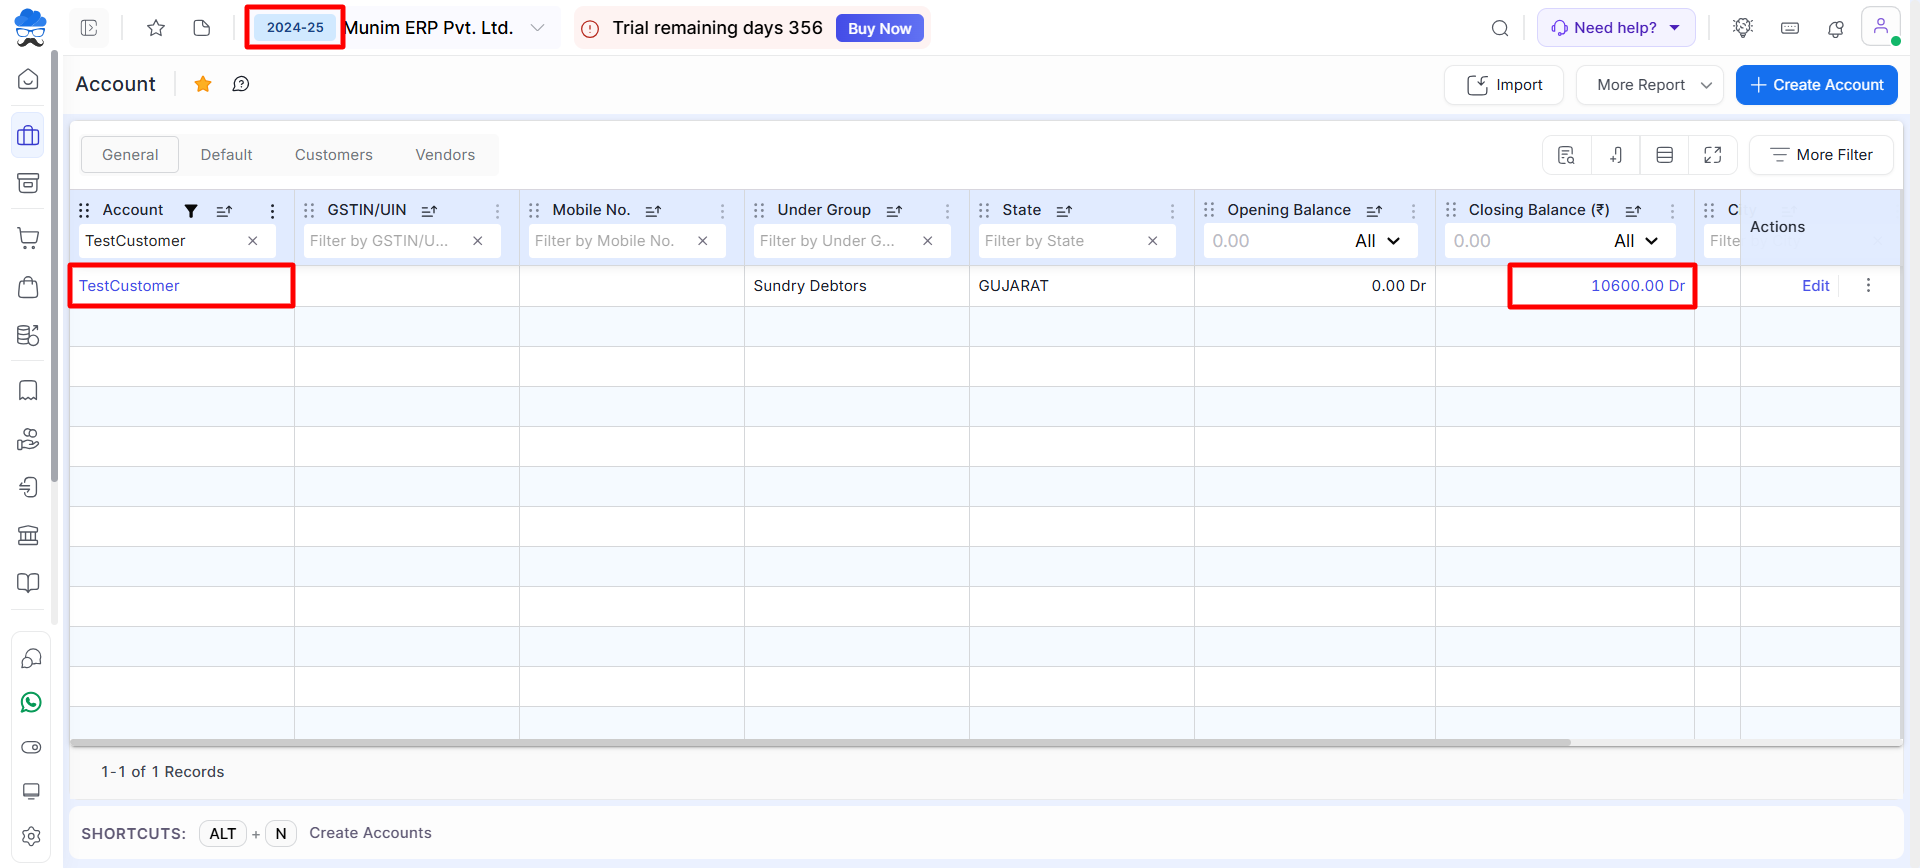
Step 1
- Open the previous financial year‘s Ledger Report or Account List page and note the closing balance.
Step 2
- Open the current financial year‘s Ledger Report or Account List page and verify the opening balance.
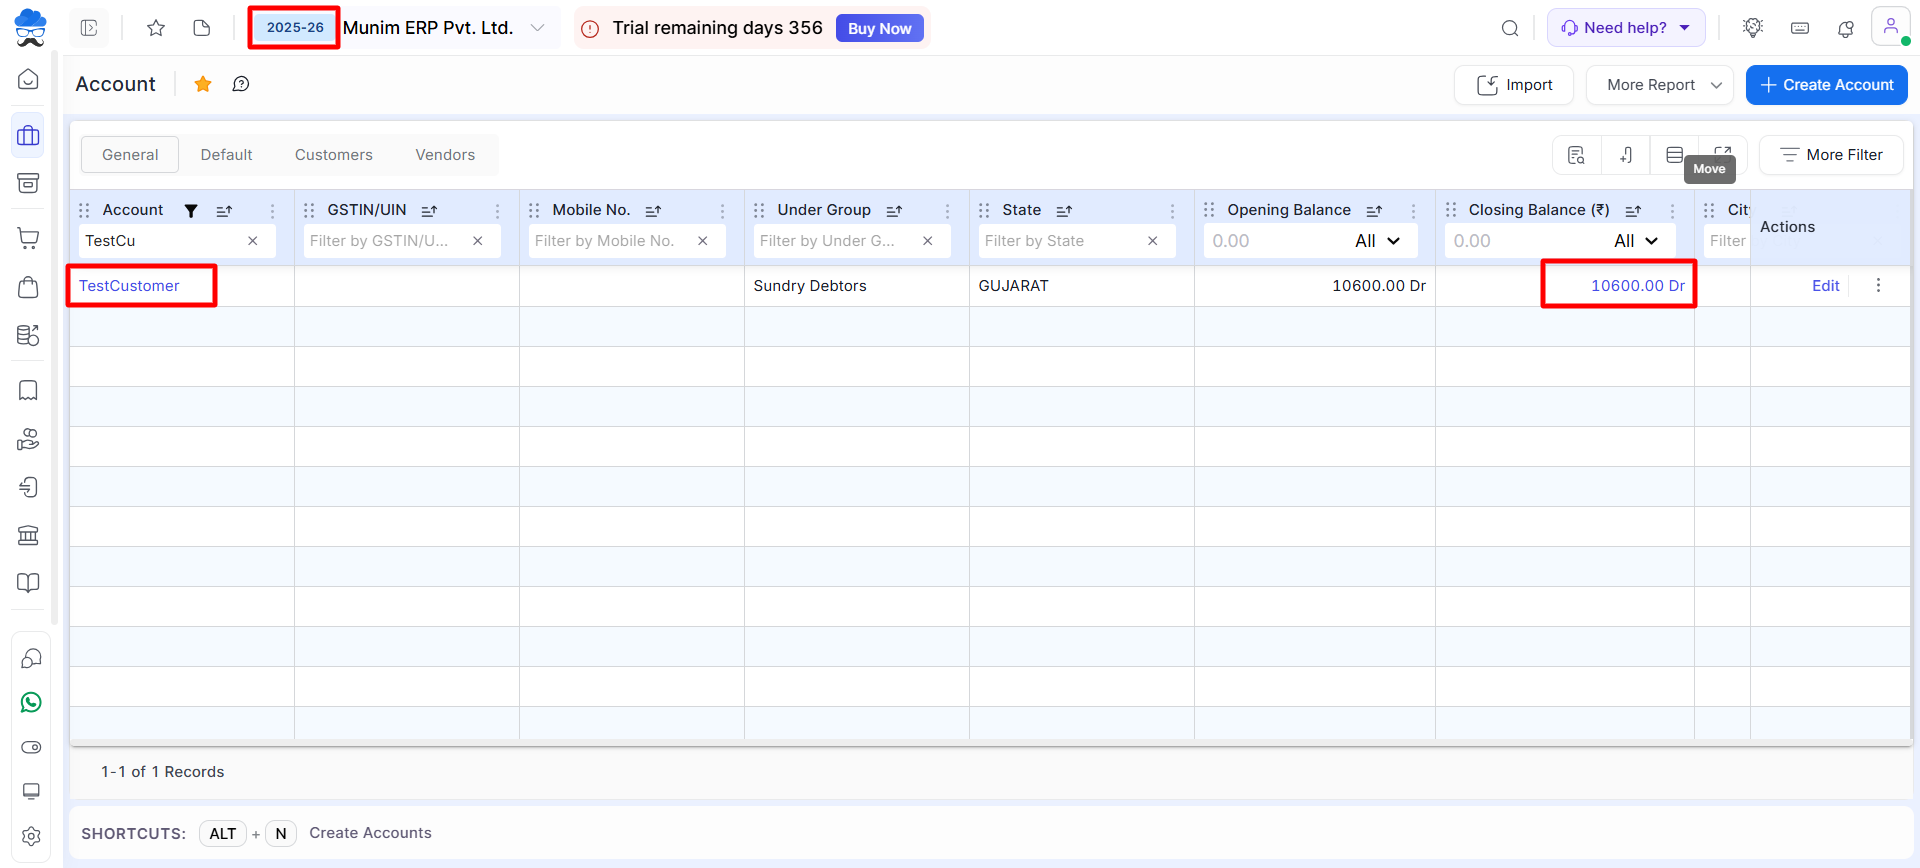
- The opening balances should match the previous year’s closing balance.
Important Notes
- The first balance transfer must be completed manually.
- Auto transfer updates the balance whenever transactions change in the previous financial year.
- If previous year transactions are modified, you must transfer the updated balance again (or use Auto mode).
- Always verify the transferred balance using the Ledger Report before working in the new financial year.
Need Assistance?
If you face any issues while transferring balance to the next financial year, contact the Munim Support Team.


