
 3553 views
 Overview
The Barcode Settings feature in Munim allows you to enable barcode printing and configure barcode labels according to your sticker paper or sticker roll dimensions. You can customise the barcode layout, label size, margins, and the information printed on each barcode label.
Benefits
- Enable barcode printing for inventory items.
- Configure barcode labels based on your sticker size.
- Customize the information displayed on barcode labels.
- Supports both A4 Sticker Sheets and Sticker Rolls.
- Helps improve inventory management and billing accuracy.
How to Enable Barcode
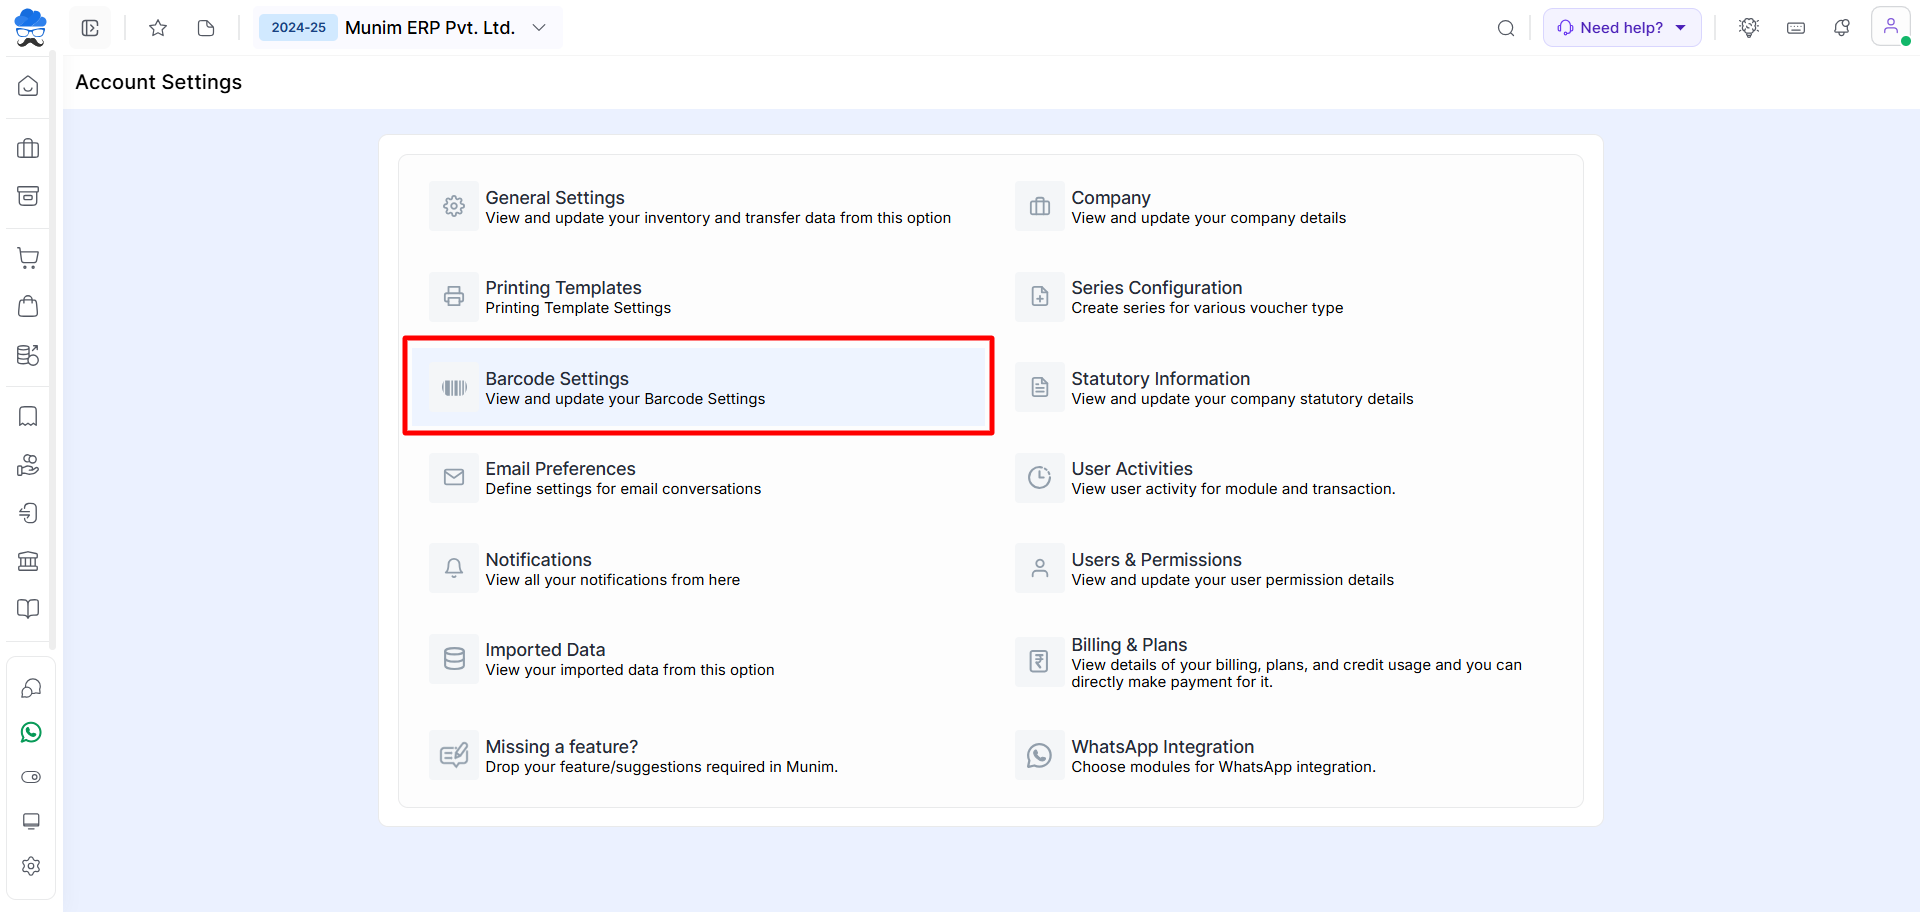
Step 1: Open Barcode Settings
- Go to Settings.
- Click Barcode Settings.
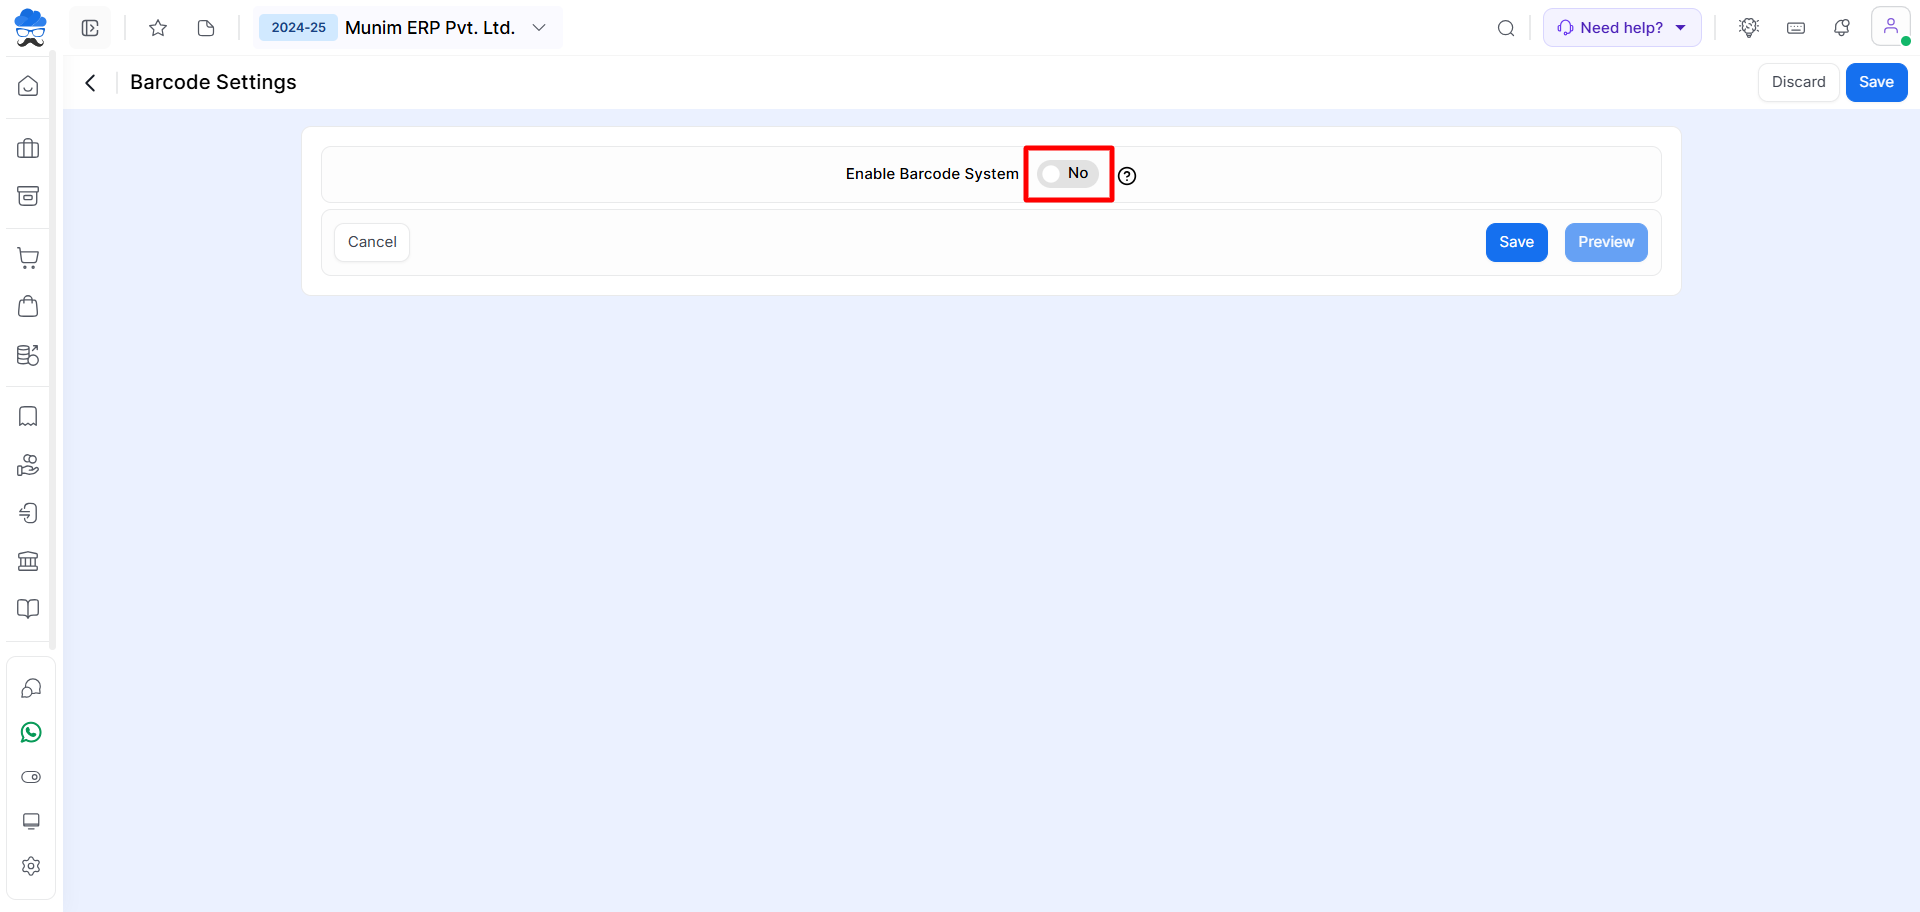
Step 2: Enable the Barcode System
- Turn on the Enable Barcode System toggle.
- Click Save if prompted.
Step 3: Configure Barcode Label Settings
Enter the barcode label specifications according to your barcode paper or sticker roll, including:
- Label Paper Type: Select between A4 Sticker Sheet and Sticker Roll.
- Sticker Width: Add the sticker’s horizontal size in mm.
- Sticker Height: Add the Sticker’s vertical size in mm.
- Gap Between Rows: Add a margin size between two stickers in the middle in mm.
- Gap Between Columns: Add a margin size between two stickers vertically in mm.
- Page Margins: Add margin size at the page ends at Top/Bottom and Right/Left in mm.
- Number of Rows: Add the number of Rows in case of an A4 Sticker Sheet page type.
- Number of Columns: Add the number of Columns, restricted to a maximum of 2 in Sticker Roll type.
- Sticker Font Size: Set the Font size in px according to the requirement.
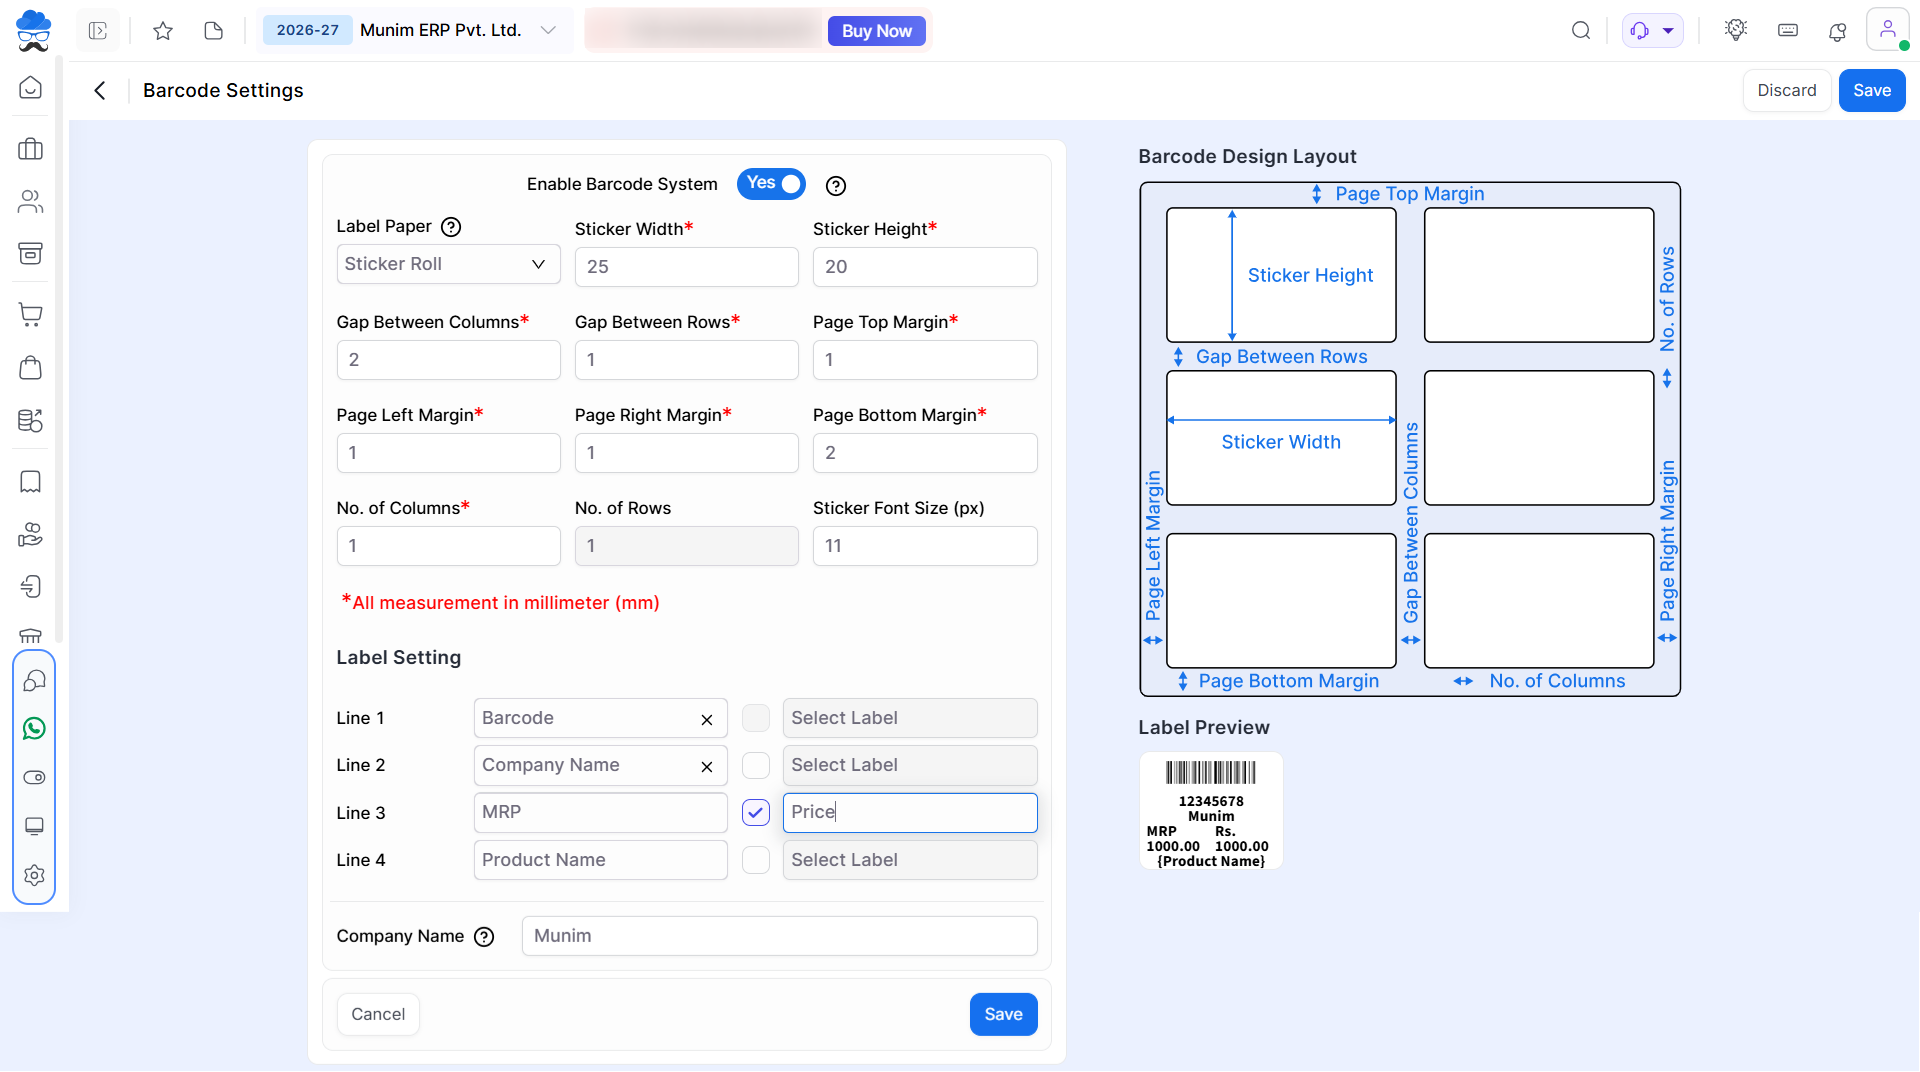
Note: All measurements should be entered in millimetres (mm).
Step 4: Configure Label Content
Choose the fields you want to display on the barcode label, such as:
- Barcode
- Product Name
- MRP
- Price
- Company Name
You can select which row you want two fields in with a radio button in the middle.
Select Company Name from the dropdown to reveal a field at the bottom for entering your company name.
You can also preview the barcode layout in Label Preview before saving.
Step 5: Save the Configuration
After completing the settings, click Save to enable barcode printing.
Important Notes
- Configure the sticker dimensions carefully to ensure proper barcode alignment during printing.
- Select the correct Label Paper type (A4 Sticker Sheet or Sticker Roll).
- Use the Preview option to verify the barcode layout before printing.
- Incorrect dimensions may result in misaligned barcode labels.
Result
The barcode system will be enabled, and barcode labels will be printed using your configured layout and label settings.
Related Helpdesk: For detailed instructions on barcode generation and printing, refer to the Full Barcode process helpdesk.
Need Assistance?
If you need help configuring barcode settings or barcode printing, please contact our support team. We’re happy to assist you.


