 4098 views
 Overview
Creating a GST invoice in Munim is a straightforward process once your GST configuration, company details, and item tax rates are properly set up.
This guide walks you through every required configuration and invoice creation step, ensuring that GST is calculated correctly and reflected on your Sales Invoice. By following this process, you can create GST-compliant invoices without requiring any additional setup or support assistance.
Before You Begin
Ensure the following prerequisites are completed:
- Your company is registered under GST.
- GST details are configured in Munim.
- Products or services have GST rates assigned.
- Customer information is available.
- Required GSTIN details are entered correctly.
If any of these configurations are missing, GST calculations may not appear on your invoice.
Troubleshooting Common GST Issues and Solutions:
Step 1: Configure Company GST Registration
Before creating GST invoices, your company must be configured as a GST-registered business.
Navigate to:
Settings → Company
On the Company page:
- Open your company details.
- Locate the Registration Type field.
- Select Regular (With GST).
- Enter your GSTIN Number.
- Save the changes.

Why This Setting Is Important
The Registration Type determines whether GST-related features are available throughout the software.
If the company is configured as:
- Regular (With GST) → GST invoices can be generated.
- Without GST → GST-related fields and calculations may not be available.
Step 2: Verify GST Configuration
After configuring your company as GST registered, verify that GST is enabled in statutory settings.
Navigate to:
Settings → Statutory Information → GST Details
Check the following option:
Enable Goods and Service Tax (GST)?
If the value is set to No, change it to Yes and save the configuration.

GST Configuration Checklist
Verify that:
✔ Company registration type is GST-enabled
✔ GST is enabled from Settings
✔ GSTIN is entered correctly
✔ GST-related settings are saved
Failing to enable GST here may prevent GST calculations from appearing on invoices.
Step 3: Create Products or Services with GST Rates
GST rates are picked from the product or service master during invoice creation.
Navigate to:
Inventory → Item Master
Create a new item or edit an existing item.
In the item configuration:
- Enter item details.
- Select the applicable GST Rate (%).
- Save the item.
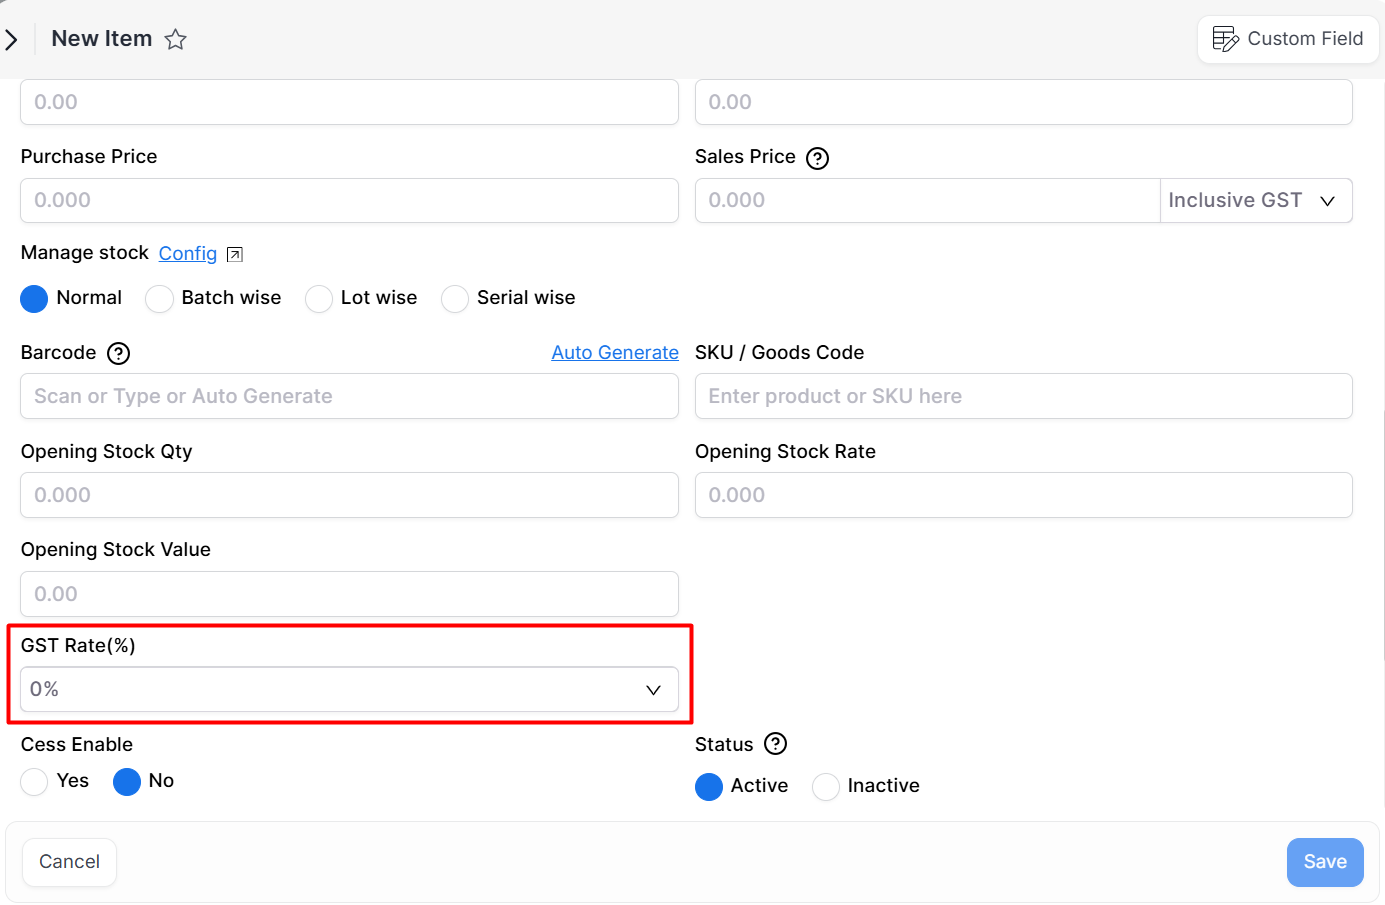
Understanding GST Rate Configuration
The GST Rate selected here directly controls:
- GST calculation during billing.
- CGST and SGST calculation for intra-state transactions.
- IGST calculation for inter-state transactions.
- GST values shown in reports and GST returns.
Step 4: Create the GST Invoice
Navigate to: Sales → Sales Invoice
Click: Create Invoice or press Alt + N
The Create Sales Invoice page will open.
Enter Invoice Information
Fill in the required fields:
Customer Information
Select the customer.
Ensure customer GST details are entered correctly if GST is applicable.
Invoice Details
Provide:
- Invoice Date
- Series Name
- Invoice Number
- Place of Supply
- Book Name (if applicable)
Item Details
Add products or services to the invoice.
When an item is selected:
- GST Rate is automatically fetched from the item master.
- Taxable amount is calculated automatically.
- GST amount is calculated automatically.
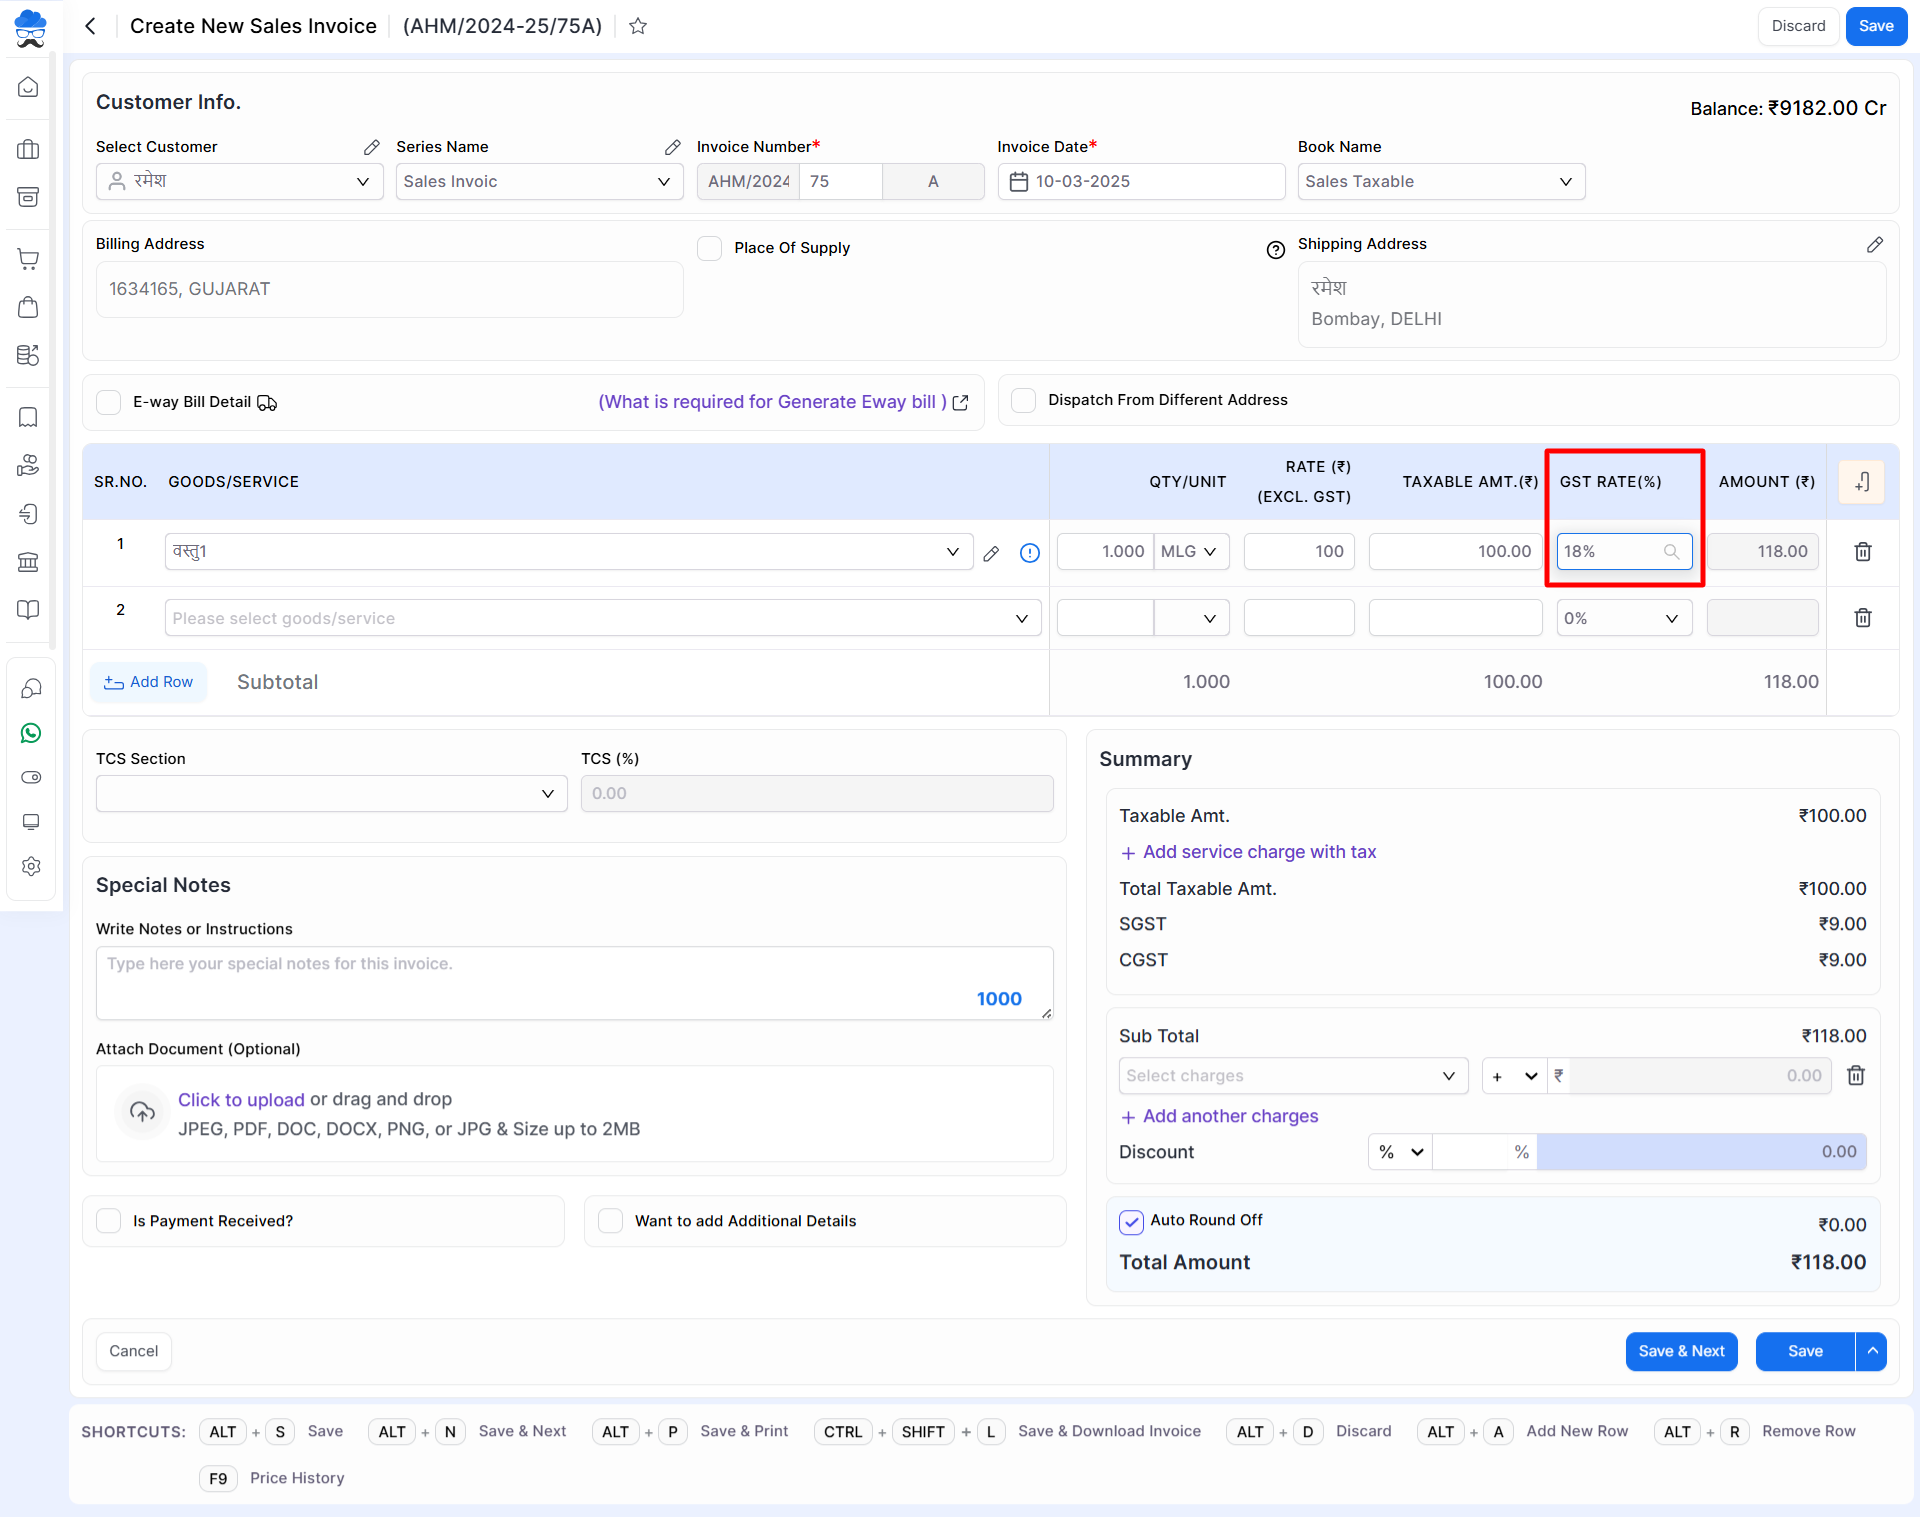
How GST Is Calculated
Munim automaticaly determines GST based on the seller’s state and the Place of Supply.
Intra-State Sale
When seller and buyer belong to the same state:
Example:
Seller State: Gujarat
Buyer State: Gujarat
GST Rate: 18%
Result: CGST = 9% , SGST = 9%
Inter-State Sale
When seller and buyer belong to different states:
Example:
Seller State: Gujarat
Buyer State: Maharashtra
GST Rate: 18%
Result: IGST = 18%
Review Invoice Summary
Before saving, verify:
- Customer Name
- GSTIN
- Place of Supply
- Item Rates
- GST Rate
- Taxable Amount
- CGST / SGST / IGST
- Total Invoice Amount
This step helps prevent incorrect GST calculations and filing discrepancies.
Step 5: Save the Invoice
After verifying all details:
- Click Save.
- The Sales Invoice will be generated.
- GST calculations will be recorded automatically.
The invoice is now ready for:
- Printing
- PDF Download
- E-Invoice Generation
- E-Way Bill Generation
- GST Reporting
Common Reasons GST Does Not Appear on Invoice
| Issue | Solution |
|---|---|
| Registration Type is not GST-enabled | Set Registration Type to Regular (With GST) |
| GST is disabled in Statutory Information | Enable GST in GST Details |
| GST Rate is not configured on item | Assign GST Rate in Item Master |
| Incorrect Place of Supply | Verify Place of Supply selection |
| Customer GST details missing | Update customer master |
| Item selected has 0% GST | Review GST Rate configuration |
Important Notes
- GST rates are fetched from the Item Master.
- Place of Supply directly affects whether CGST/SGST or IGST is applied.
- GST settings should be configured before invoice creation.
- Changes to GST rates in the Item Master affect future invoices only.
- Always review GST calculations before saving the invoice.
Result
A GST-compliant Sales Invoice is successfully created with automatic tax calculation based on your GST settings, Place of Supply, and item-wise GST rates.
Need Assistance?
For any assistance related to GST configuration or GST invoice creation, please contact the support team.


