 3835 views
 This module is used for inward purchase bills. Here you are able to add new vendors and new items.
On this page, you are able to create a new or import the purchase bill. we are providing the sample Excel file which you can download, add the details and import the data.
Watch the Video Tutorial:
For a step-by-step guide, watch the video below:
Create purchase bill :
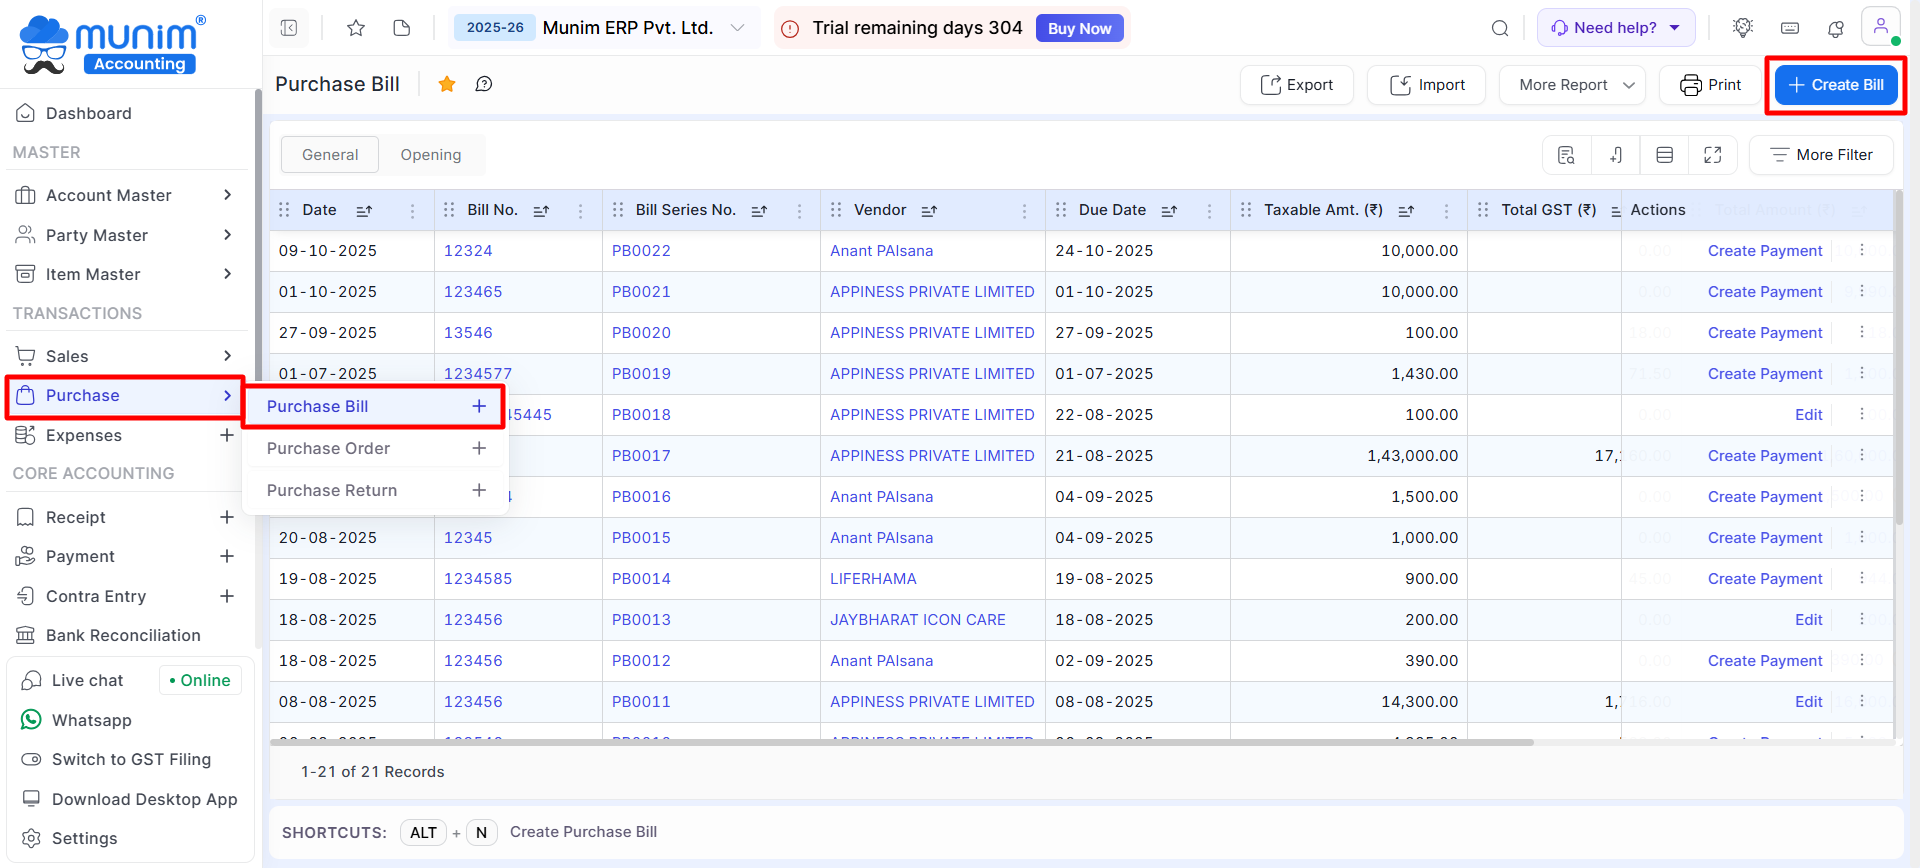
- Go to the Purchase Bill option in the Purchase module available in the Transactions section in the left menu sidebar.
- Click on the Create Bill button or press the Alt+N key.
+−⟲
+−⟲
| Field | Description | Note |
|---|---|---|
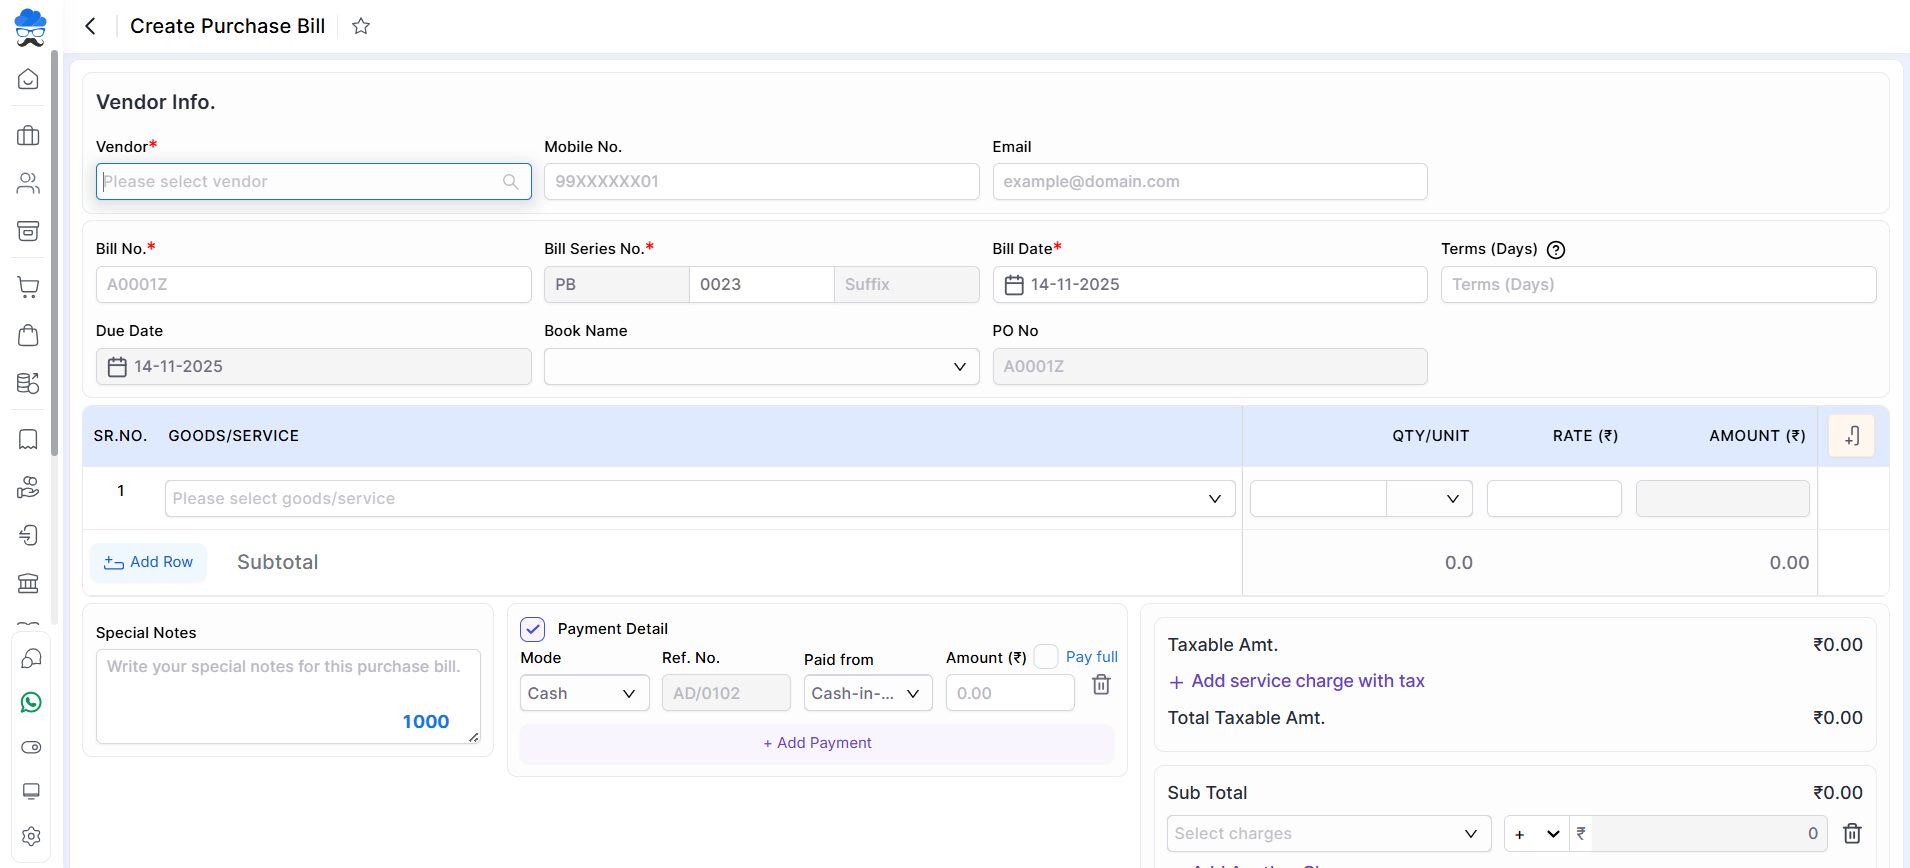
| Vendor | Here select a vendor for creating a purchase bill. here also you are able to add new vendors. | Mandatory field |
| Mobile no. | Here write your vendor mobile number. | |
| Here write your vendor email. | ||
| Billing address | If you have written the address in the vendor ledger then as you select vendor, the Billing address will automatically come here. | Mandatory field |
| Place of supply | IGST will be applicable on the invoice. Suppose selected billing accounts province is different in comparison to the Place of supply province. | |
| Bill no. | Here write the purchase bill number that you have received from the Supplier. | Mandatory field |
| Bill Series No. | Here automated number will appear of Purchase Bill number for internal reference. | |
| Bill date | Here write the purchase bill date. | Mandatory field |
| Terms (Days) | Here set the due days for this purchase bill. | |
| Due date | As you write Terms days, The due date will automatically be set. | |
| Book | Here select the purchase book for purchase record. | |
| PO No. | If you are creating a purchase bill using a purchase order then the purchase order number is shown here but if you creating a direct purchase bill then this field showing disabled. | |
| Product/Service | Here select an item, here also you are able to add an item. | Mandatory field |
| HSN/SAC | If you have written the HSN/SAC code in the item master then as you select an item, the HSN/SAC code will automatically come here. | |
| BATCH NO. | Here write the batch number. | |
| Expire Date | Here write the batch expire date. | |
| MRP | Here write the item MRP. | |
| Quantity | Here write the item quantity. | Mandatory field |
| Rate (₹) | Here write the item rate. | Mandatory field |
| Discount(%/₹) | Here write discount. here you are able to apply discounts in two types, first percentage-wise and second amount-wise. | |
| Discount amount (₹) | As you write discount, The discount amount will automatically come here. | |
| Taxable amount (₹) | As you select the item, write the item quantity, write the item rate, and add the discount then the taxable amount will show here. | |
| CESS(%) | Here write CESS(%). | |
| GST RATE(%) | As you select the item, GST Rate automatically comes here from the item master. Here also you are able to change GST Rate. | |
| AMOUNT (₹) | As you write the item name, item quantity, item rate, and discount then the amount will show here. | |
| Special notes | Here write a special note for this invoice. | |
| Payment Detail | Here you can enable and add Payment details if you have already paid to vendor against this Bill. data like Mode, Ref. No., Paid from and Amount need to be added. | |
| TDS section & % | Here select the TDS Section to show add TDS amount in bill if eligible for supplier. As you select the TDS Section rule, TDS (%) will come and TDS amount will be calculated automatically in subtotal. | If enabled in Vendor Account |
| TCS section & % | Here select the TCS Section to show add TCS amount in bill if eligible for supplier. As you select the TCS Section rule, TCS (%) will come and TCS amount will be calculated automatically in subtotal. | If enabled in Vendor Account |
| + Add service charge with tax | Here you can add an additional service charge for this invoice. here you are able to add multiple additional services. | |
| +Add another charge | Here you are able to add and remove another charge for this bill. here you are able to add multiple other charges. | |
| Discount Amount | Here you are able to apply a discount for this bill. | |
| Auto round off checkbox | This checkbox is used for the invoice total amount set in the round of the amount, and also you are able to set a custom amount. | |
| No file chosen | Here you able to attached the document for this bill. | |
| Save & next | This button is used to save the purchase bill and the page redirects to the same page. | |
| Save | This button is used to save the purchase bill and the page redirects to the purchase listing page. |
| Shortcut | Description |
|---|---|
| Alt+S | Save – This shortcut is used to save the purchase bill. |
| Alt+N | Save & next – This shortcut is used to save the purchase bill and redirect on same page. |
| Alt+P | Save & Print – This shortcut is used to save & Print the Bill. |
| Alt+D | Discard- This shortcut is used to discard the purchase bill. |
| Alt+A | New- This shortcut is used to add a new row |
| Alt+R | Remove- This shortcut is used to remove a row |
| Alt+C | Cancel- This shortcut is used to cancel the purchase entry. ( work as Back button) |
+−⟲
| Field | Description |
|---|---|
| Export | Here the user can export purchase bill data. |
| Import | Here the user can import purchase bill data. |
| More Report | Here you can use preset filters to check the Bill list accordingly. |
| Here you can edit Print settings of Purchase Bill. | |
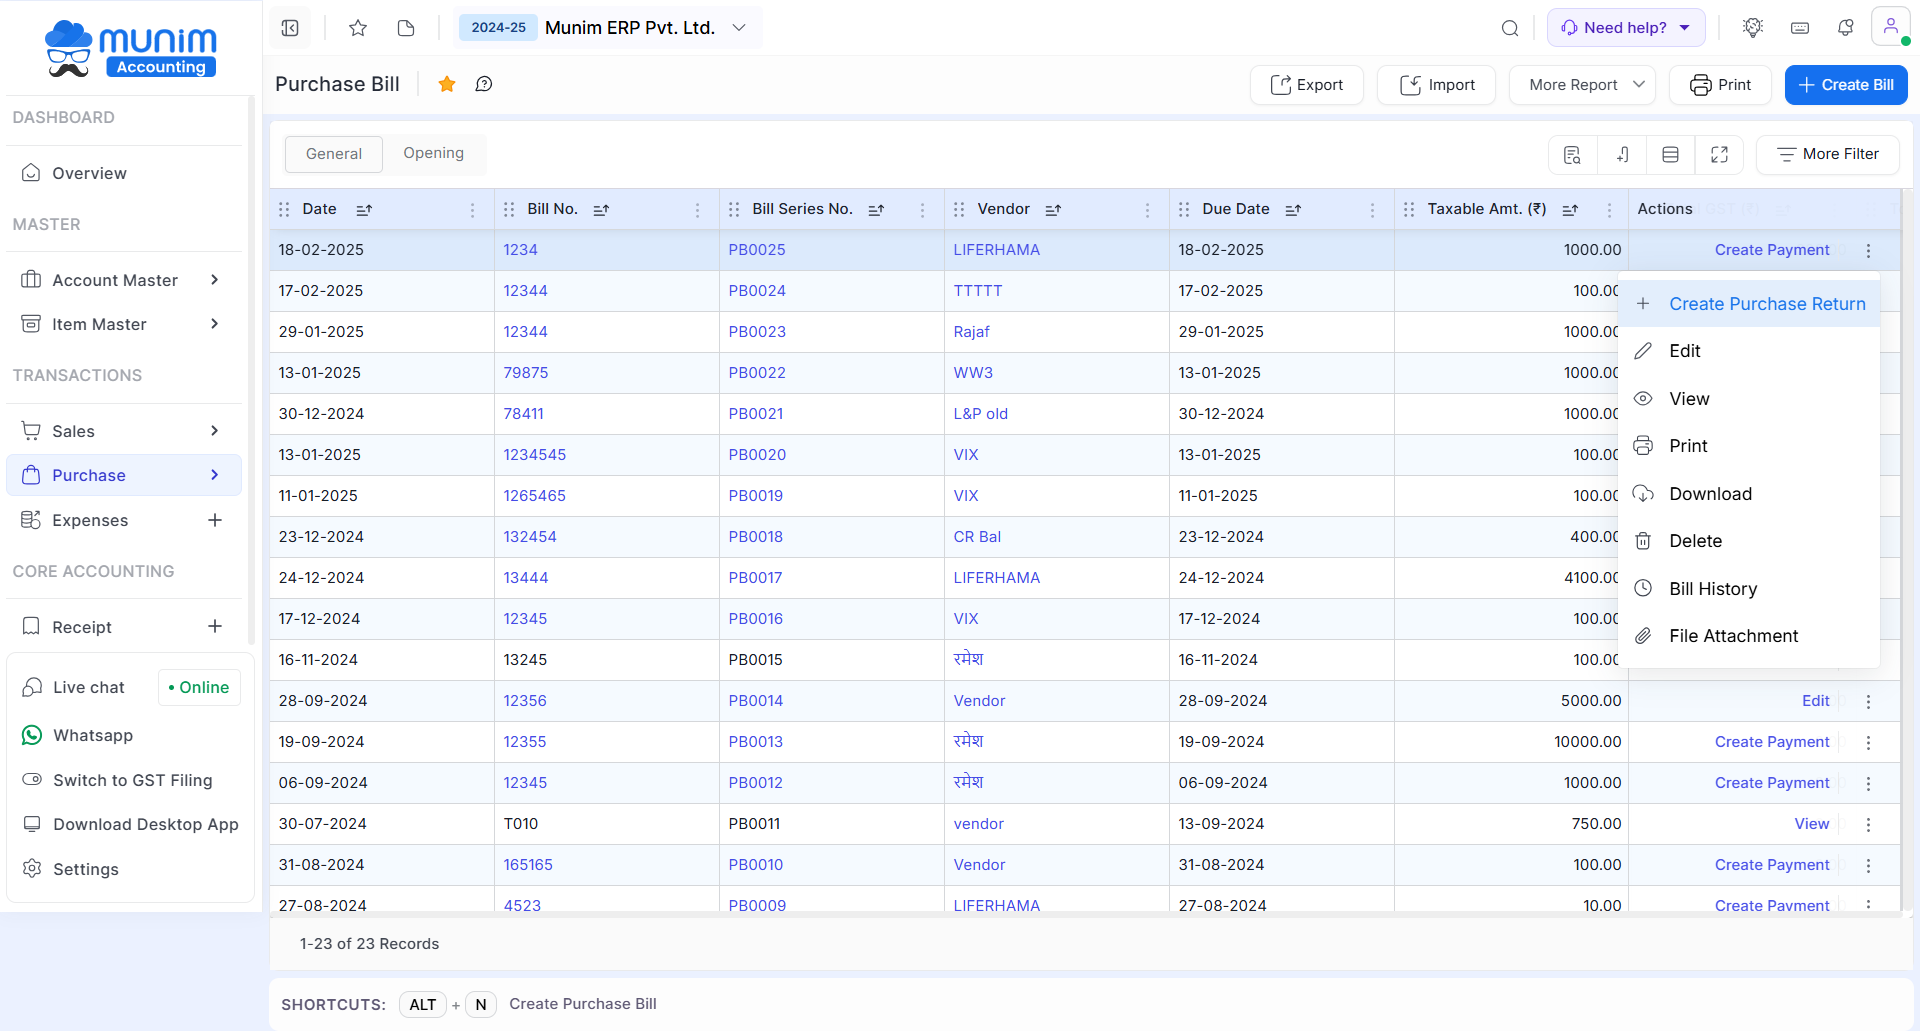
| Create payment | This action is used to create a payment for the purchase bill. |
| Create Purchase Return | This action is used to create a Purchase return of Purchase Bill. |
| Edit | This action is used to edit the purchase bill. |
| View | This action is used to view the purchase bill. |
| This action use to print Purchase Bill | |
| Download | This action is used to download Purchase Bill |
| Delete | This action is used to delete the purchase bill. |
| Bill History | This action is used to see bill history. |
| File Attachment | This action is used to upload and download the file. |
| Status | Details |
|---|---|
| Paid | This status will identify the entry as paid, As Payment of this Purchase Bill is done. |
| Unpaid | This status will identify the entry as unpaid, As Payment of this Purchase Bill is not done. |
| Partially Paid | This status will identify the entry as partially done, As Payment of this Purchase Bill is half or partially done. |
| Close | This status will identify the entry as closed if a Purchase return has been done for this Bill. |
How to import purchase bill:
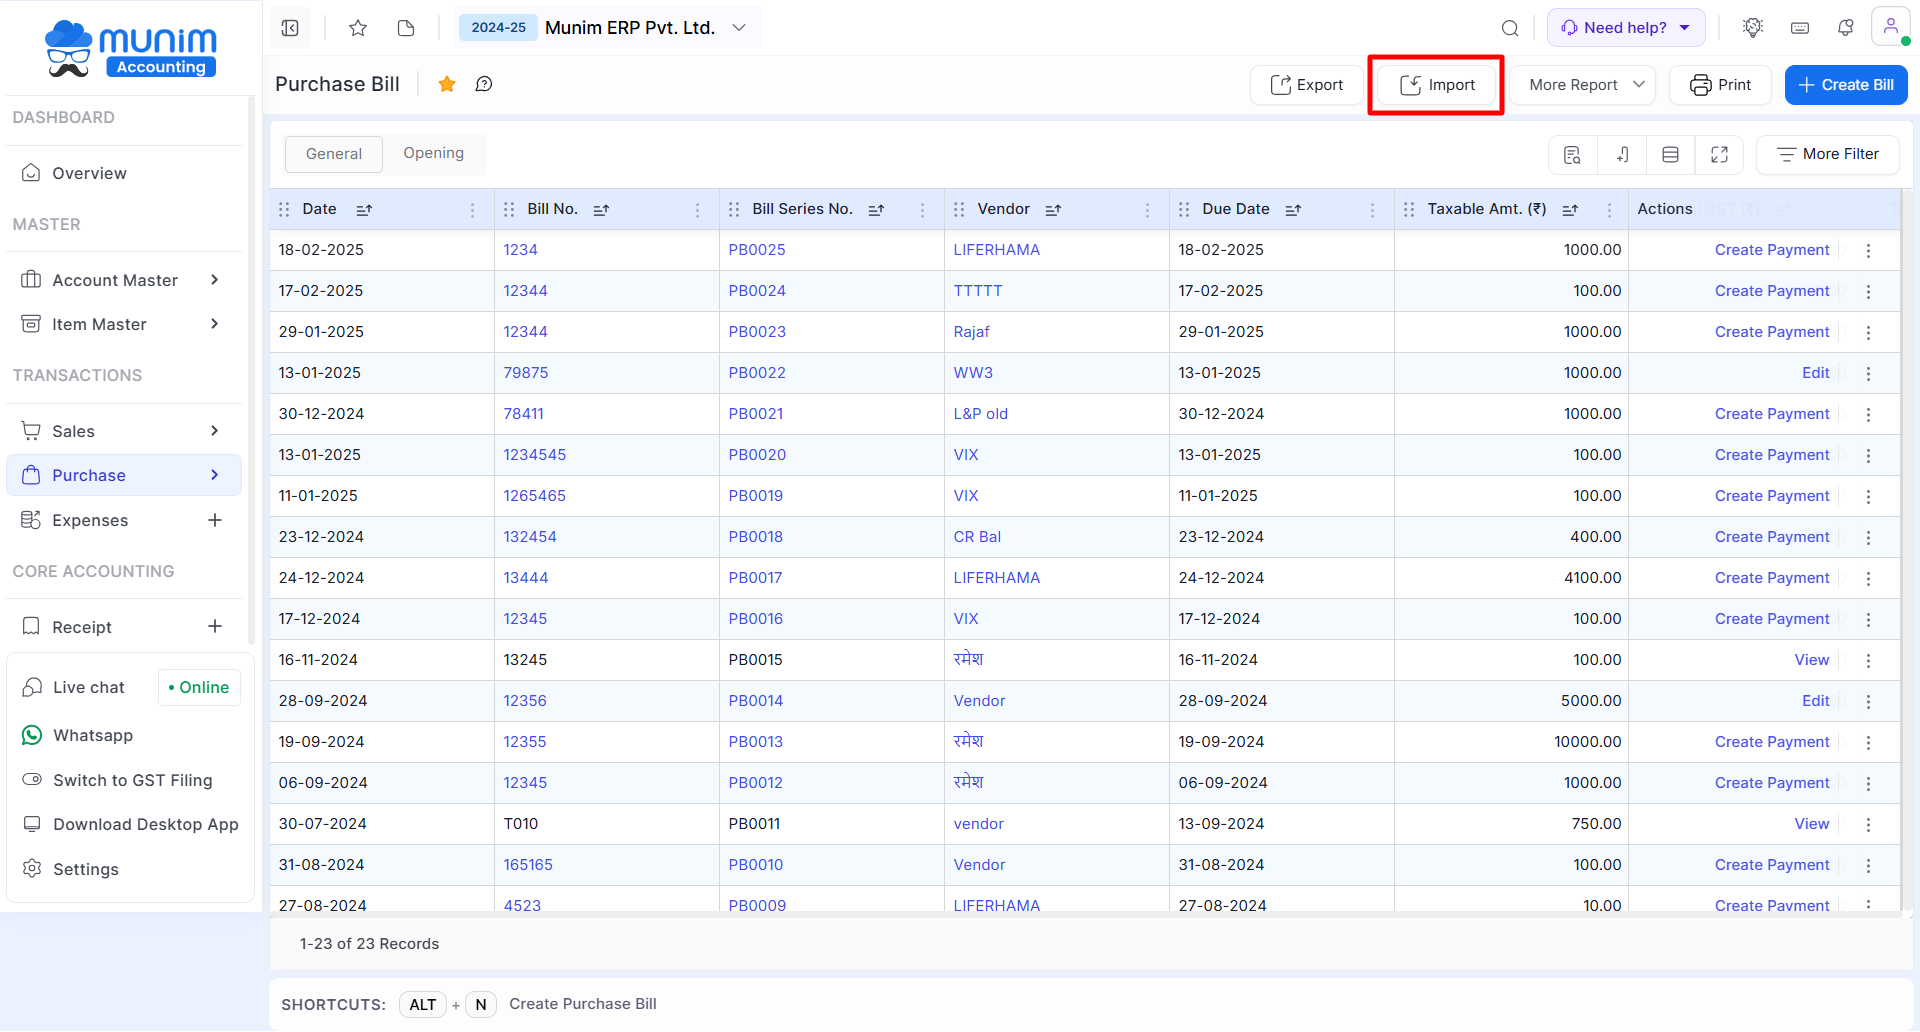
- Go to the Purchase module from the left sidebar and then select the Purchase Bill.
- Now on this page, click on the Import button from the top right corner.
+−⟲
- Now the import sales popup will be shown from which you need to click on the Download sample file.
- Now open the downloaded Excel file, add the details, save it and upload the file in that pop-up itself.
+−⟲


