 3823 views
 Overview
The Payment Received option allows you to record payment while creating a Sales Invoice. When payment details are entered and the invoice is saved, Munim automatically generates a Receipt Voucher.
This helps reduce manual work by creating both the Sales Invoice and Receipt Voucher in a single process.
Benefits
- Create Receipt Vouchers automatically.
- Save time by avoiding separate receipt entry.
- Record customer payments during invoice creation.
- Support multiple payment entries for a single invoice.
- Reduce manual accounting work.
Create a Sales Invoice with Payment Received
Step 1: Open Sales Invoice
- Go to the Sales module.
- Click Sales Invoice.
- Click Create Invoice or press Alt + N.
- Enter customer and item details.
Step 2: Enable Payment Received
- Locate the Is Payment Received? option on the invoice screen.
- Enable the checkbox.
- Payment-related fields will become available.
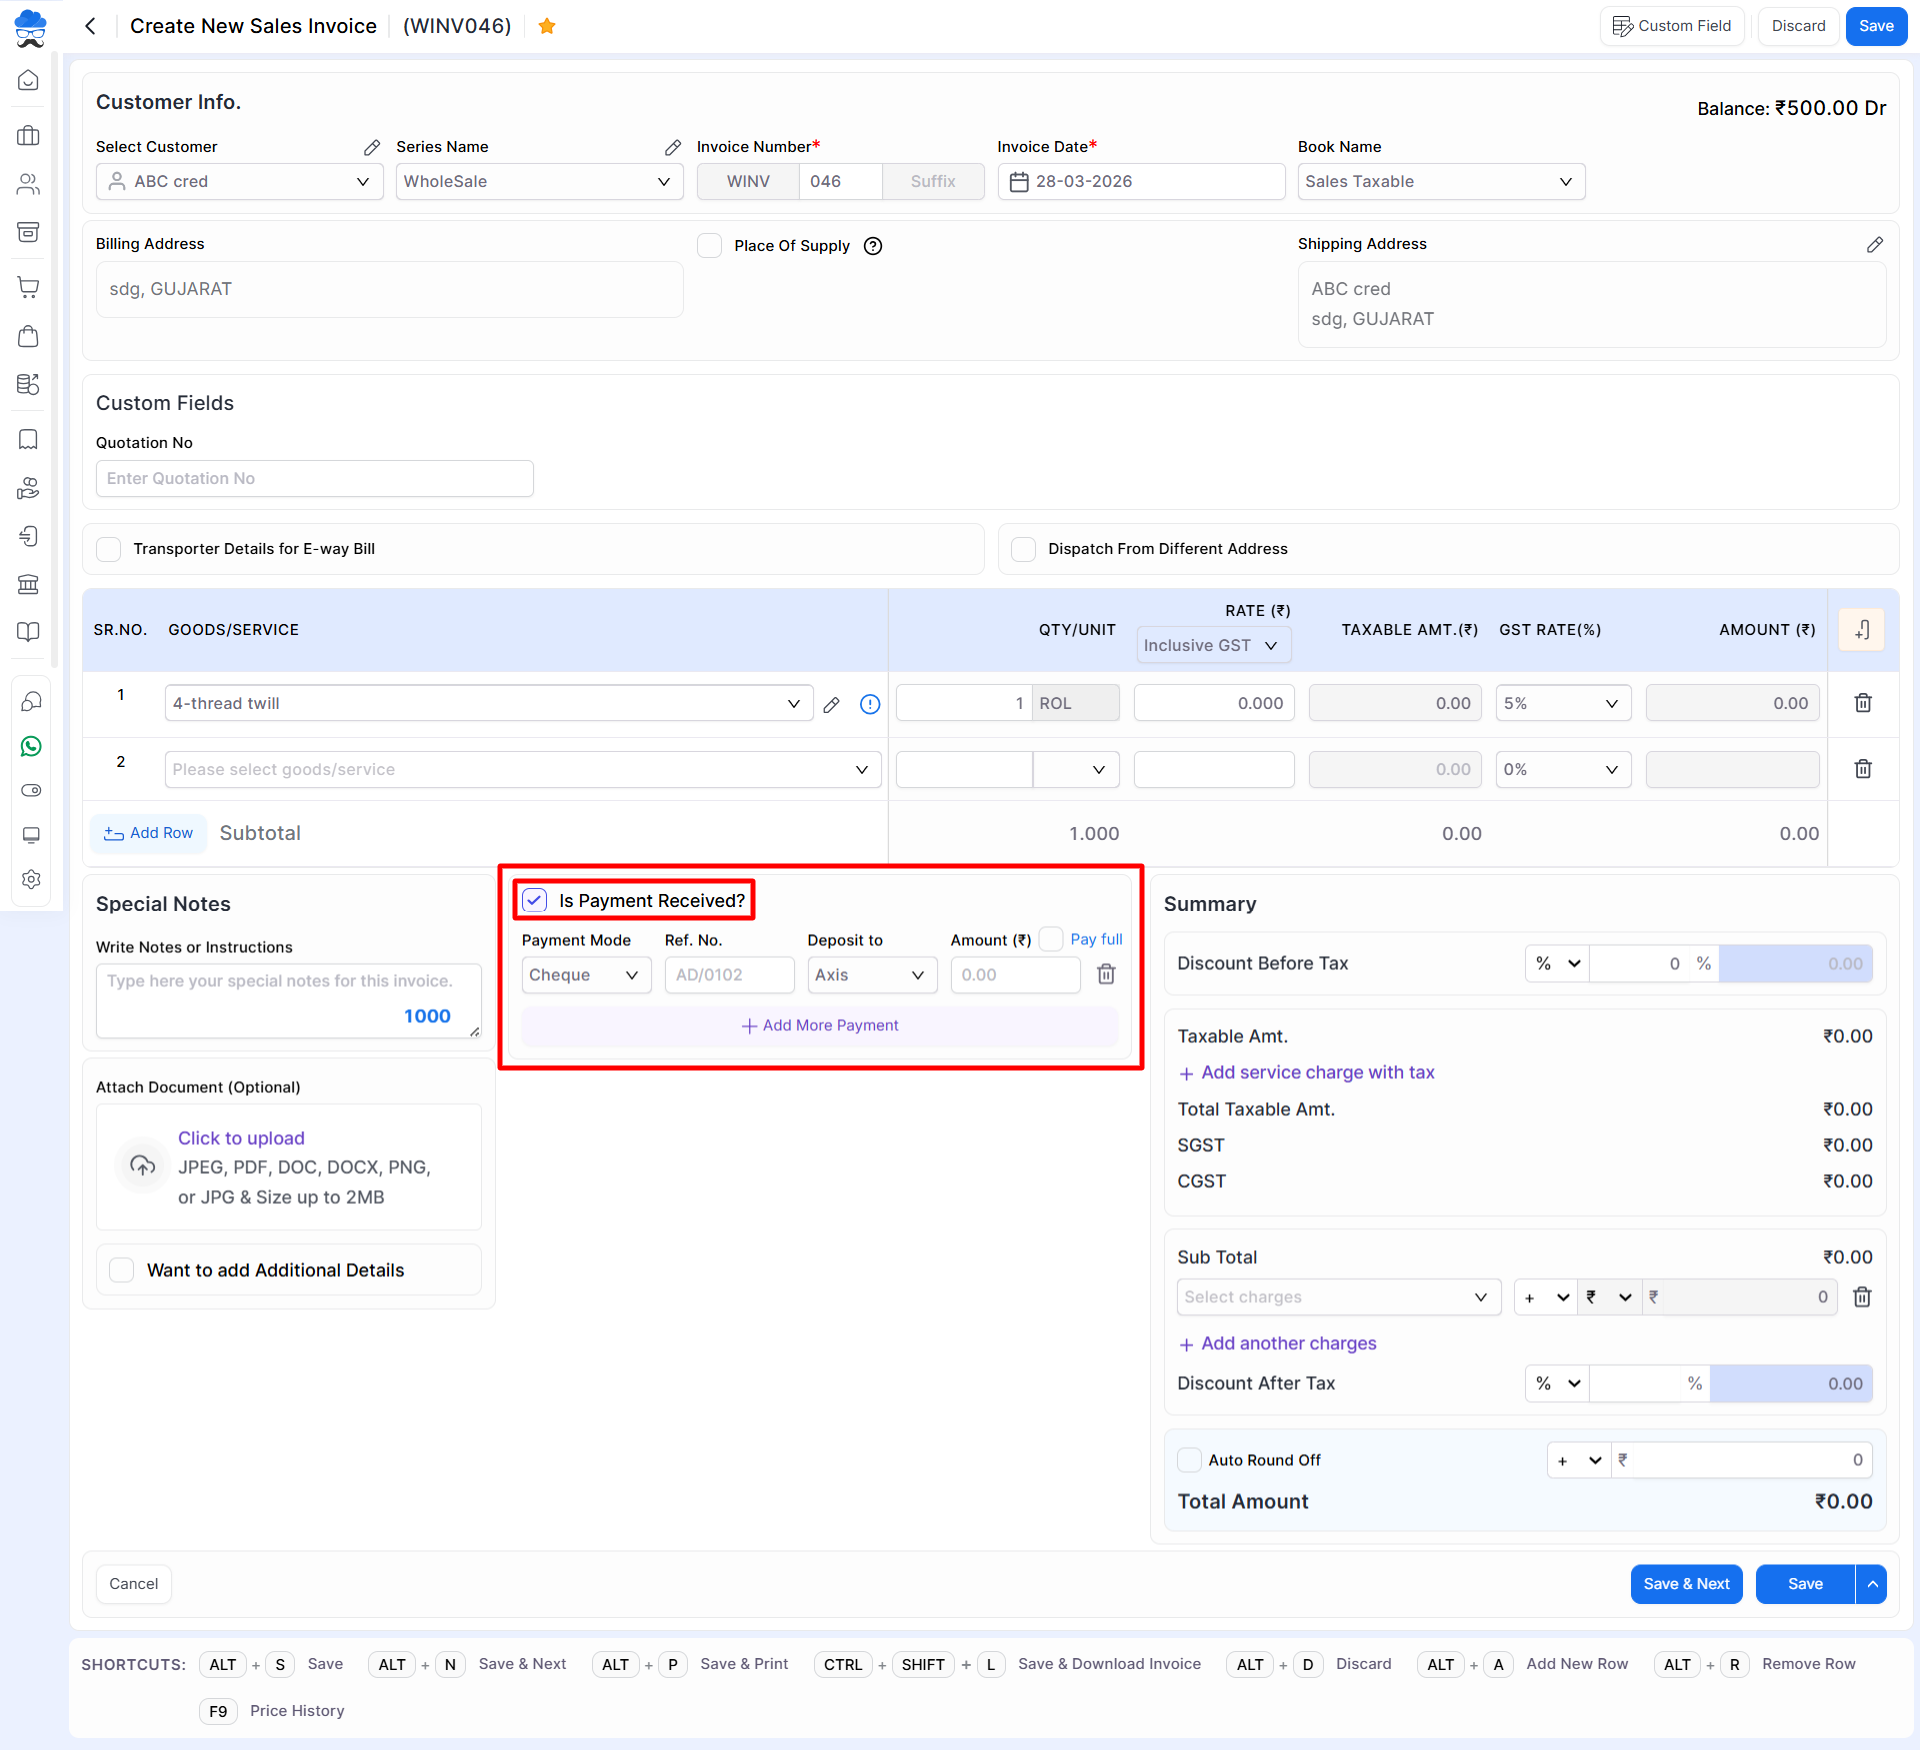
Step 3: Enter Payment Details
Fill in the required payment information:
| Field | Description |
|---|---|
| Payment Mode | Select Cash, Cheque, Net Banking, UPI, or other available modes |
| Ref. No. | Enter the payment reference number |
| Deposit To | Select the account where payment will be deposited |
| Amount | Enter the received amount |
| Pay Full | Automatically fills the full invoice amount |
| Add More Payment | Add multiple payment entries |
| Remove | Remove an unwanted payment entry |
Step 4: Save the Invoice
- Verify invoice and payment details.
- Click Save.
The Sales Invoice and Receipt Voucher will be created automatically.
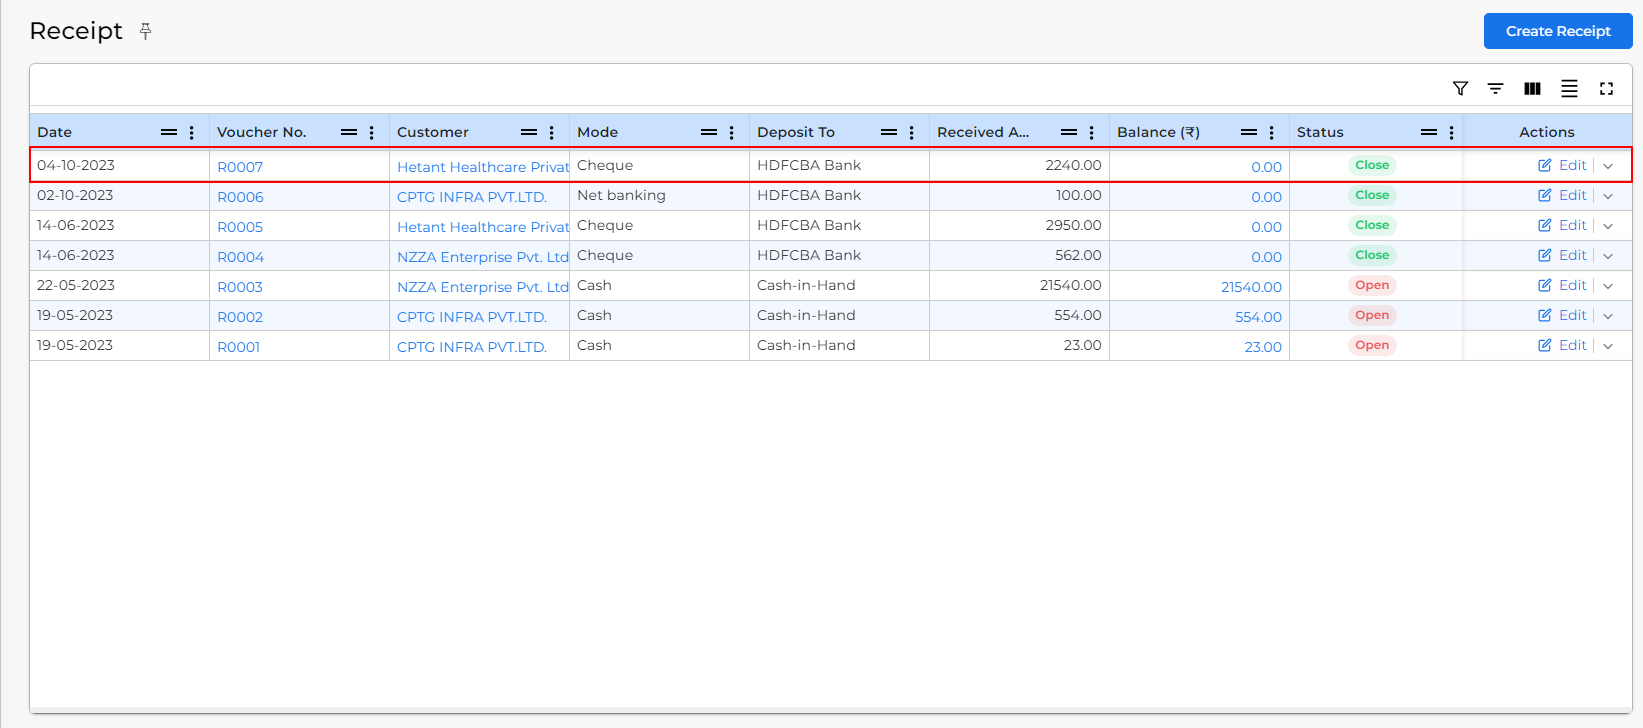
View the Auto-Generated Receipt Voucher
After saving the invoice:
- Go to the Receipt module.
- Locate the generated Receipt Voucher.
- Open the voucher to verify payment details.
Multiple Payment Entries
If a customer pays using multiple payment methods:
- Click Add More Payment.
- Enter the additional payment details.
- Save the invoice.
A separate receipt entry will be created for each payment entry.
Frequently Asked Questions
What happens if the Sales Invoice is deleted?
If the Sales Invoice is deleted, the receipt voucher becomes unadjusted and its status will be shown as Open.
What happens if the Receipt Voucher is deleted?
If the Receipt Voucher is deleted from the Receipt module, the payment received information will be removed from the Sales Invoice.
Can I create multiple payment entries for a single invoice?
Yes. Multiple payment entries can be added using the Add More Payment option.
Can the received amount exceed the invoice amount?
No. The total received amount cannot be greater than the invoice total amount.
Important Notes
- Receipt Vouchers are created automatically when payment details are entered.
- Payment entries should be verified before saving the invoice.
- The total received amount must not exceed the invoice value.
- Multiple payment methods can be recorded in a single invoice.
Result
A Sales Invoice and corresponding Receipt Voucher are created simultaneously, ensuring faster and more efficient payment recording.
Need Assistance?
For any assistance related to Payment Received entries or Receipt Vouchers, please contact the support team.


