 4046 views
 Bank reconciliation is a process used by individuals and businesses to ensure that the bank’s records of their account transactions match their own records. This process is essential for identifying any discrepancies or errors that may exist between the two sets of records.
Here’s a basic overview of how bank reconciliation typically works:
- Gather Statements: Obtain both your bank statement and your own records, such as a check register or accounting software, for the same period you want to reconcile.
- Match Transactions: Go through each transaction on your bank statement and compare it with the corresponding entry in your own records. This includes deposits, withdrawals, cheque, electronic transfers, fees, and any other transactions.
- Tick Off Matches: As you compare transactions, tick off or mark those that match between your records and the bank statement. This ensures that you don’t double-count any transactions.
- Identify Differences: Note any transactions that appear on your records but not on the bank statement (outstanding checks or deposits) and vice versa (bank fees, interest, or electronic transactions). These differences are referred to as reconciling items.
- Adjust Records: Make adjustments to your records to account for any reconciling items. For example, if there are outstanding checks, subtract their total from your records. If there are bank fees, add them to your records.
- Reconcile: Once you’ve accounted for all reconciling items, ensure that the ending balance on your records matches the ending balance on the bank statement. If they match, your reconciliation is complete. If they don’t, double-check your work to find any errors or missed items.
- Document: Keep a record of your reconciliation process, including any adjustments made to your records.
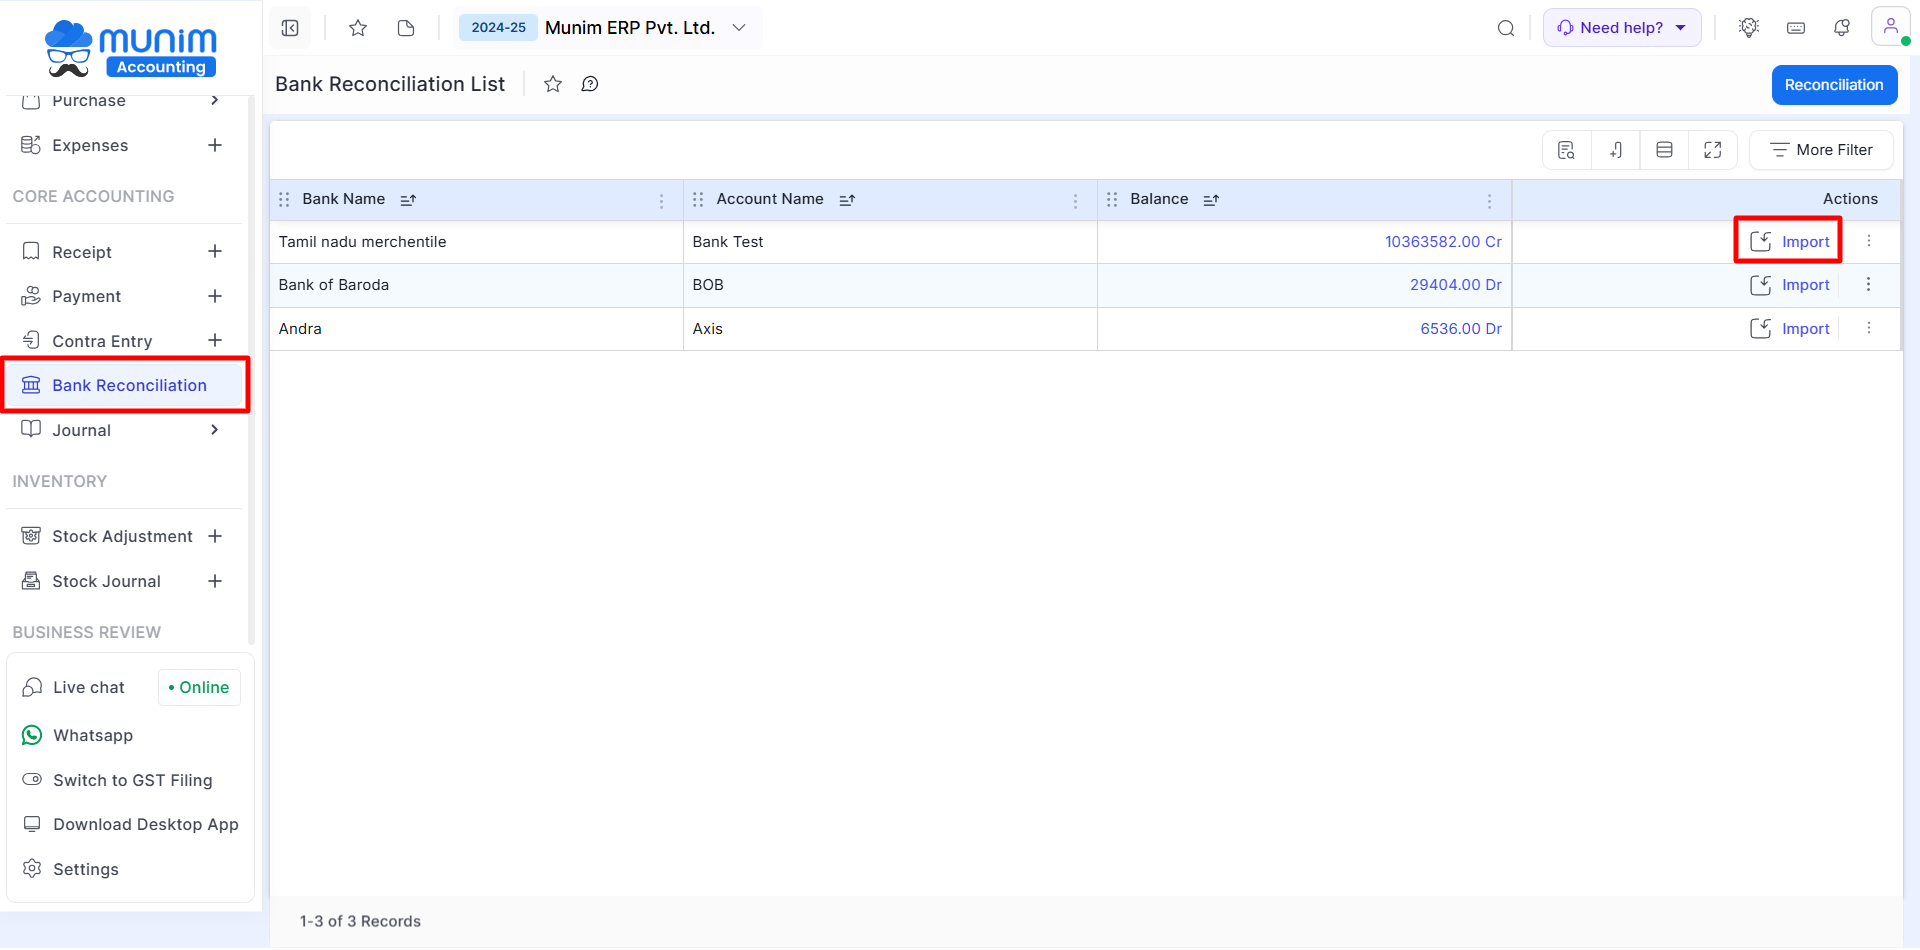
How to Work Bank Reconciliation in Munim:
- Go to the Bank Reconciliation module in the left sidebar.
- Here on this page, you can see the Bank account list.
- Click on the Import button to upload your bank statement.
- The next page shows different types of Input Type, like Munim Template, Default Mapping and Custom Mapping.
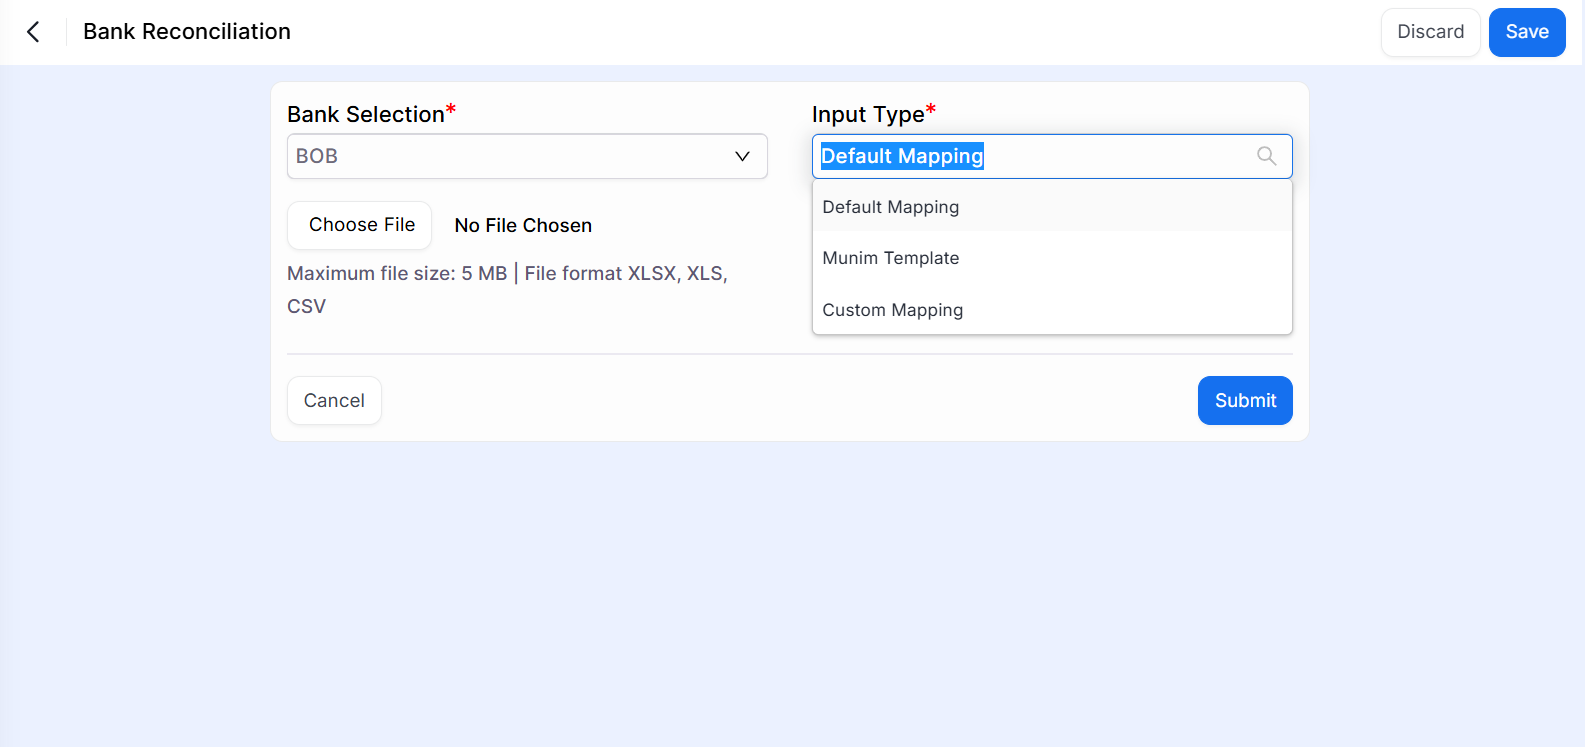
Default Mapping: When selecting Default Mapping, simply upload the bank statement file and click the submit button. There is no requirement to modify the statement sheet or perform any additional manual processing. (Supports major banks only)
Munim Template: If the user selects Munim Template, then first download the sample file. Fill in the proper data on the sheet and upload the sample file.
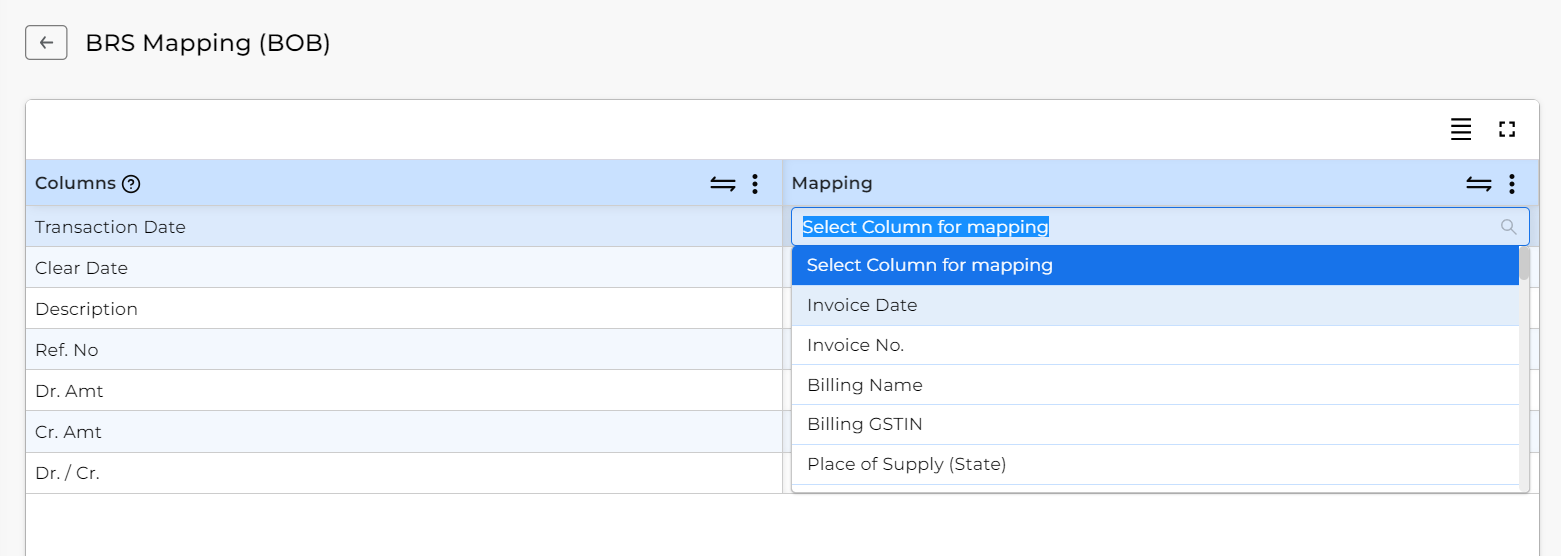
Custom Mapping: If the user selects Custom Mapping, then first upload the statement sheet and click on the Submit button. After that, set custom mapping of columns accordingly.
- The bank reconciliation page shows when the statement sheet import process is completed. The data page will be shown.
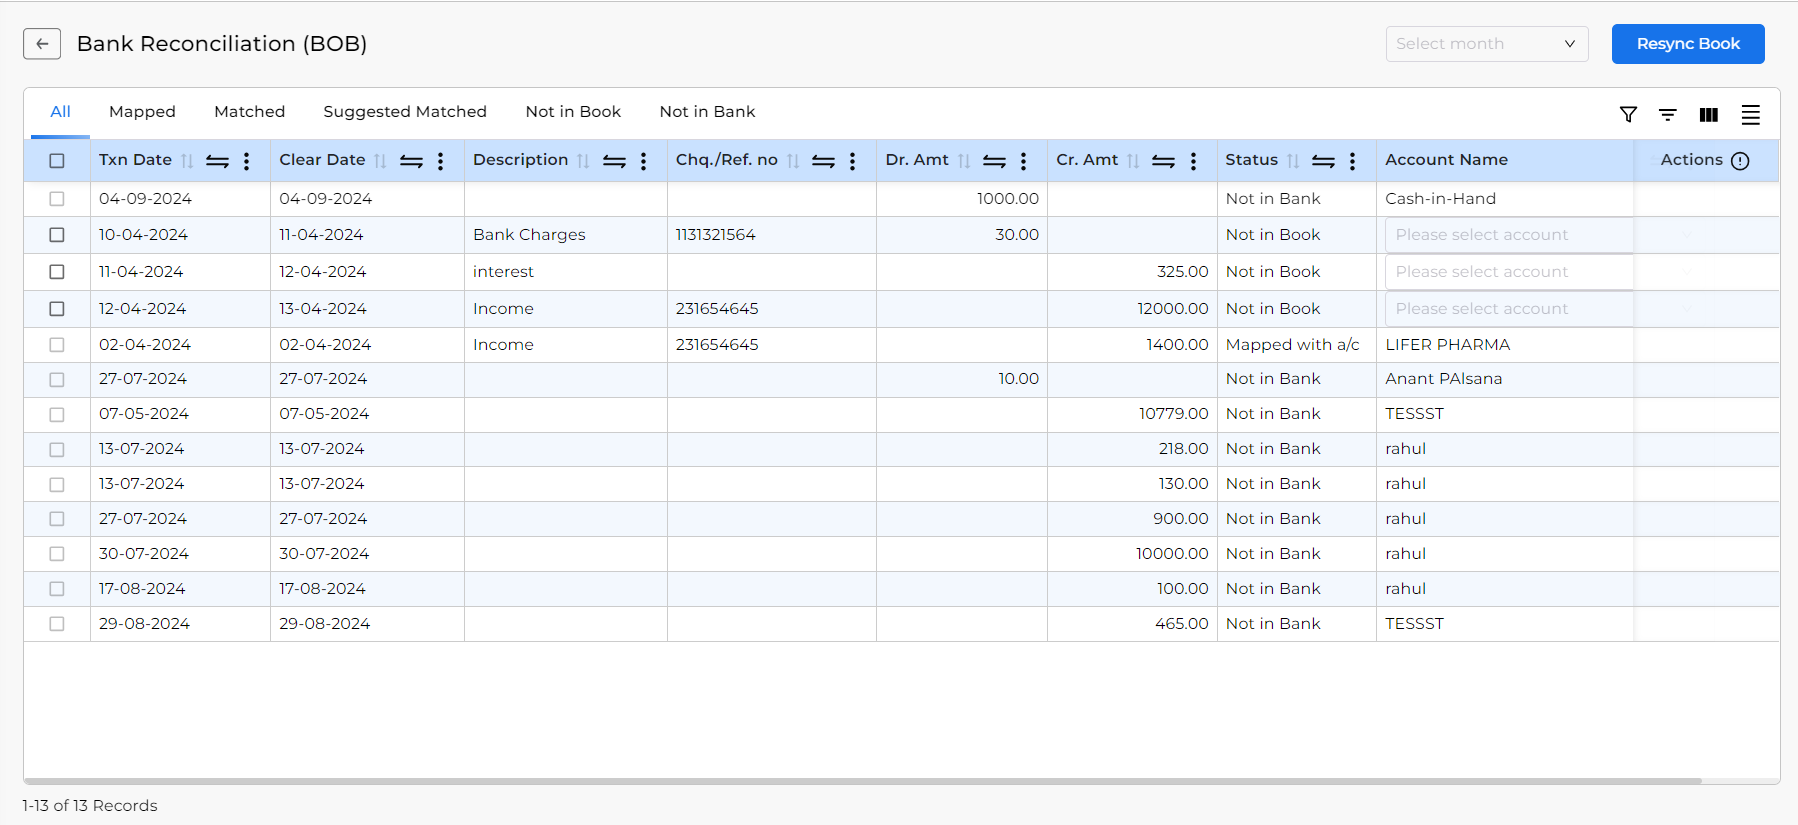
On this page, six sub-pages are shown, named All, Mapped, Matched, Suggested Matched, Not in Book and Not in Bank.
- All: This page shows all entries like matched, Unmatched, and mapped.
- Mapped: This page shows mapped entries. Mapped means which entries are manually linked to the account.
- Matched: This page shows matched entries. Matched means entries where data is matched with existing entries. The main criteria for matched entries are Txn date, Che./Ref no, Dr. Amount or Cr. Amount.
- Suggested Matched: This field will show you possible matches between entries. Here, many different criteria have to match to appear in the suggested match.
- Not in Book: This field will show you entries that are in the Bank Statement but not in the software.
- Not in Bank: This field will show you entries that are in the software but not in the Bank statement.
What are the benefits of mapped entries:
- If the user mapped the entry with an account, then it will auto-generate a receipt/payment voucher against this customer.
- This saves time and reduces the likelihood of errors associated with manual input.
- The mapped entries help maintain data accuracy and consistency. This ensures that financial records are reliable and reflect the true state of the organisation’s finances.
- Accurate and consistent data provided by mapped entries enables better financial reporting.
- Mapped entries help maintain a clear audit trail of financial transactions, supporting compliance with regulatory requirements and auditing standards.
How to make Mapped entries with account:
- Go to the Bank reconciliation entry list page.
- Click on the Account Name list for the entry you want to select.
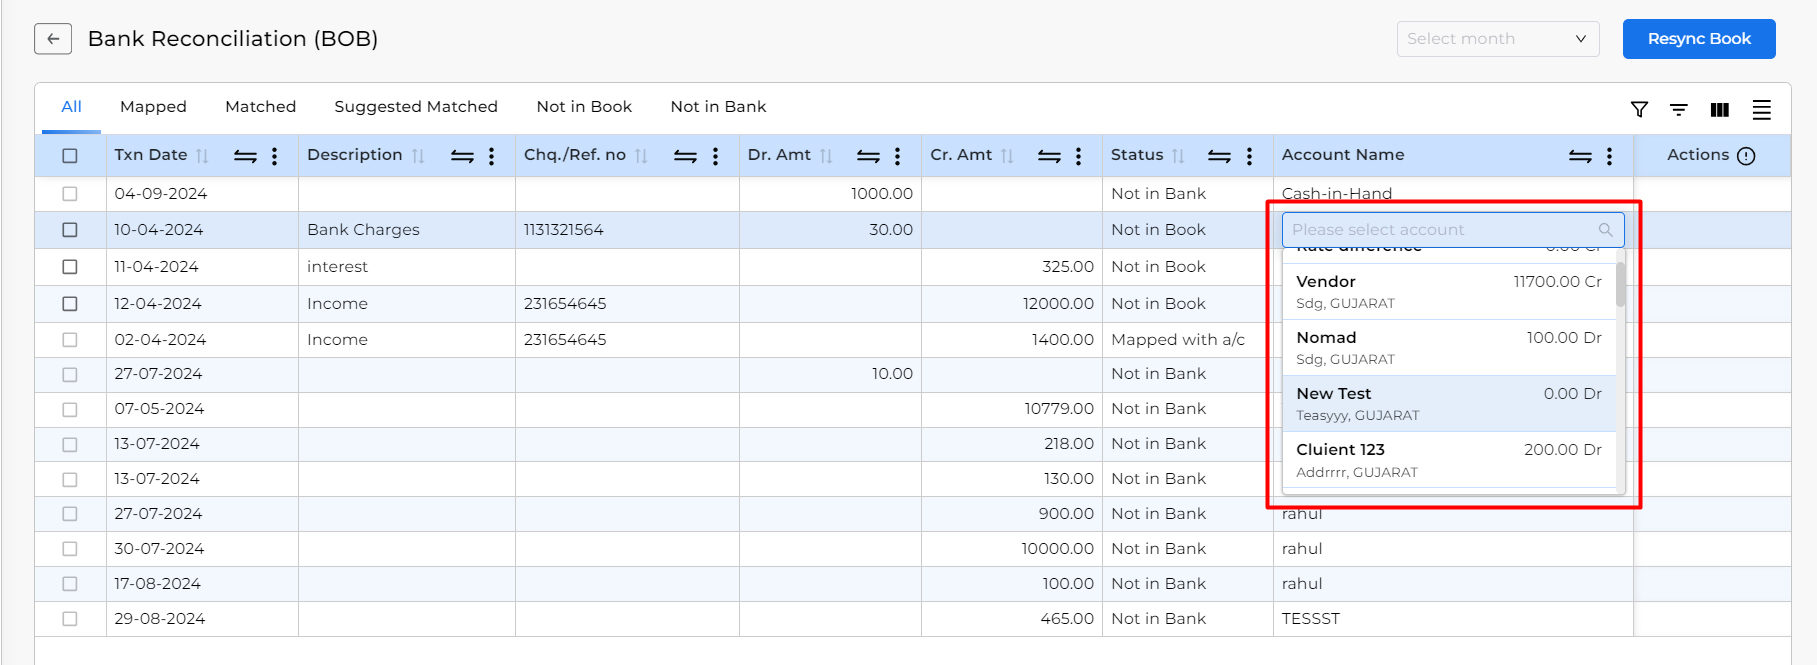
- Find the account for link entry. (Here, the user can scroll down the account list and find an account, or type the account name and search the account.)

- When the user finds an account, the user can adjust the entries against sales or purchase bills for this account.
- (Note: If the user mapped a credit amount entry, the receipt is generated, or if the user mapped a debit amount entry, the payment is generated, and the entry’s adjustment will be done.)
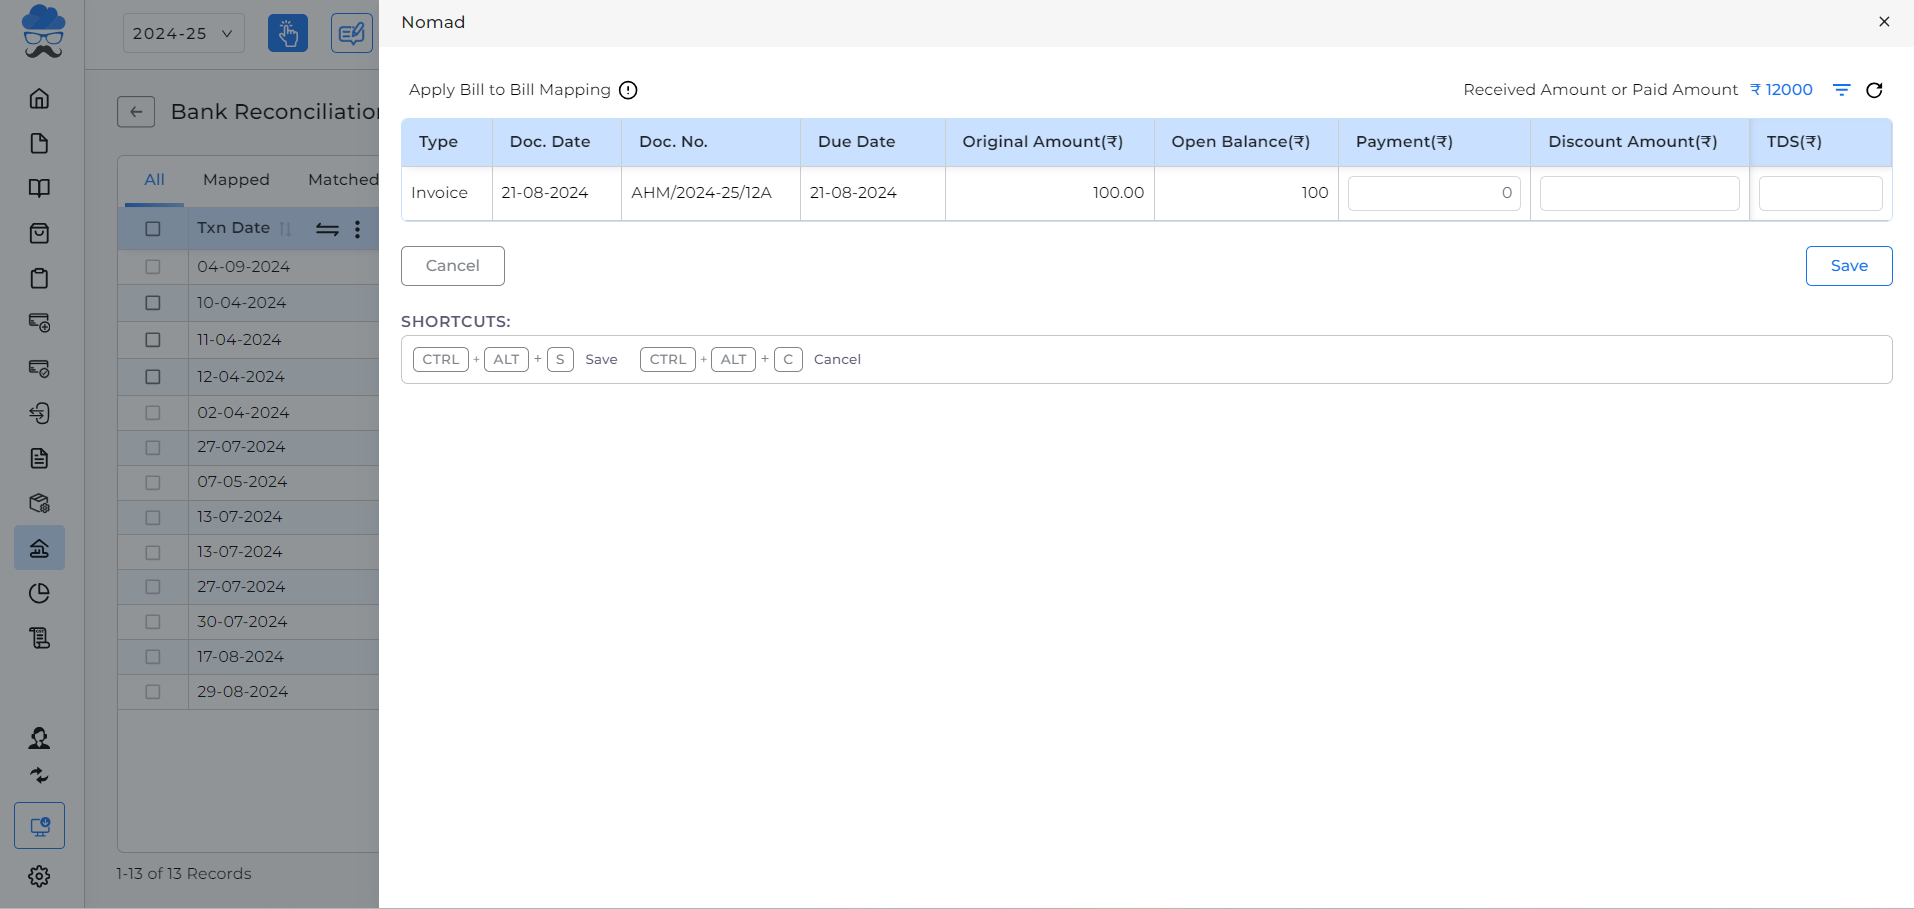
- Click on the Save button to complete the process.
For more help or assistance, please reach out to the support team.


