 3702 views
 Overview
The Quick Create E-Invoice & E-Way Bill feature allows you to generate E-Invoices and E-Way Bills directly while creating a Sales Invoice. You can generate either document individually or both together without leaving the invoice creation screen.
Also, you can create an E-way Bill or an E-Invoice later on from the Invoice list page. This helps reduce manual work and ensures GST compliance during invoice generation.
How It Works
The feature supports:
- Generating an E-Invoice while creating a Sales Invoice.
- Generating an E-Way Bill while creating a Sales Invoice.
- Generate both E-Invoice and E-Way Bill together.
- Generating E-Invoice or E-Way Bill later from the Sales Invoice list.
Note: Click here to learn how to enable and set up an E-Invoice and E-way bill
Generate E-Invoice & E-Way Bill During Invoice Creation
Step 1: Create a Sales Invoice
- Go to Sales → Sales Invoice.
- Click Create Invoice or press Alt + N.
- Enter customer and other invoice details.
Step 2: Enable Transport Details
Enable Transporter Details for E-Way Bill.
You can choose:
- E-Way Bill with Part A
- E-Way Bill with Part A & B
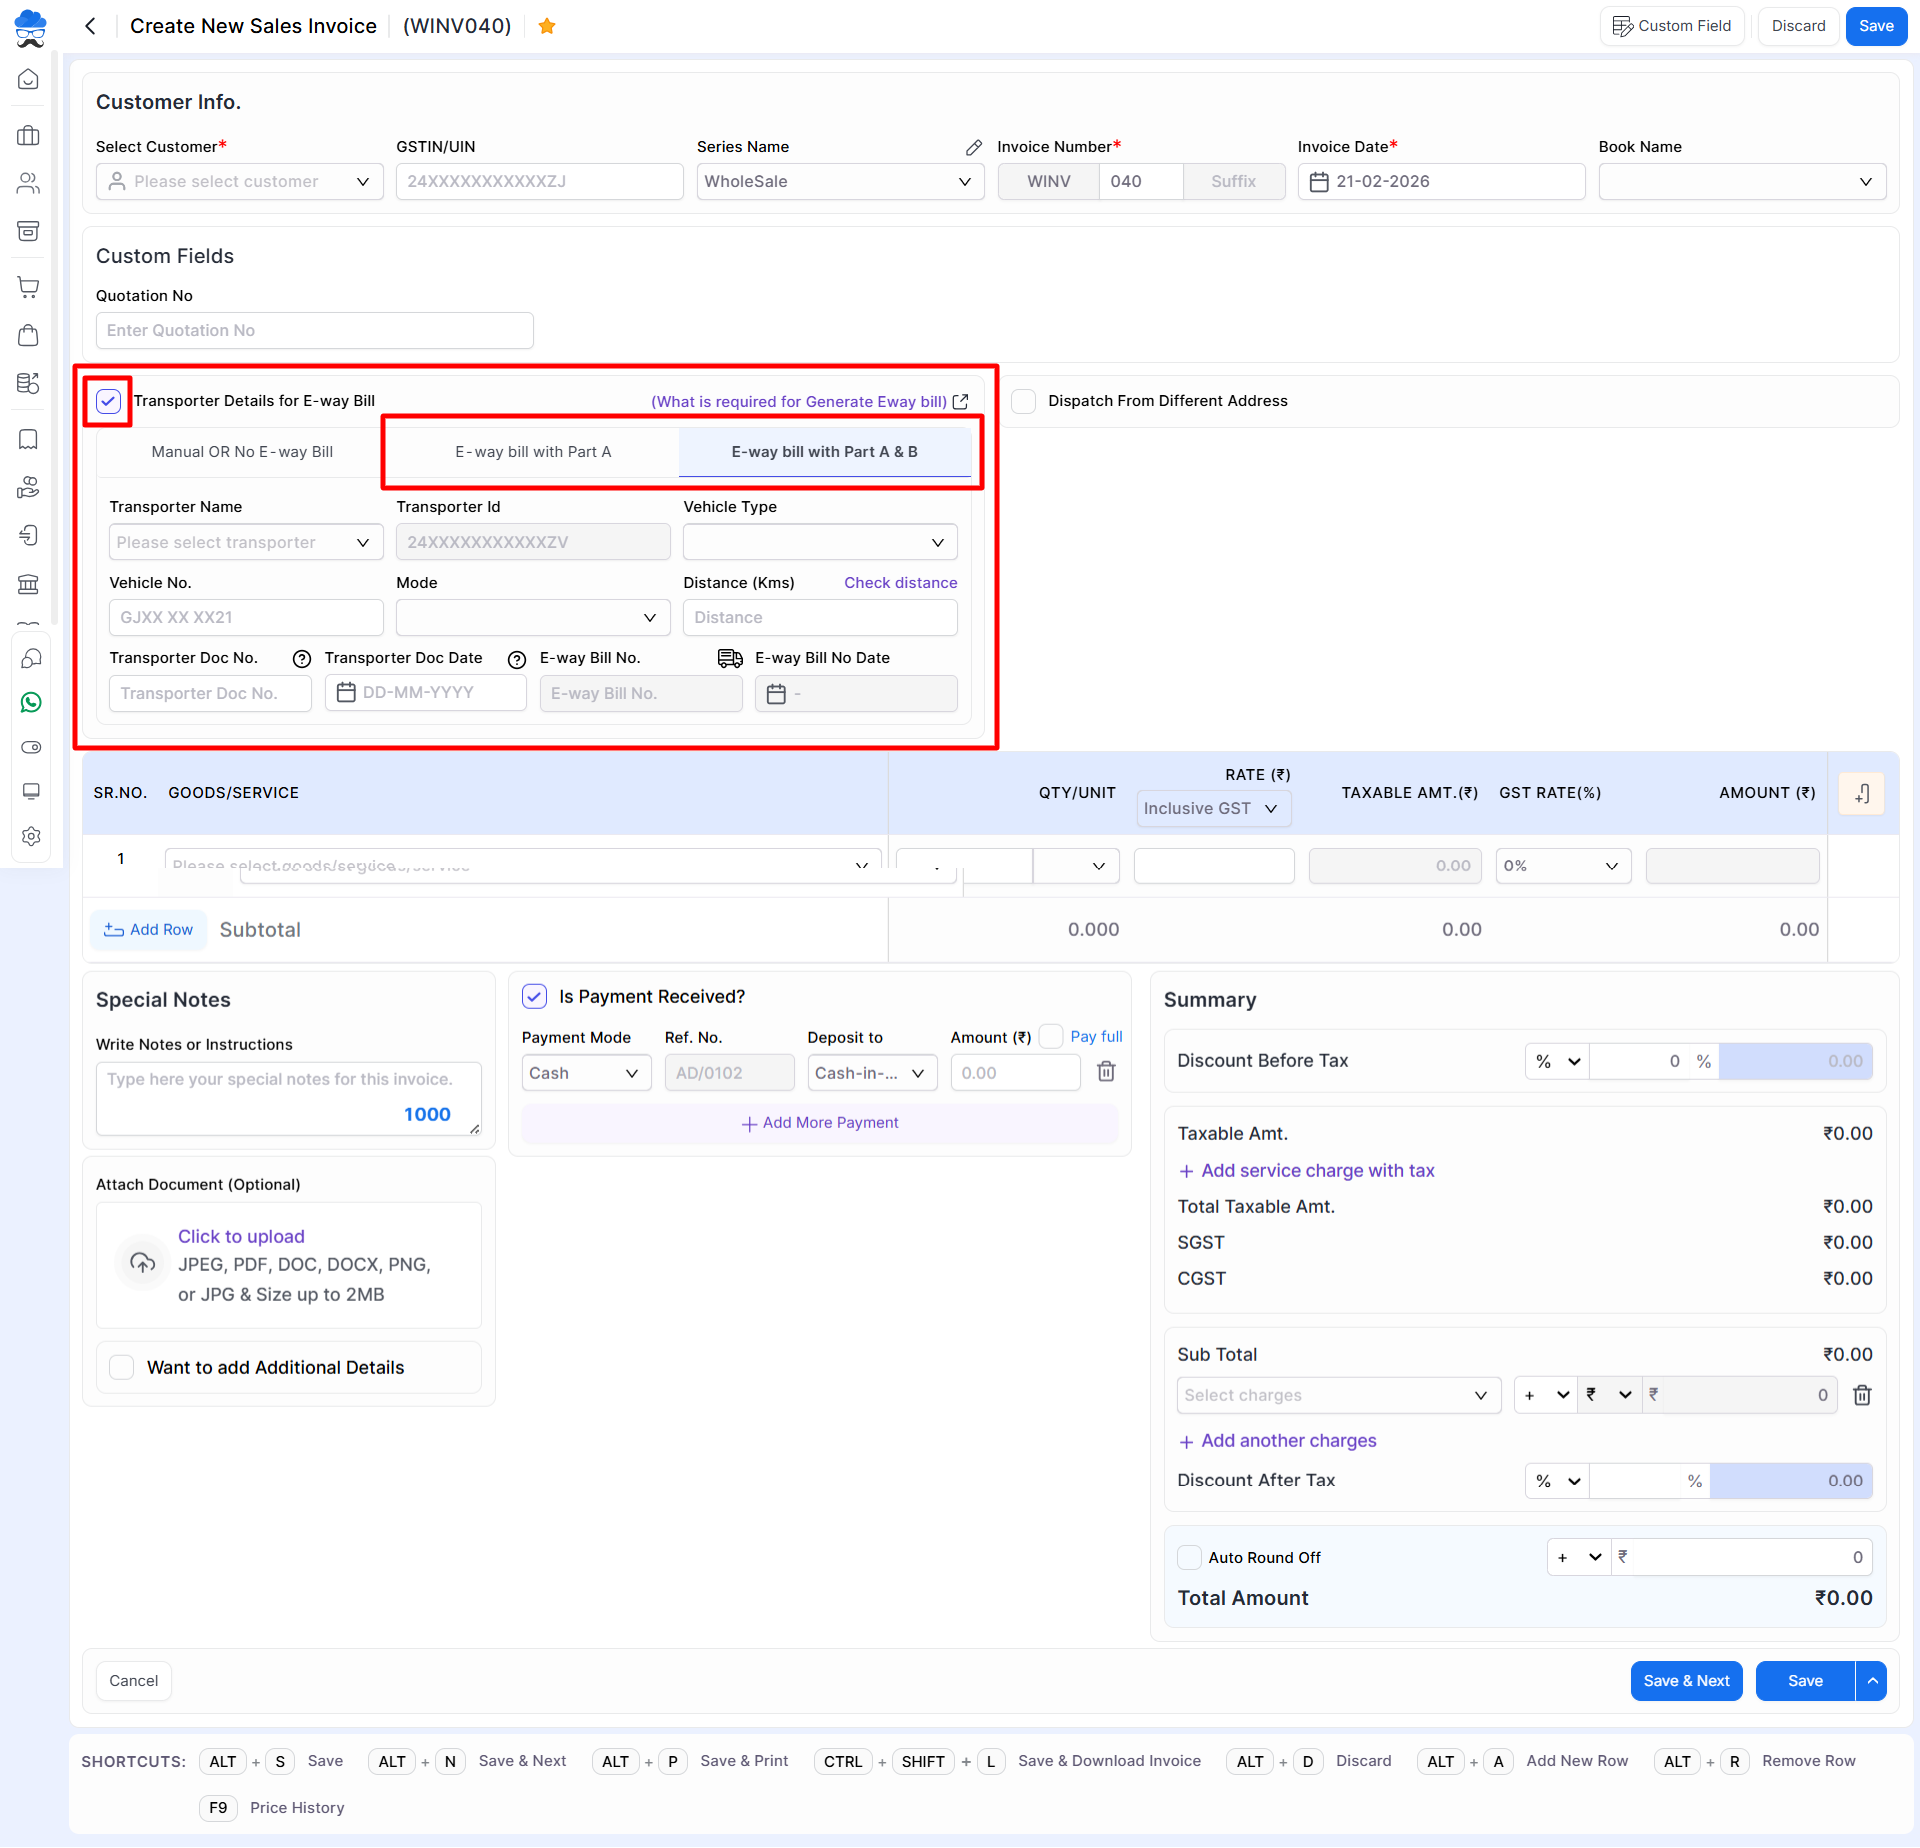
Field Information
| Field | Description |
|---|---|
| Customer | Select the customer for whom the invoice is being created. |
| Invoice Date | Automatically generated today’s invoice date. Can be modified if required. |
| Transporter Details for E-Way Bill | Enables E-Way Bill information entry section. |
| Transporter Name | Select an existing transporter or create a new transporter. |
| Transporter ID | Auto-populated transporter identification number from already created transporter. |
| Vehicle Number | Enter the vehicle number used for transportation. |
| Mode | Select transport mode such as Road, Rail, Air, or Ship. |
| Distance (KM) | Enter the distance between dispatch and destination locations. |
| Vehicle Type | Select Regular or Over-Dimensional Cargo (ODC) vehicle type. |
| Transport Document No. | Enter LR No., GR No., or other transport document number. |
| Transport Document Date | Enter the transport document date. |
| E-Way Bill No. | Enter E-Way Bill number if already available. |
| E-Way Bill Date | Enter the E-Way Bill generation date. |
| Dispatch From Different Address | Enable when goods are dispatched from a location other than the company address. |
| Item Section | Add products/services to be invoiced. |
| Save | Saves the invoice and initiates E-Invoice/E-Way Bill generation process. |
Step 3: Save the Invoice
After saving the invoice:
- An E-Invoice/E-way Bill confirmation pop-up appears.
- Click Yes to continue.
- The system generates the E-Invoice automatically.
- If E-Way Bill details are added, the E-Way Bill is generated as well.
Generate E-Invoice or E-Way Bill Later
If the invoice has already been created without generating GST documents:
Step 1: Open Sales Invoice List
Go to:
Sales → Sales Invoice
Step 2: Use the Action Menu
Locate the required invoice and click the Action menu.
Available options:
- Generate E-Invoice
- Generate E-Way Bill
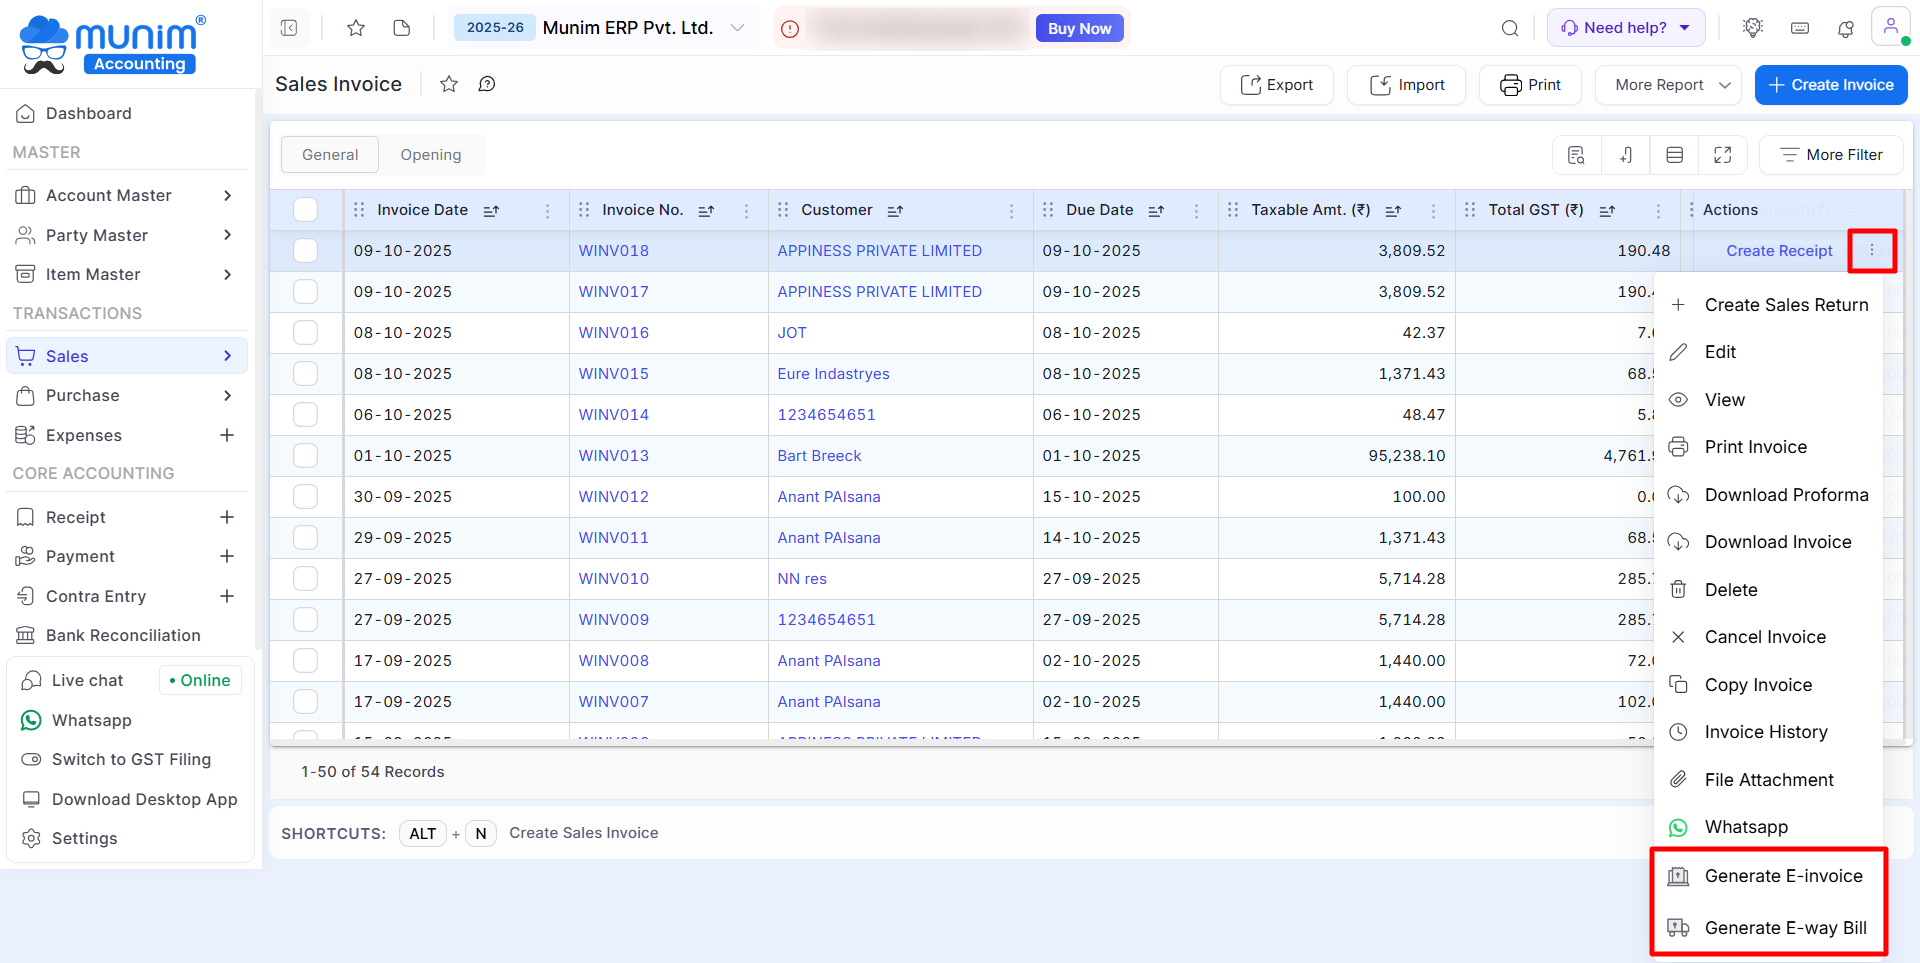
Step 3: Generate Required Document
Select the required option from Generate E-way Bill or Generate E-Invoice.
The system immediately submits the request and generates the selected GST document.
When Should You Use Part A or Part A & B?
| Option | Use Case |
|---|---|
| E-Way Bill with Part A | When only transporter details are available. |
| E-Way Bill with Part A & B | When transporter and vehicle details are available and complete E-Way Bill generation is required. |
Important Notes
- Ensure E-Invoice setup is completed before using this feature.
- GSTIN validation must be successful.
- Vehicle number and transporter details should be entered accurately.
- Incorrect transport information may result in E-Way Bill generation failure.
- Documents can be generated either during invoice creation or later from the invoice list.
Result
The E-Invoice and E-Way Bill are generated successfully and linked to the Sales Invoice for future reference and compliance reporting.
Need Assistance?
For any assistance related to E-Invoice or E-Way Bill generation, please contact the support team.


