 3837 views
 What is Stock Transfer?
Transferring the current year’s stock transfer to the next financial year means recording the movement of shares of stock that occurred in the current financial year, but are intended to be recorded in the next financial year.
How Stock Transfer Works in Munim:
Step 1: First, create the next financial year
- Go to the financial year dropdown list, it shown on the Top Left side.
- Click on the “+Create Year” option
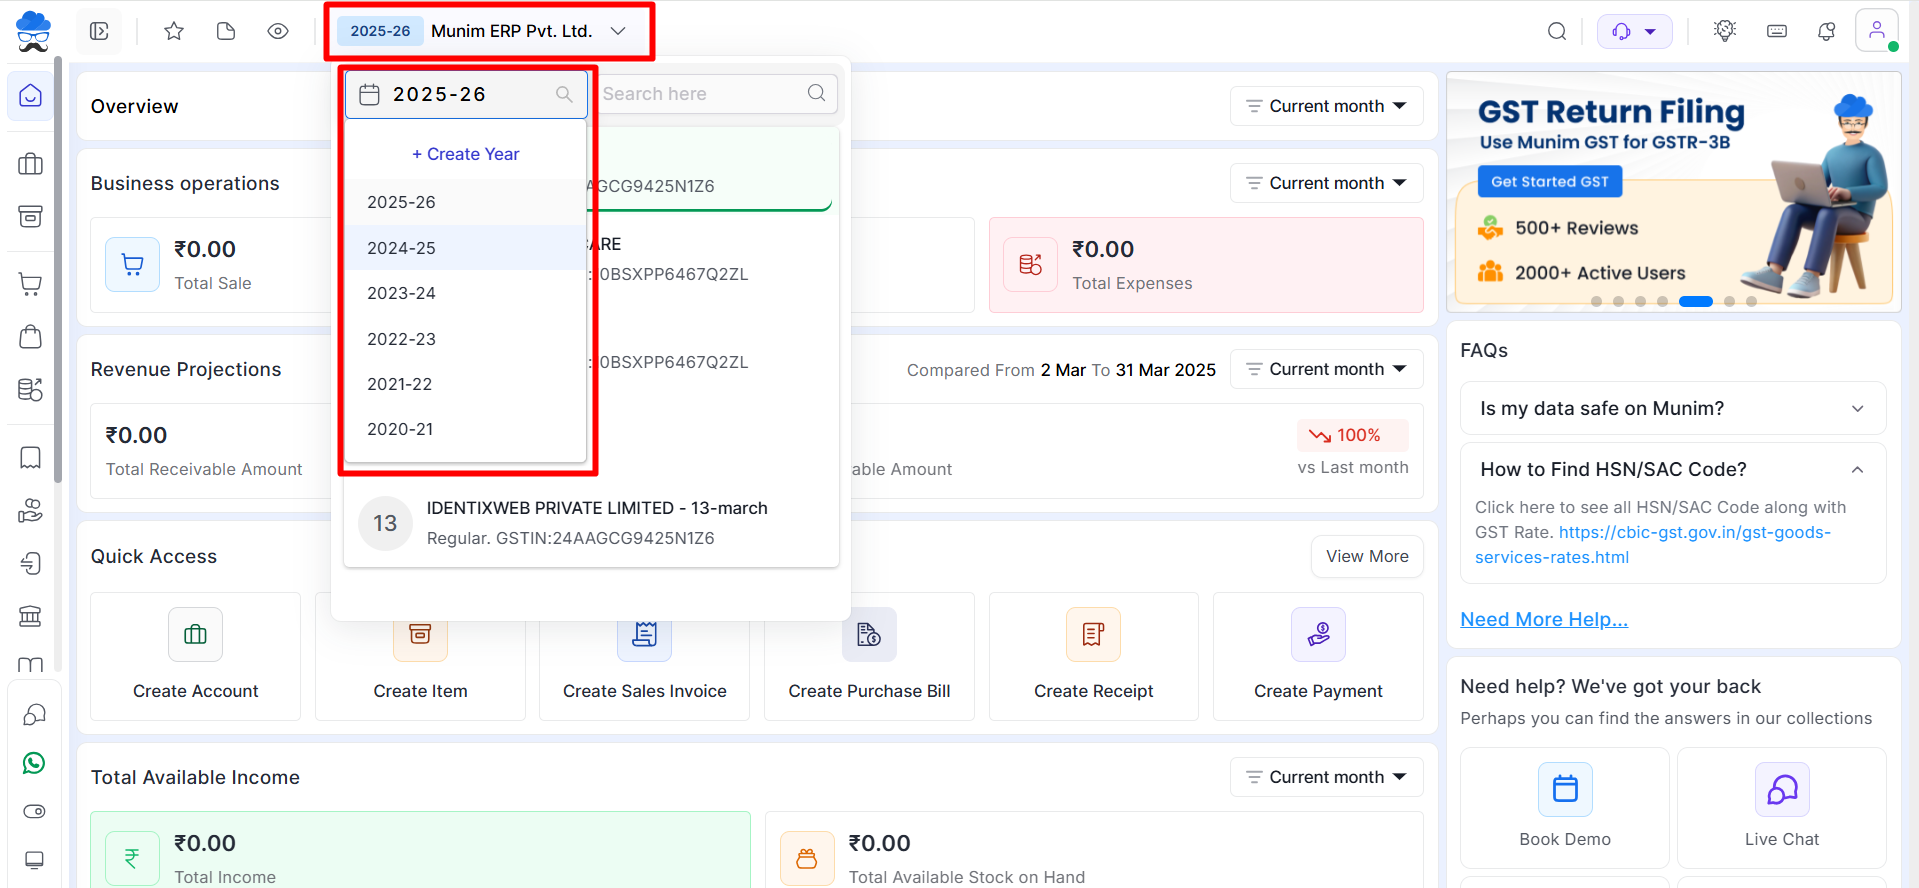
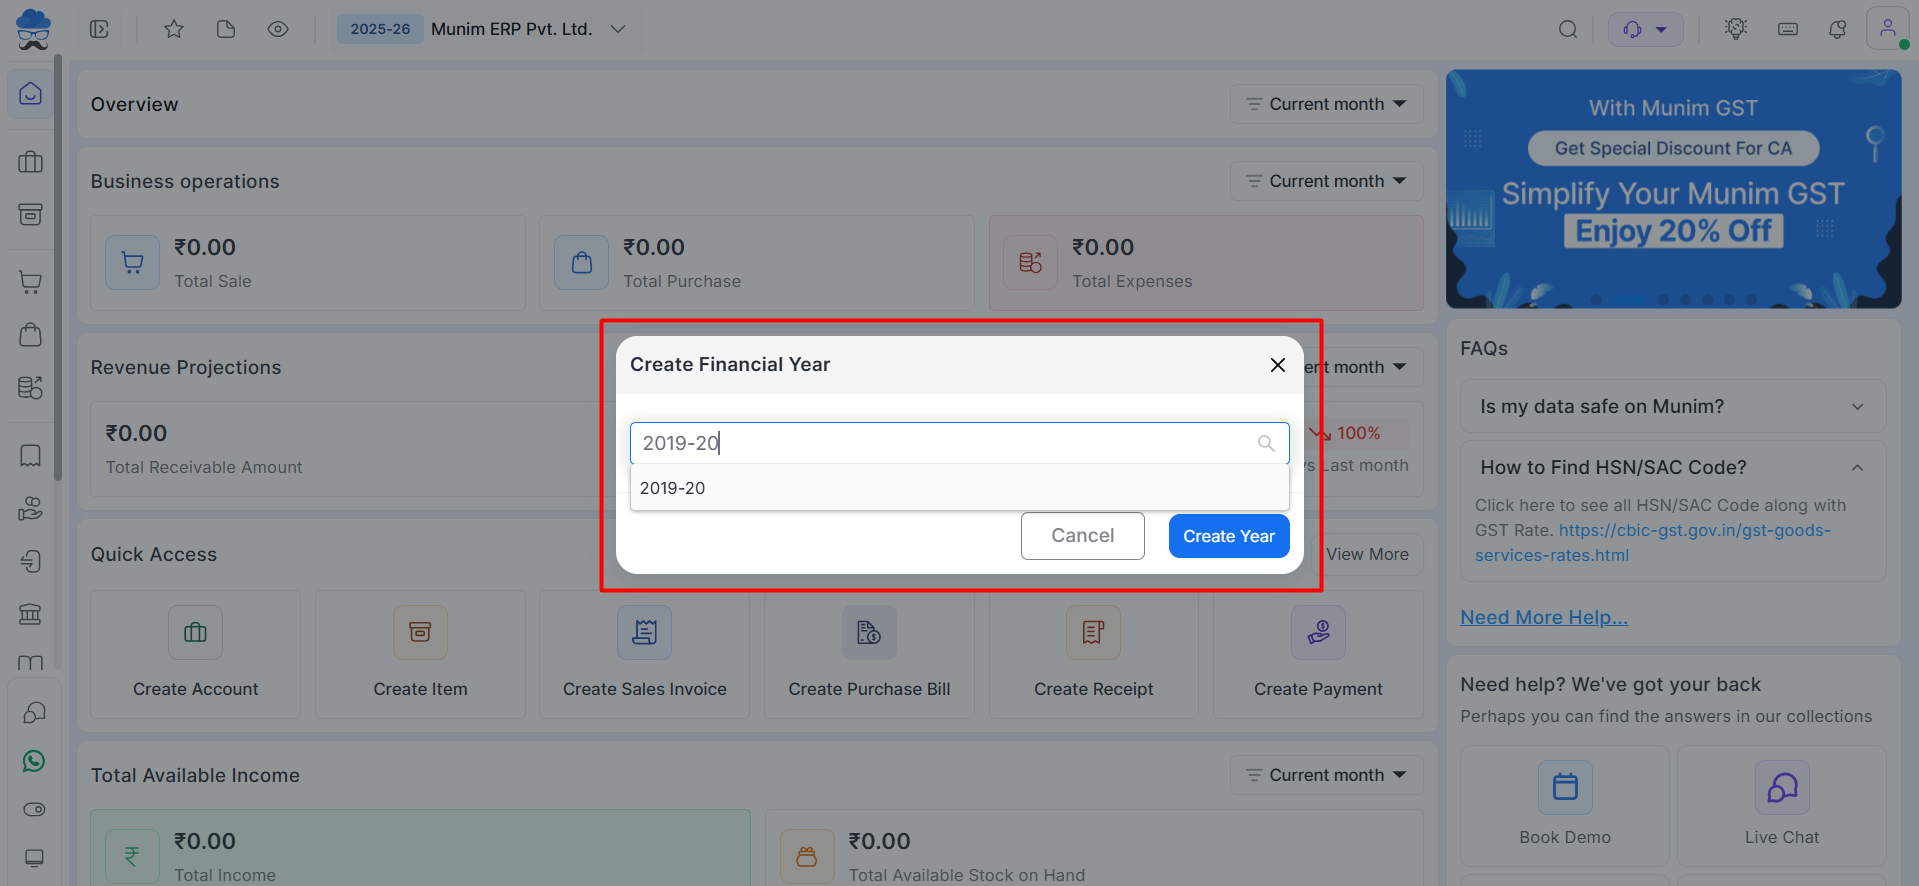
- Now you can see the “Create Financial Year” pop-up, where you should select the desired financial year from the list.
Step 2. Set a method for Stock transfer
- Now select the previous year from the financial year dropdown list at the top.
- Go to Settings and then go to the General Settings option
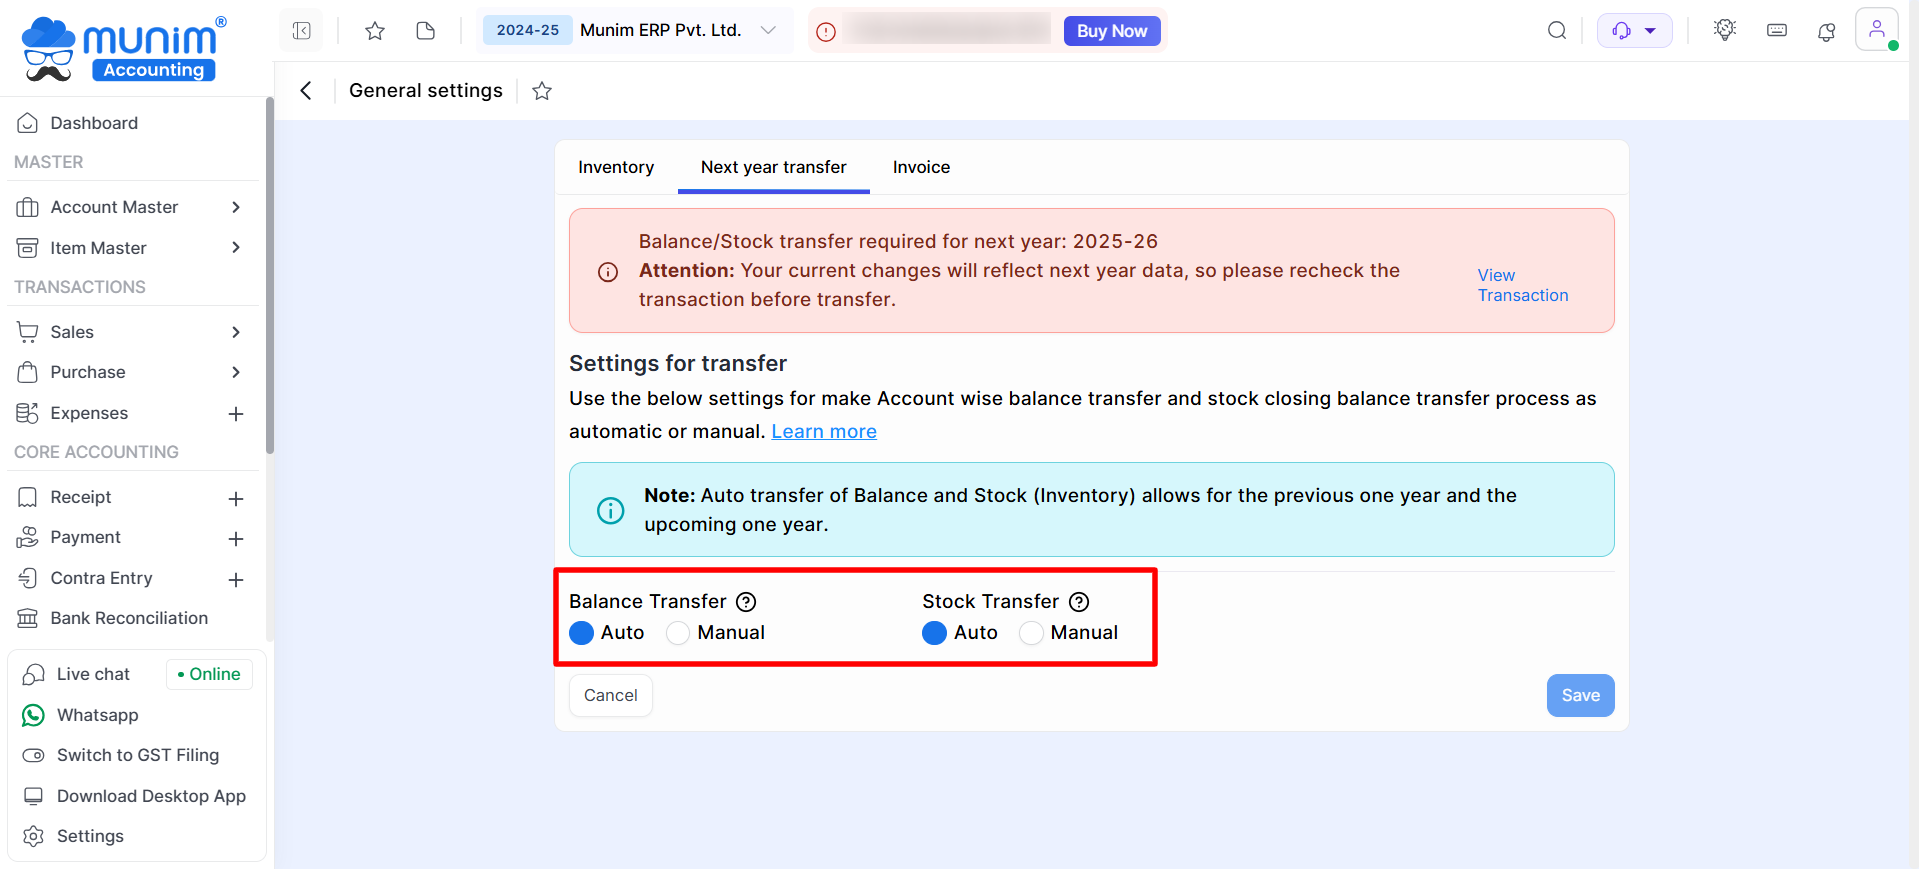
- Click on the “Next Year Transfer” tab.
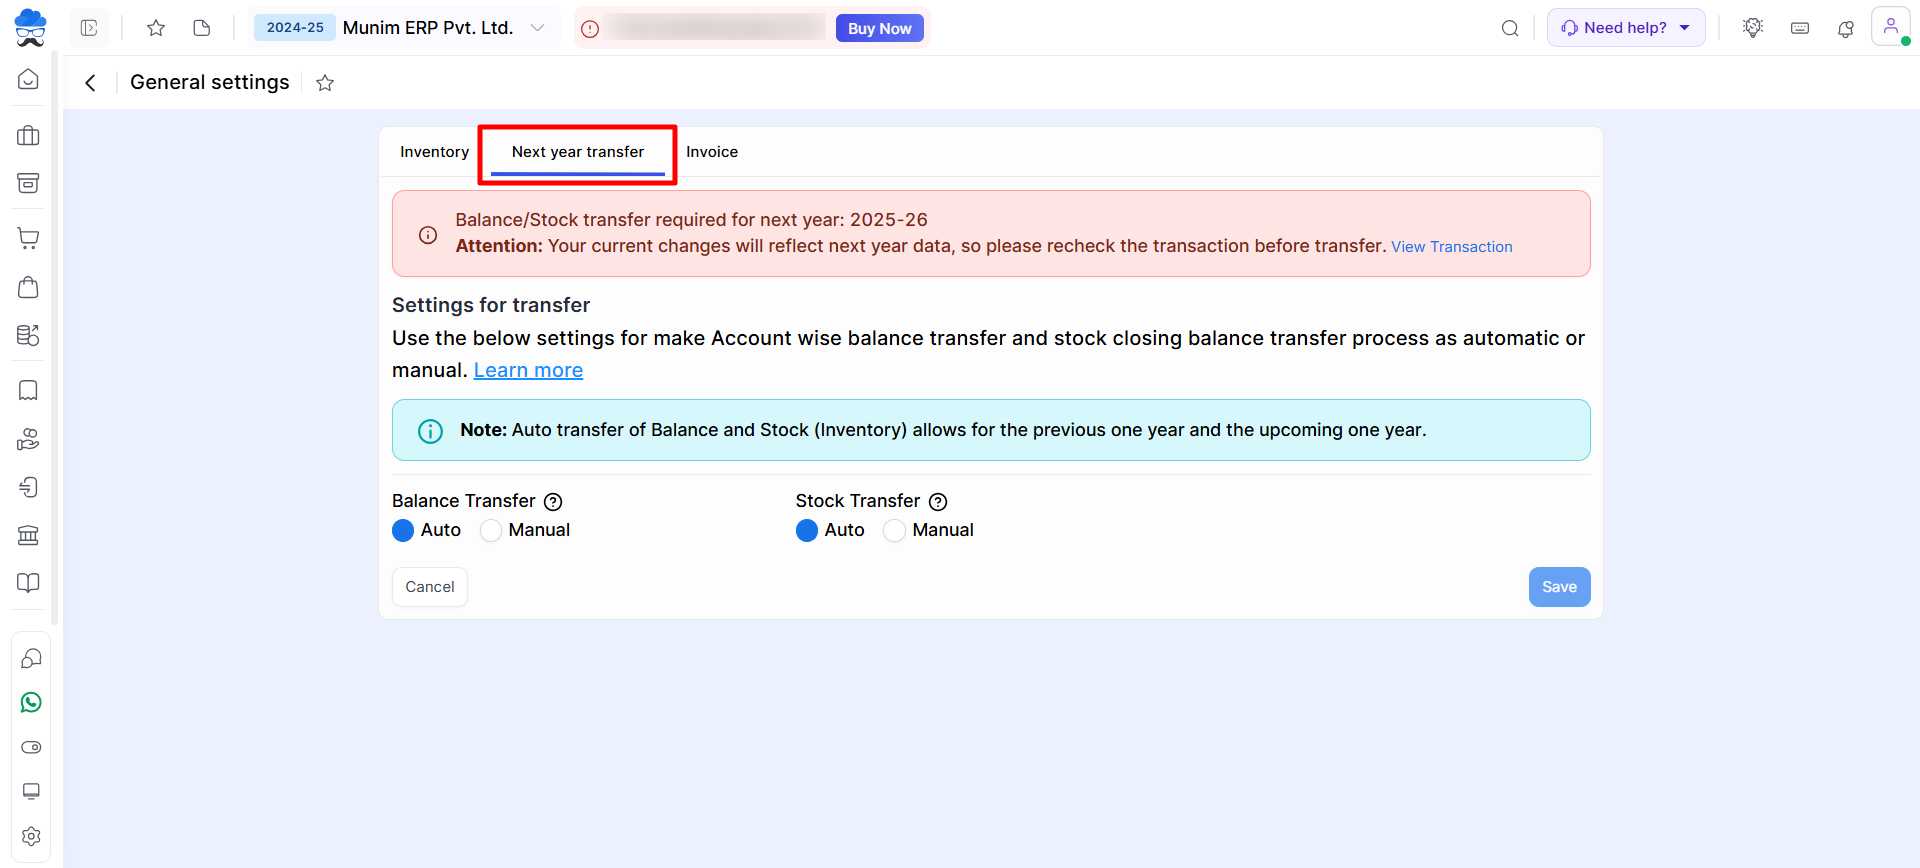
- Here you will find Auto and Manual options for Balance Transfer and Stock Transfer at the end of this section

Note: This feature allows you to effortlessly transfer your yearly stock data to the next year. You can find two options auto and manual. For the first time, you need to transfer data manually.
Once you have manually transferred the data to the next year, you can transfer using the auto or manual option whenever needed.
How to stock transfer using the manual option?
- This manual stock transfer option is accessible on the Dashboard page, Item Master page, and Year Transfer page of the previous financial year.
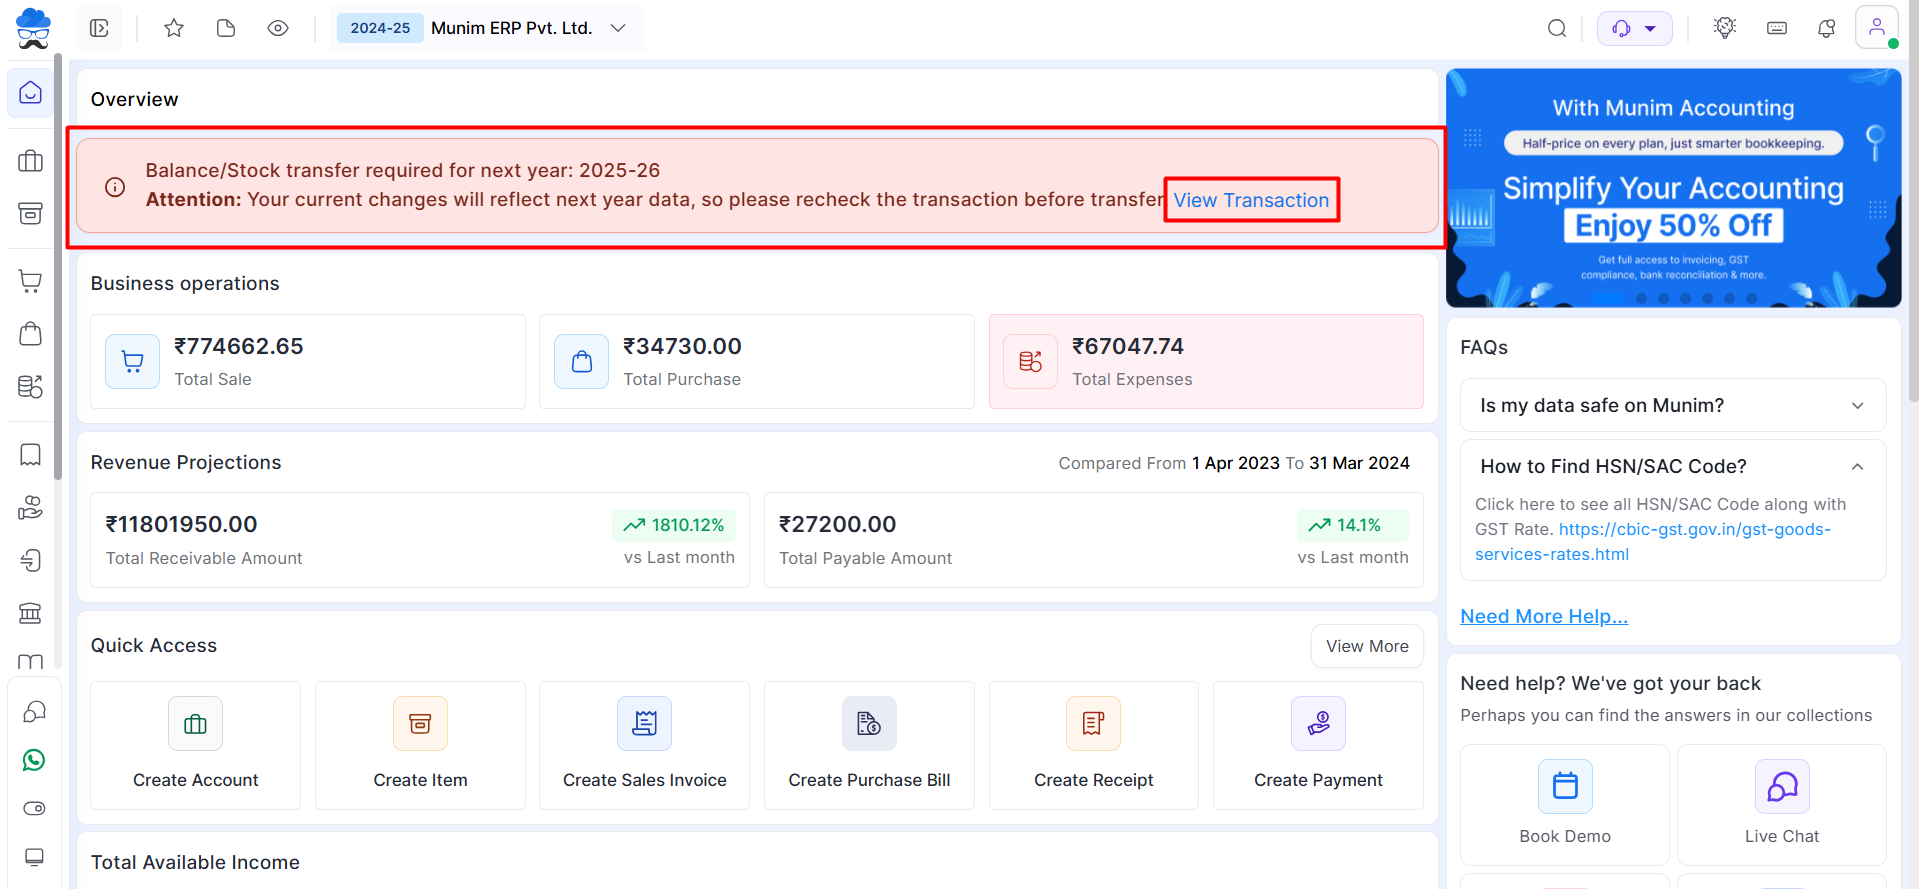
Dashboard page:
- Go to the previous financial year and go to the dashboard, here click on the “View Transaction” link as shown in the image below.
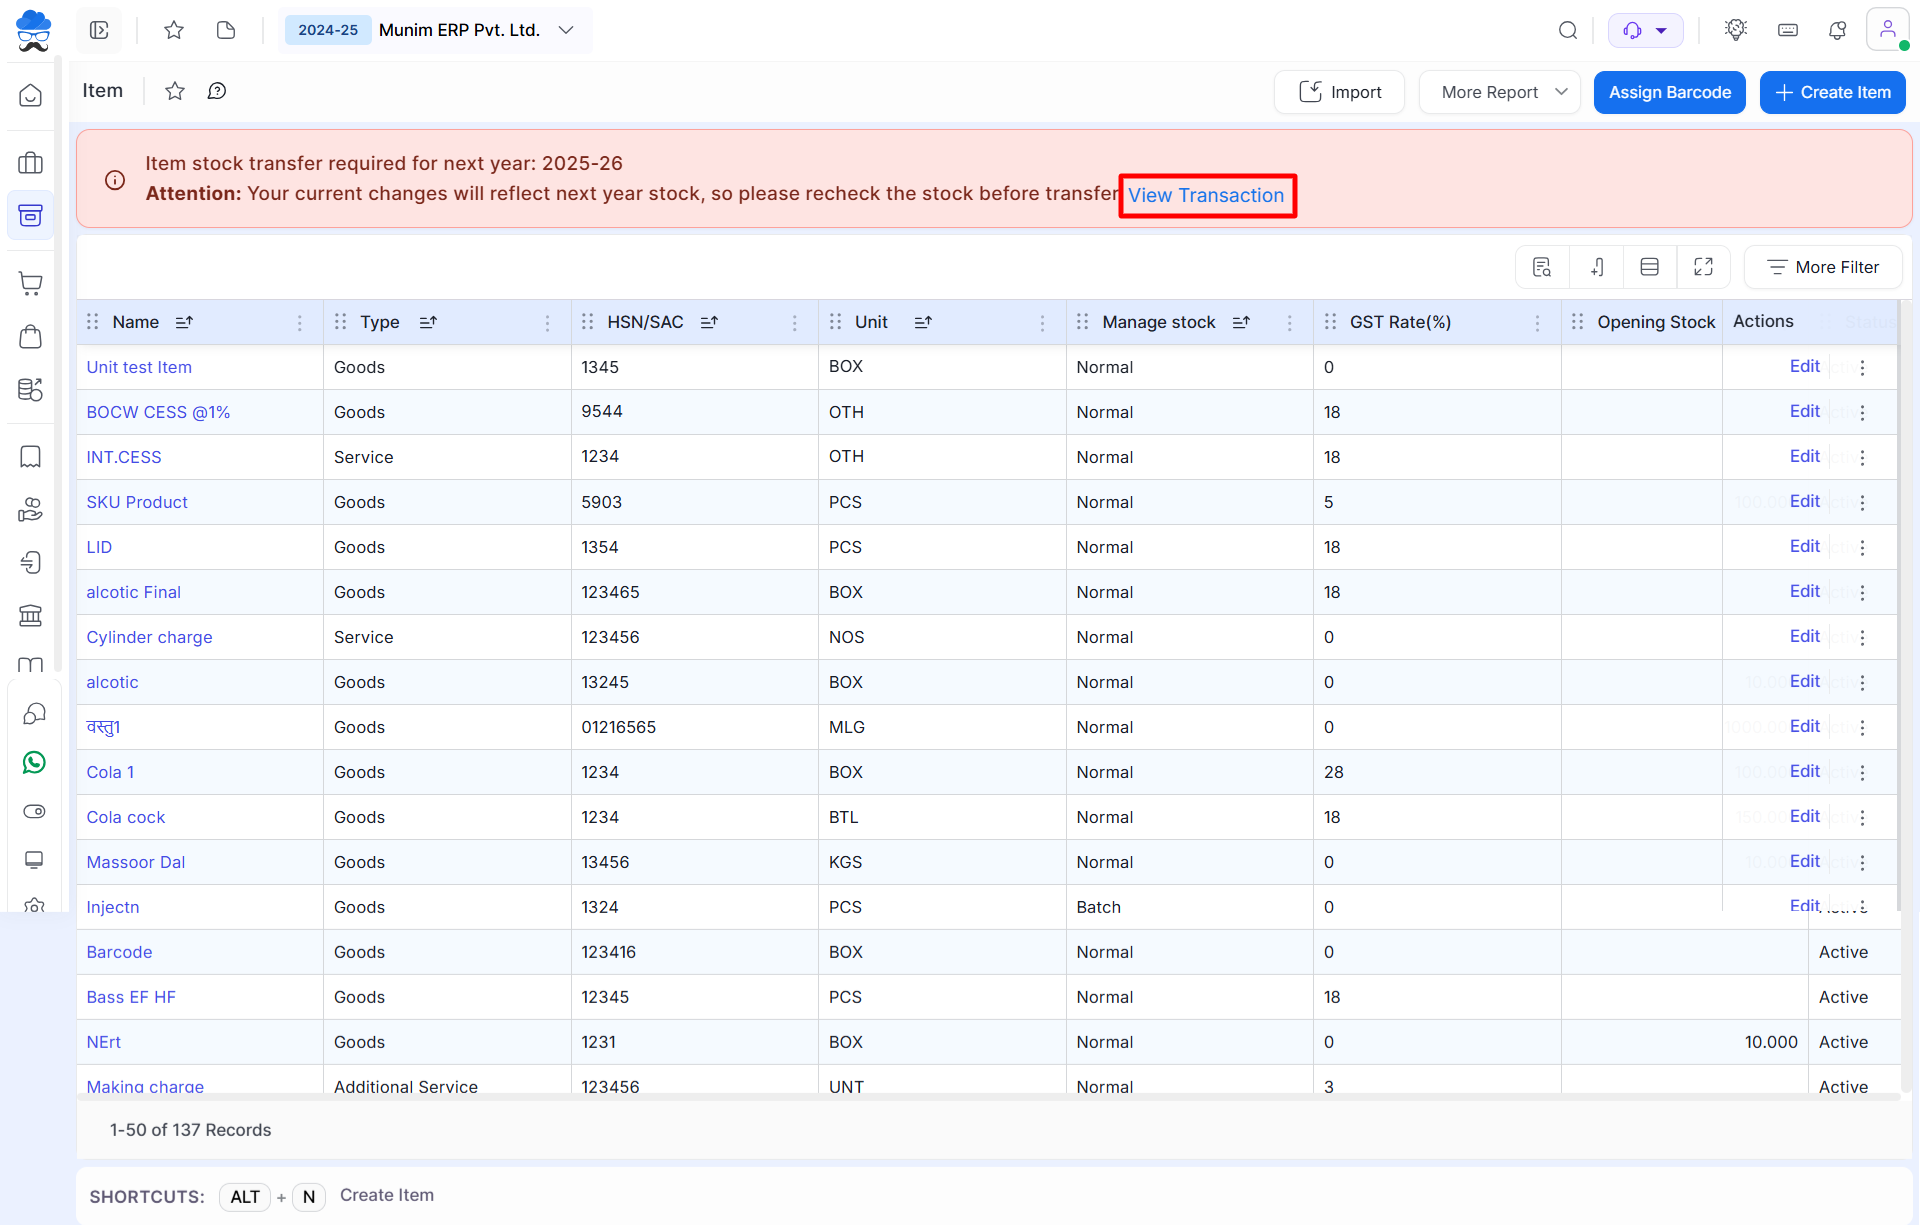
Item Master page:
- Go to the Item Master and open the Item module. Here, click on the “View Transaction” link as shown in the image below.
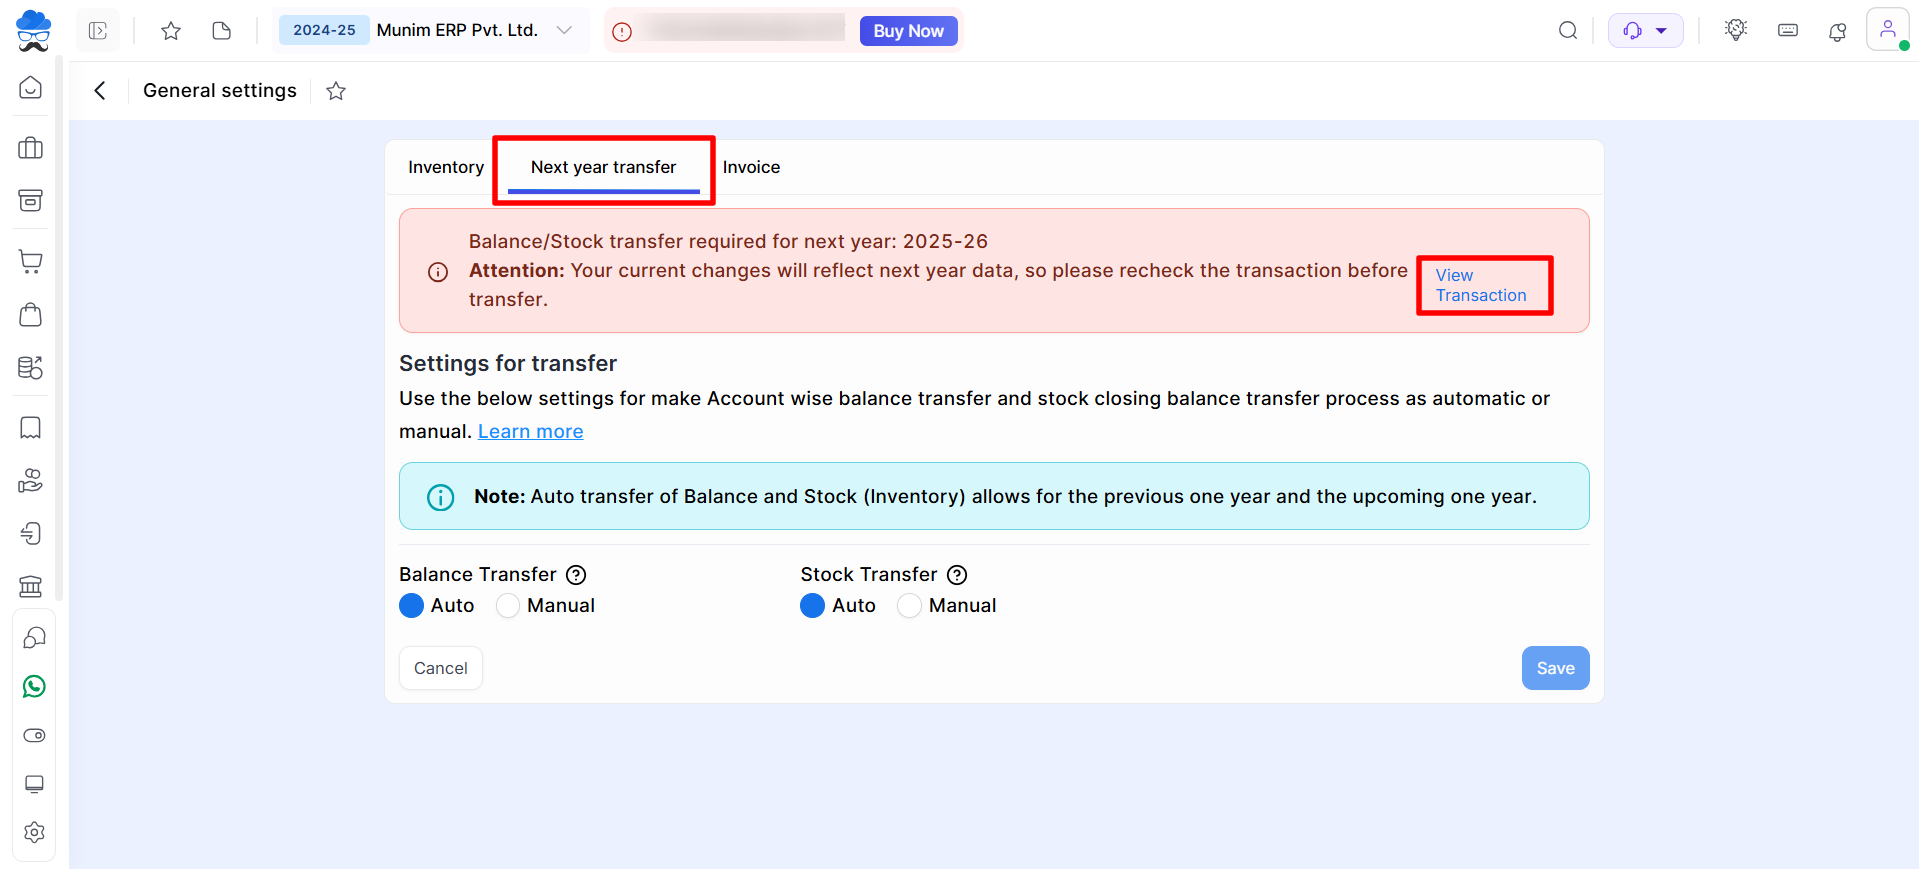
Year Transfer section page:
- First, go to the Settings module and then General Settings. Here, click on the “Next Year Transfer” Tab.
- Click on the “View Transaction” link as shown in the image below.
- Once you are on the Balance/Stock Transfer page, you can check the Old Opening and New Opening columns to check the difference.
- Carefully review your Balance and Stock data, then click the “Transfer” button located in the bottom right corner for both types
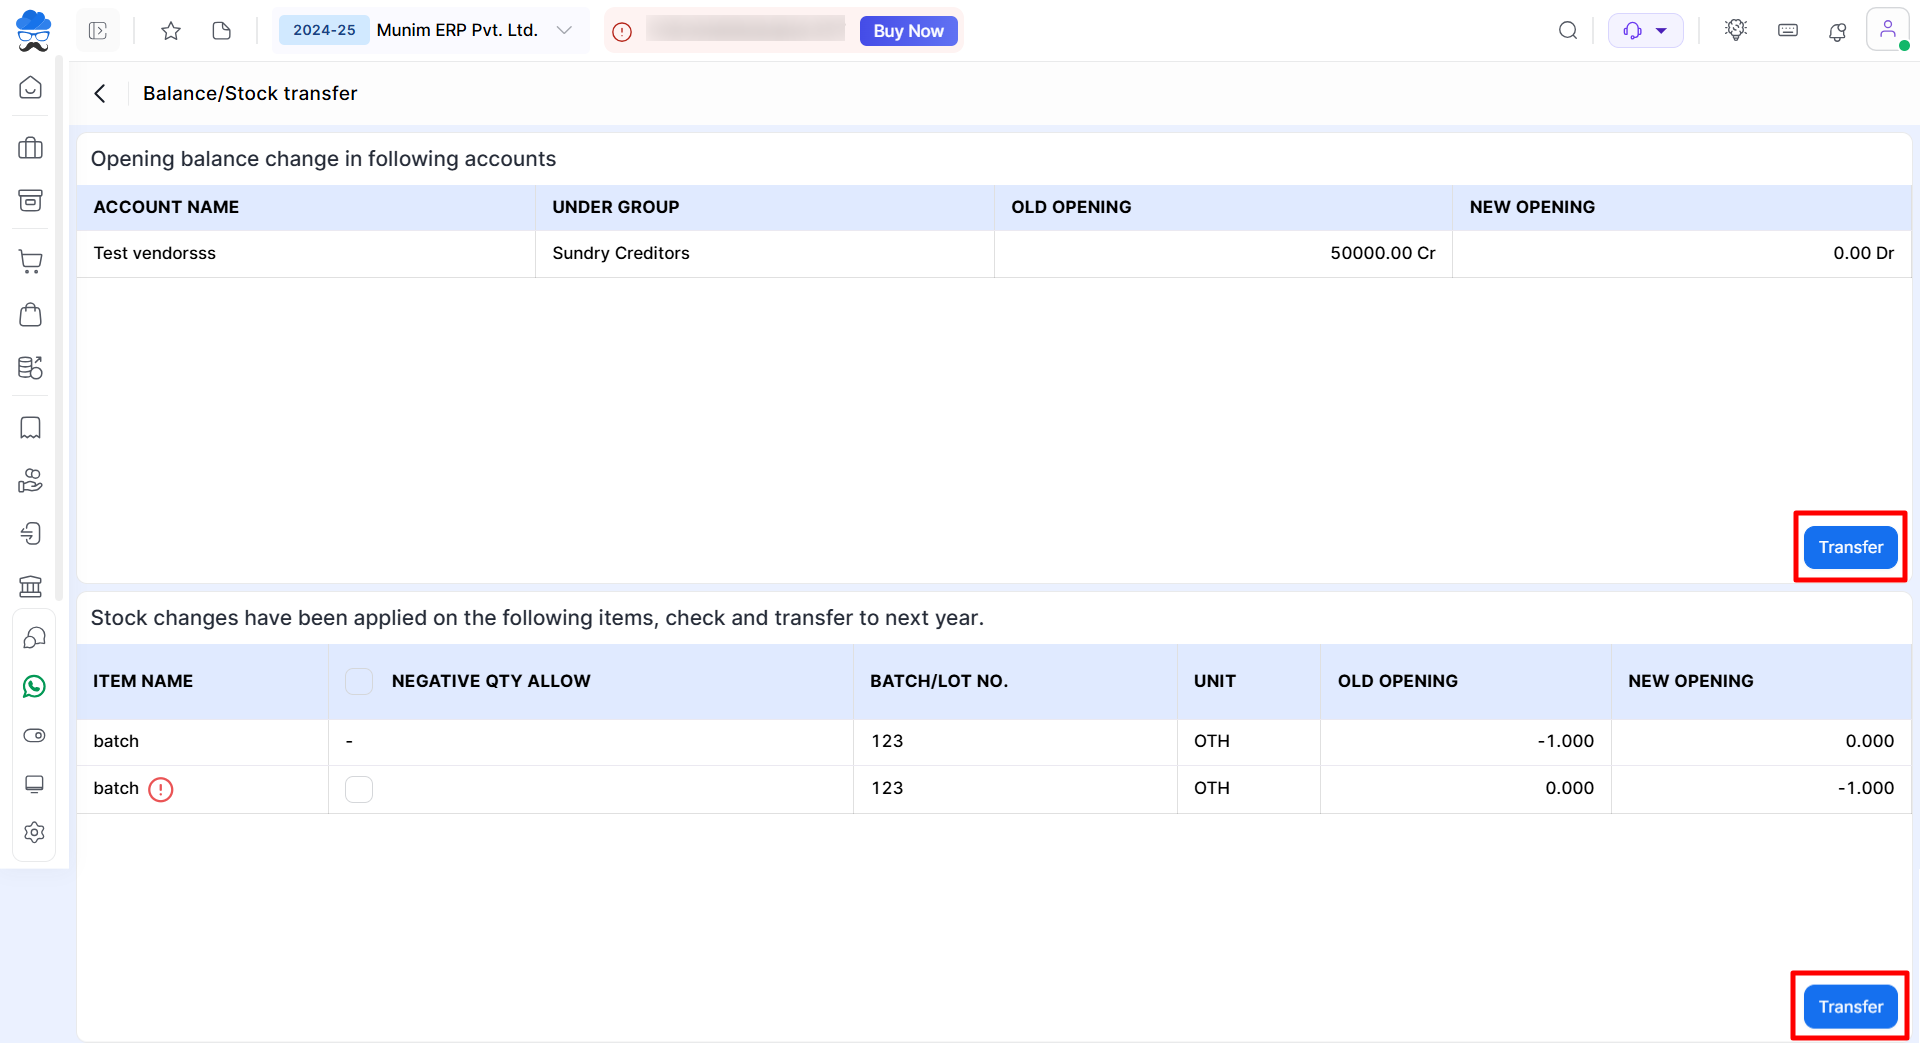
- After clicking the “Transfer” button, a confirmation pop-up will appear, asking if you want to transfer the data. Clicking “Yes” will transfer all your data to the next year.
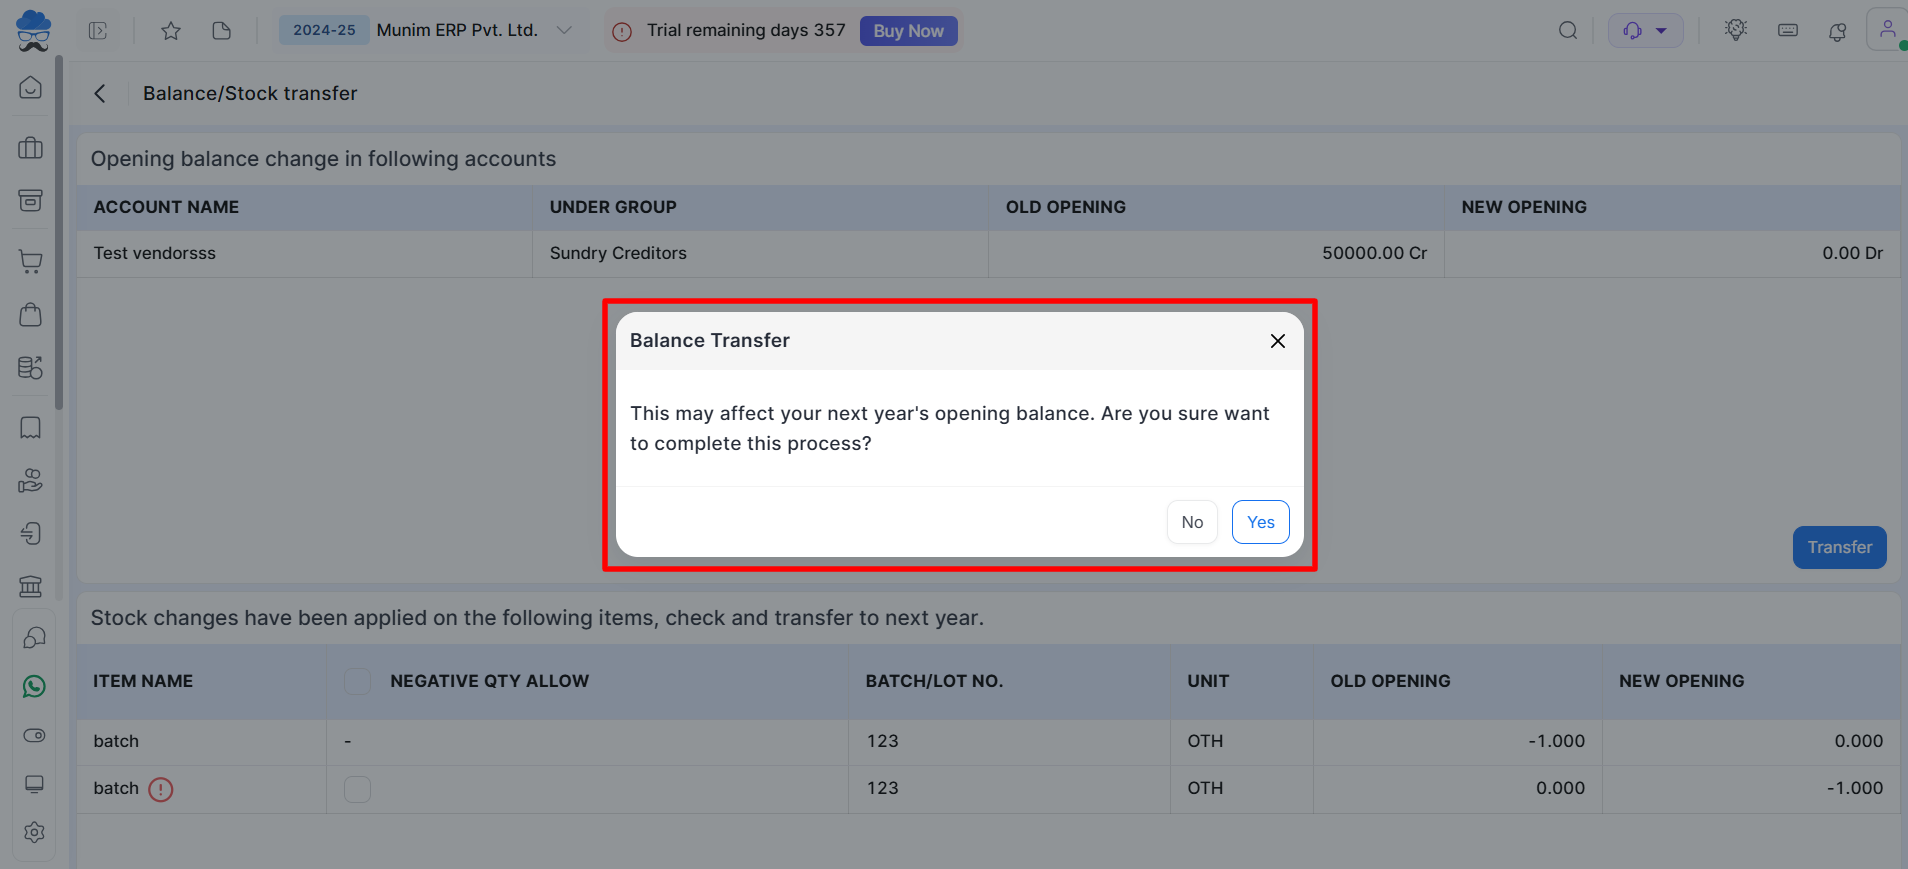
- Now your data has been successfully transferred to the next year. You can go to the Current Financial Year to check the updated opening data.
How to transfer data using the auto option?
- Go to the Settings module and click the General Settings option
- Click on the “Next Year Transfer” button
- Click on the Auto option and hit the Save button.
Note: If you make any changes in your previous year’s transaction entry, then a pop-up will be shown with two buttons, Cancel and Transfer. On clicking the Transfer button, your current changes will be updated in your next year’s data. Also, you have to transfer manually while doing it for the first time.
Example: Let’s see an example of an item, i.e. Wall clock.
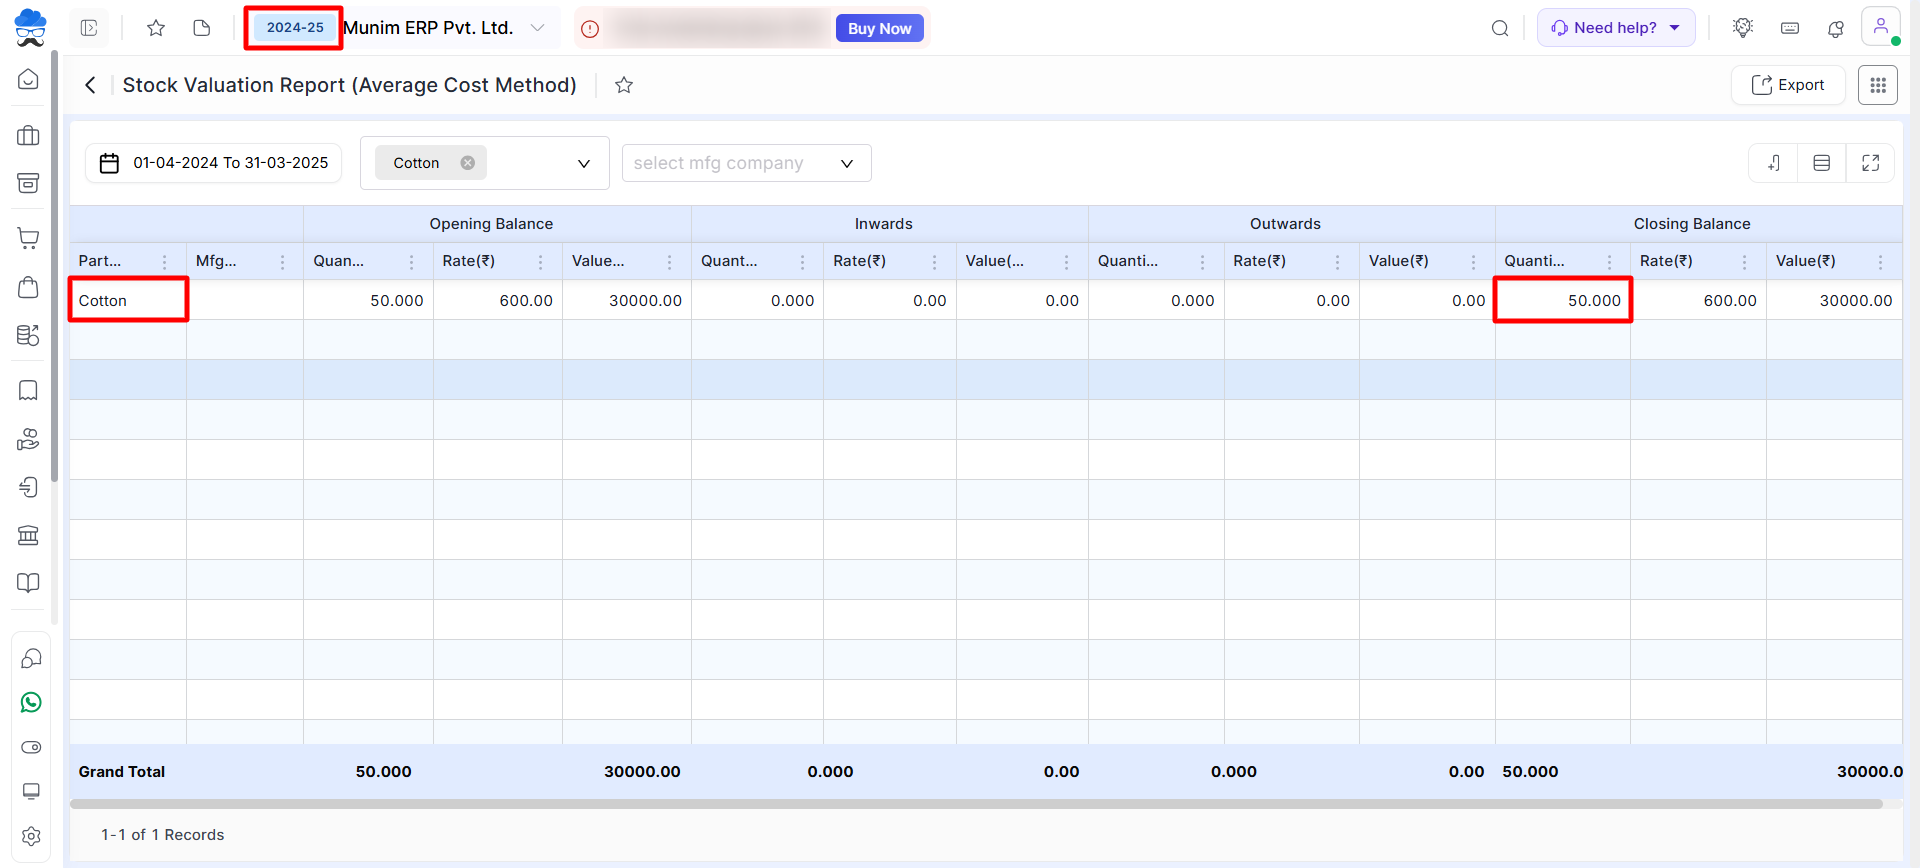
- Step 1. Check the previous year’s closing stock for the item. (e.g., Cotton)
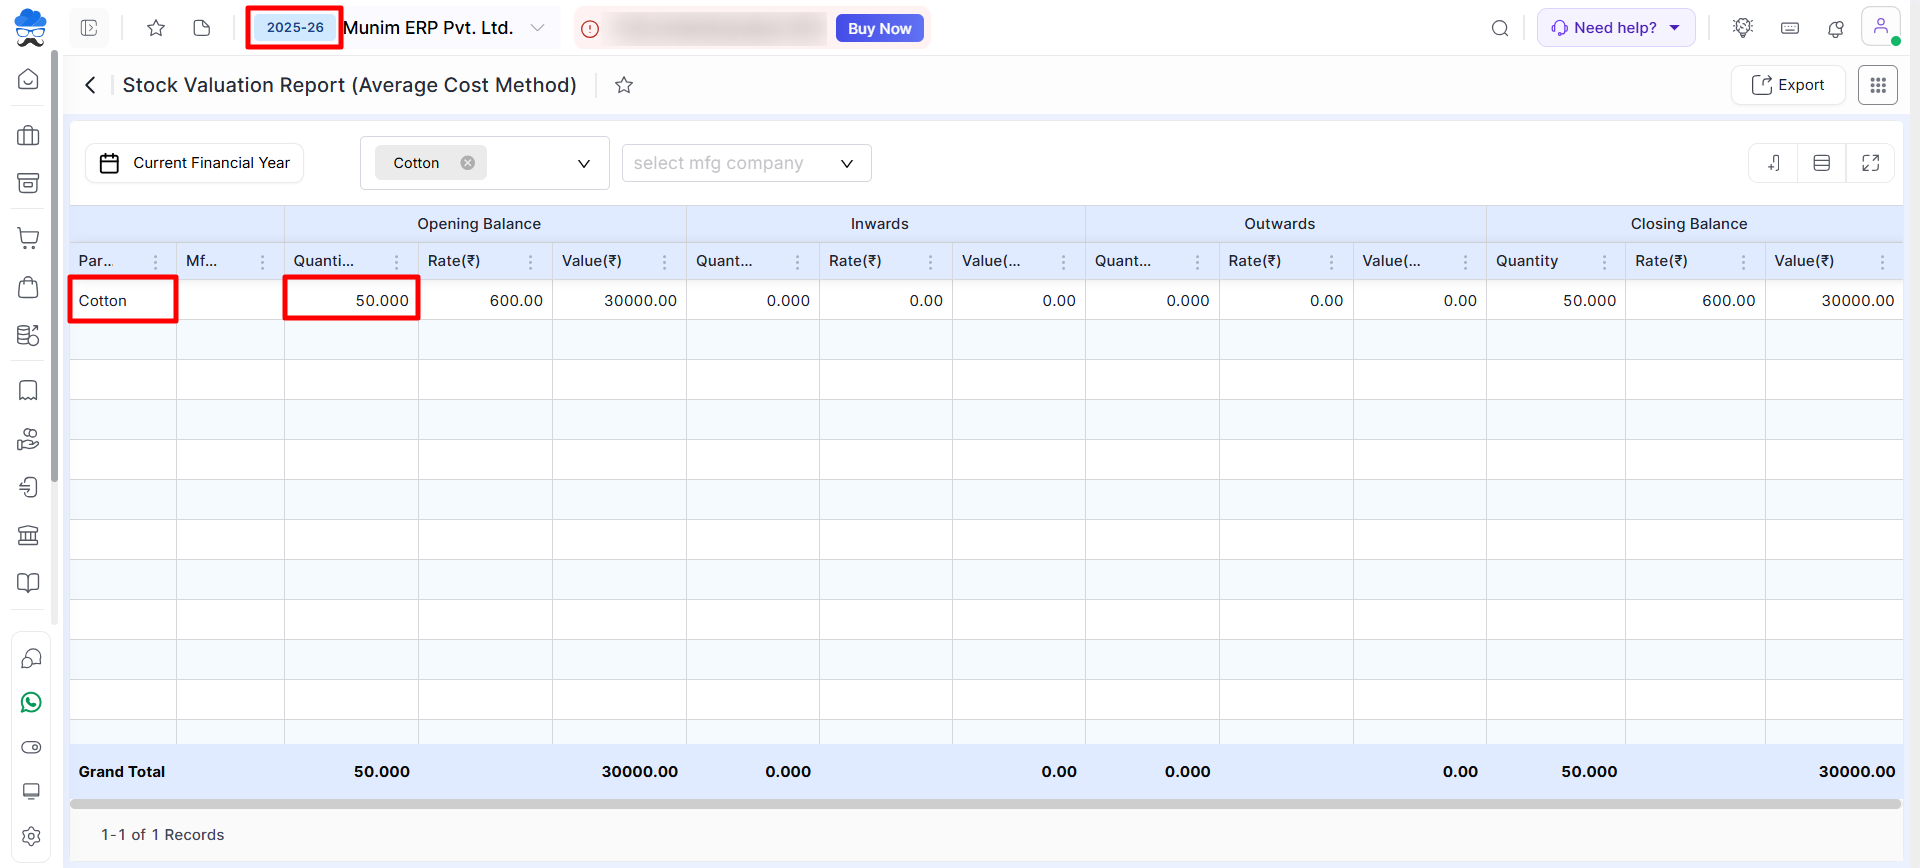
- Step 2. Check the current year’s opening stock for the item Cotton
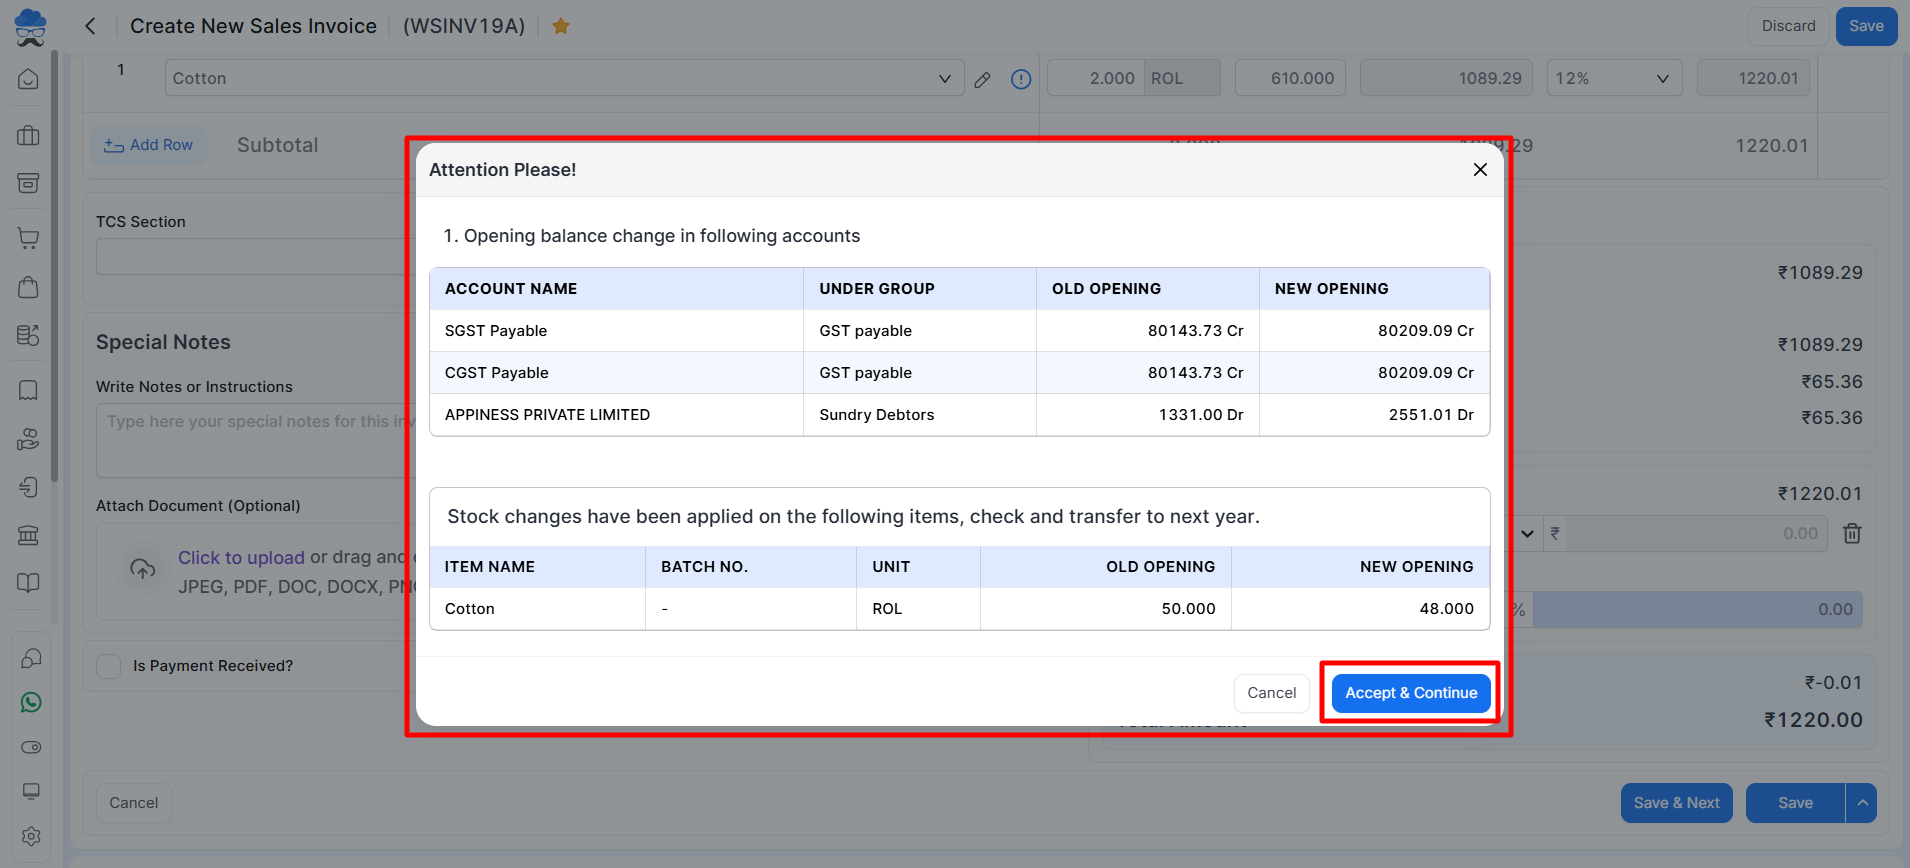
- Step 3: Now go to the previous year again and create a new sale invoice for the item Cotton with two quantities and save the invoice to show a pop-up for Stock Transfer. Here, you can review the affected accounts and stock openings.
- Click the Accept & Continue button to update and transfer the changes in next year’s data automatically.
- Now check the previous year’s closing stock and the current year’s opening stock for confirmation.
For any assistance or further help, please contact the support team.


