 3188 views
 Overview
If you have already generated an E-Way Bill from the official E-Way Bill portal, you can manually add the E-Way Bill Number and E-Way Bill Date while creating a Sales Invoice in Munim. This helps you maintain accurate invoice records and enables E-Way Bill tracking within the software.
Benefits
- Allows you to record E-Way Bills that were generated directly from the government portal.
- Eliminates the need to regenerate the E-Way Bill in Munim.
- Maintains accurate E-Way Bill information against the invoice.
- Makes it easy to identify invoices with manually entered E-Way Bill details from the Sales Invoice List.
- Helps keep transportation and compliance records organised and up to date.
Enable E-Way Bill Feature
Before entering the E-Way Bill details manually, ensure that the E-Way Bill option is enabled.
Navigation:
Settings → Statutory Information → GST Details → Edit
- Open the GST Details section.
- Enable the E-Way Bill option.
- Enter the required API credentials.
- Click Save.

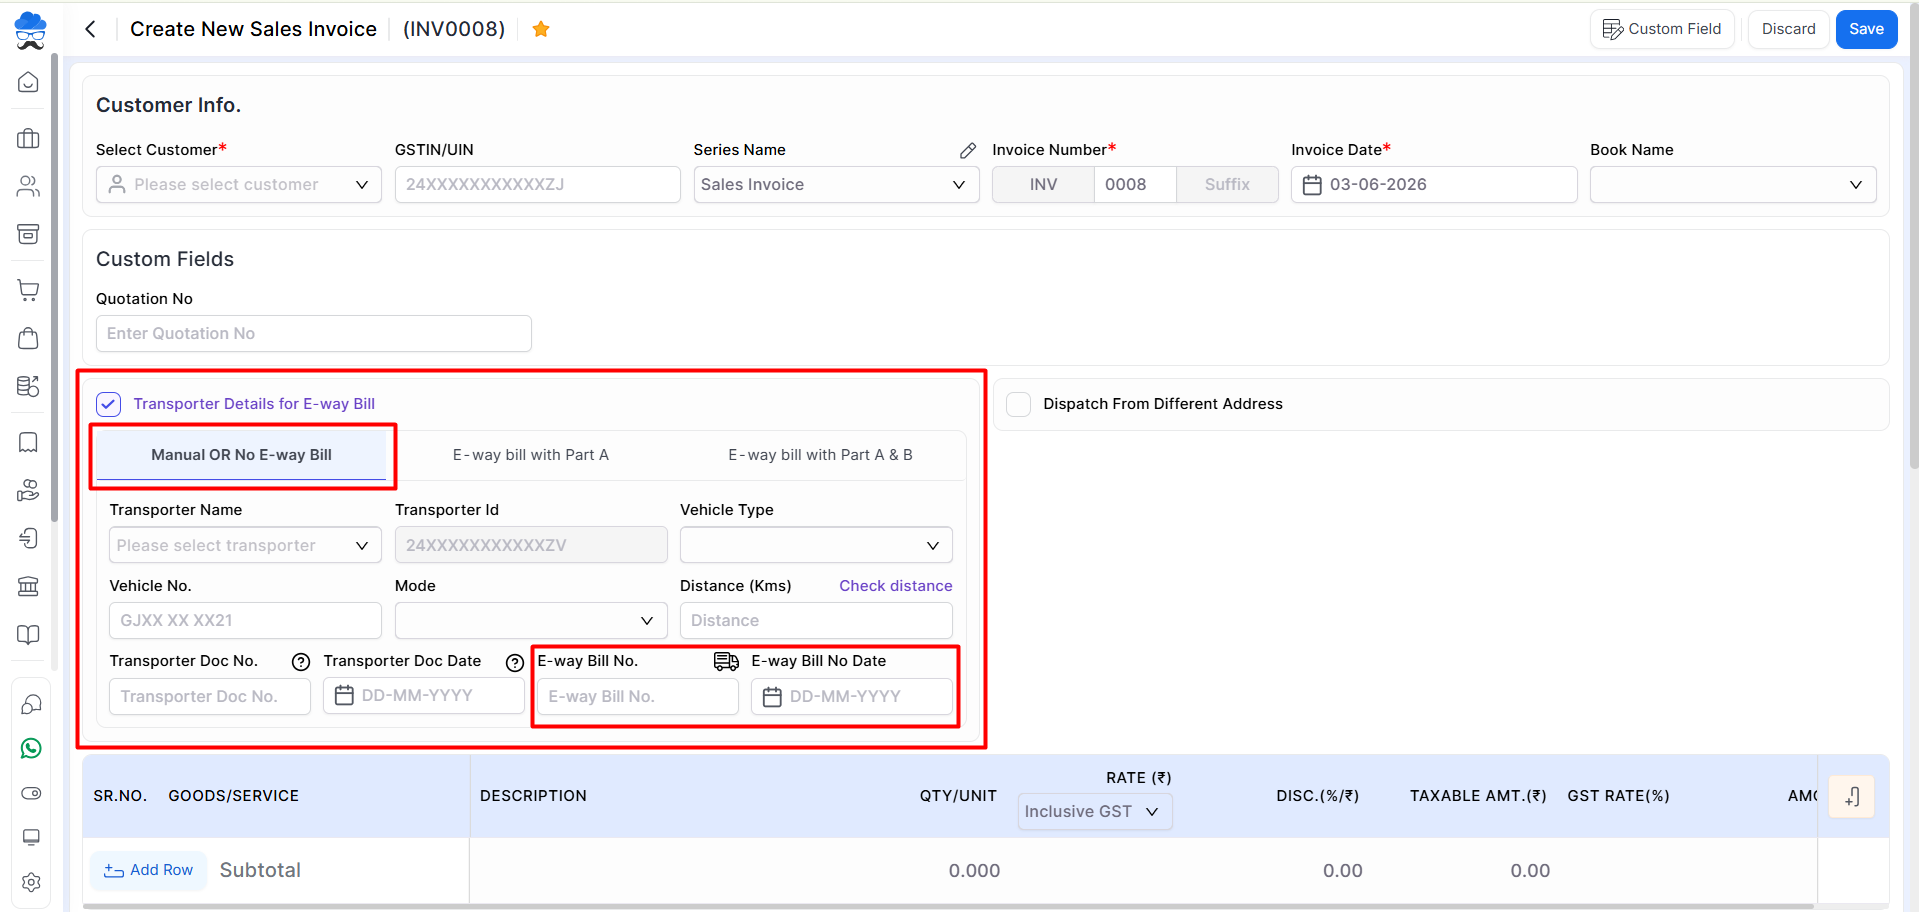
Add E-Way Bill Details in Sales Invoice
Navigation:
Sales → Sales Invoice → Create Invoice
- Create a new Sales Invoice or edit an existing one.
- Enable the Transporter Details for E-Way Bill checkbox.
- Select the Manual OR No E-way Bill option.
- Enter the following details:
- E-Way Bill No.
- E-Way Bill Date
- Complete the invoice and click Save.
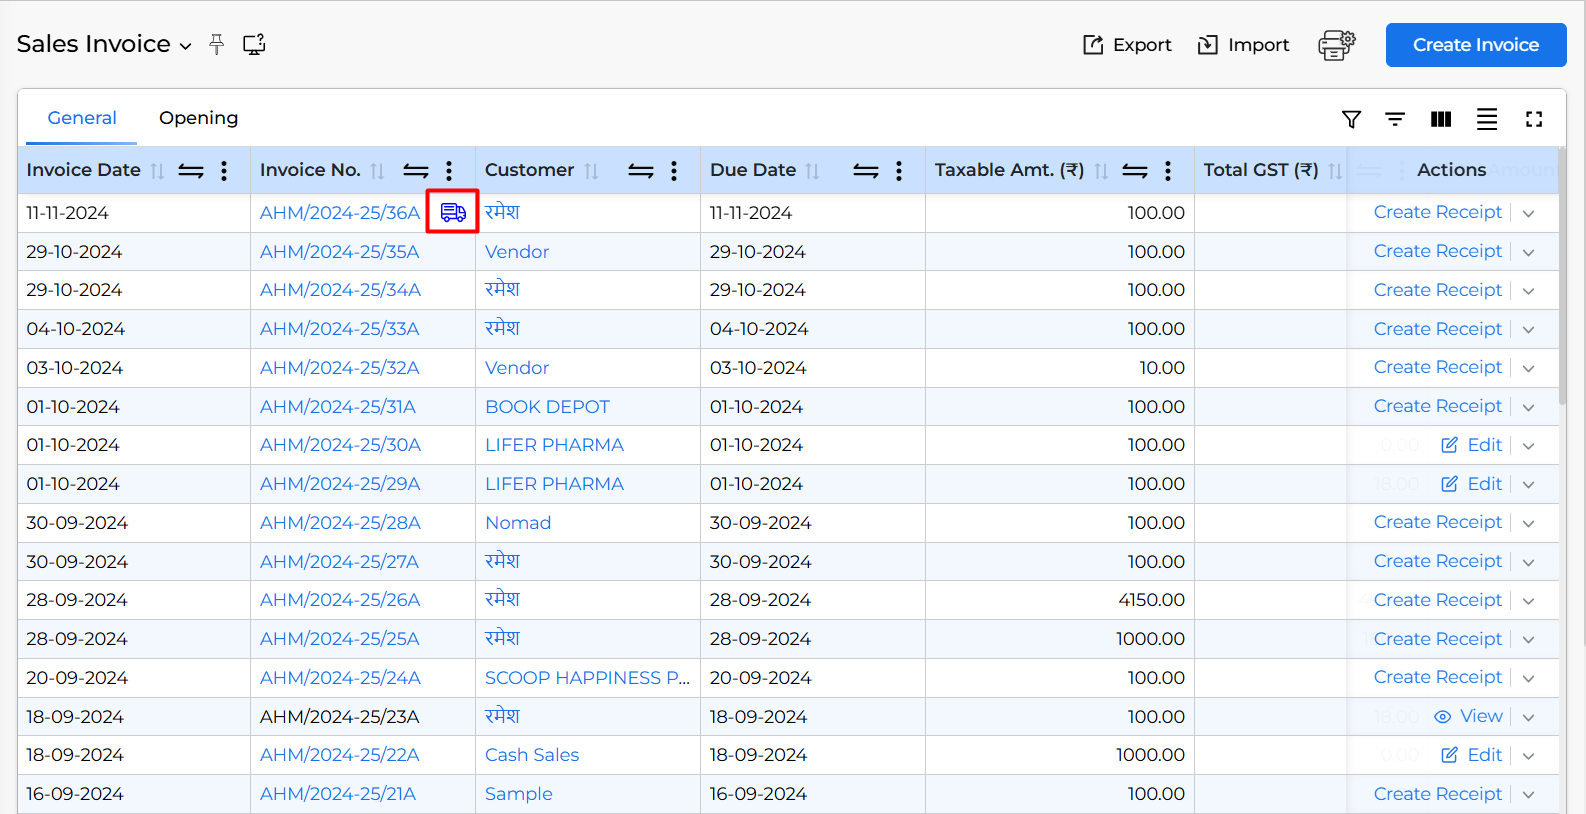
Verify E-Way Bill Status
After saving the invoice, an E-Way Bill icon will appear next to the invoice number on the Sales Invoice List page.
- A blue icon indicates that the E-Way Bill Number and Date were added manually.
- You can use this icon to identify invoices containing manually entered E-Way Bill details.
Important Note
- This option should be used only when the E-Way Bill has already been generated outside Munim.
- Ensure that the entered E-Way Bill Number and Date exactly match the details available on the government portal.
- You can print the E-Way Bill in the same format as the ones created in the Munim platform.
Result
The Sales Invoice will be successfully saved with the manually entered E-Way Bill Number and E-Way Bill Date, and the invoice can be easily identified from the Sales Invoice List through the E-Way Bill icon.
Need Assistance?
If you face any issues while adding E-Way Bill details manually, please contact the Munim Support Team for assistance.


