
 3372 views
 Overview
The Pre-printed Stationery Setting allows you to align invoice printing with your pre-printed invoice stationery. You can adjust the top and bottom margins, hide or display company details, logo, and watermark, and preview the layout before printing.
Why Use Pre-printed Stationery?
- Print invoices accurately on pre-printed forms.
- Adjust top and bottom margins for proper alignment.
- Hide company details, logo, or watermark if they are already printed on the stationery.
- Preview the final invoice before printing.
- Reduce printing errors and paper wastage.
Configure Pre-printed Stationery
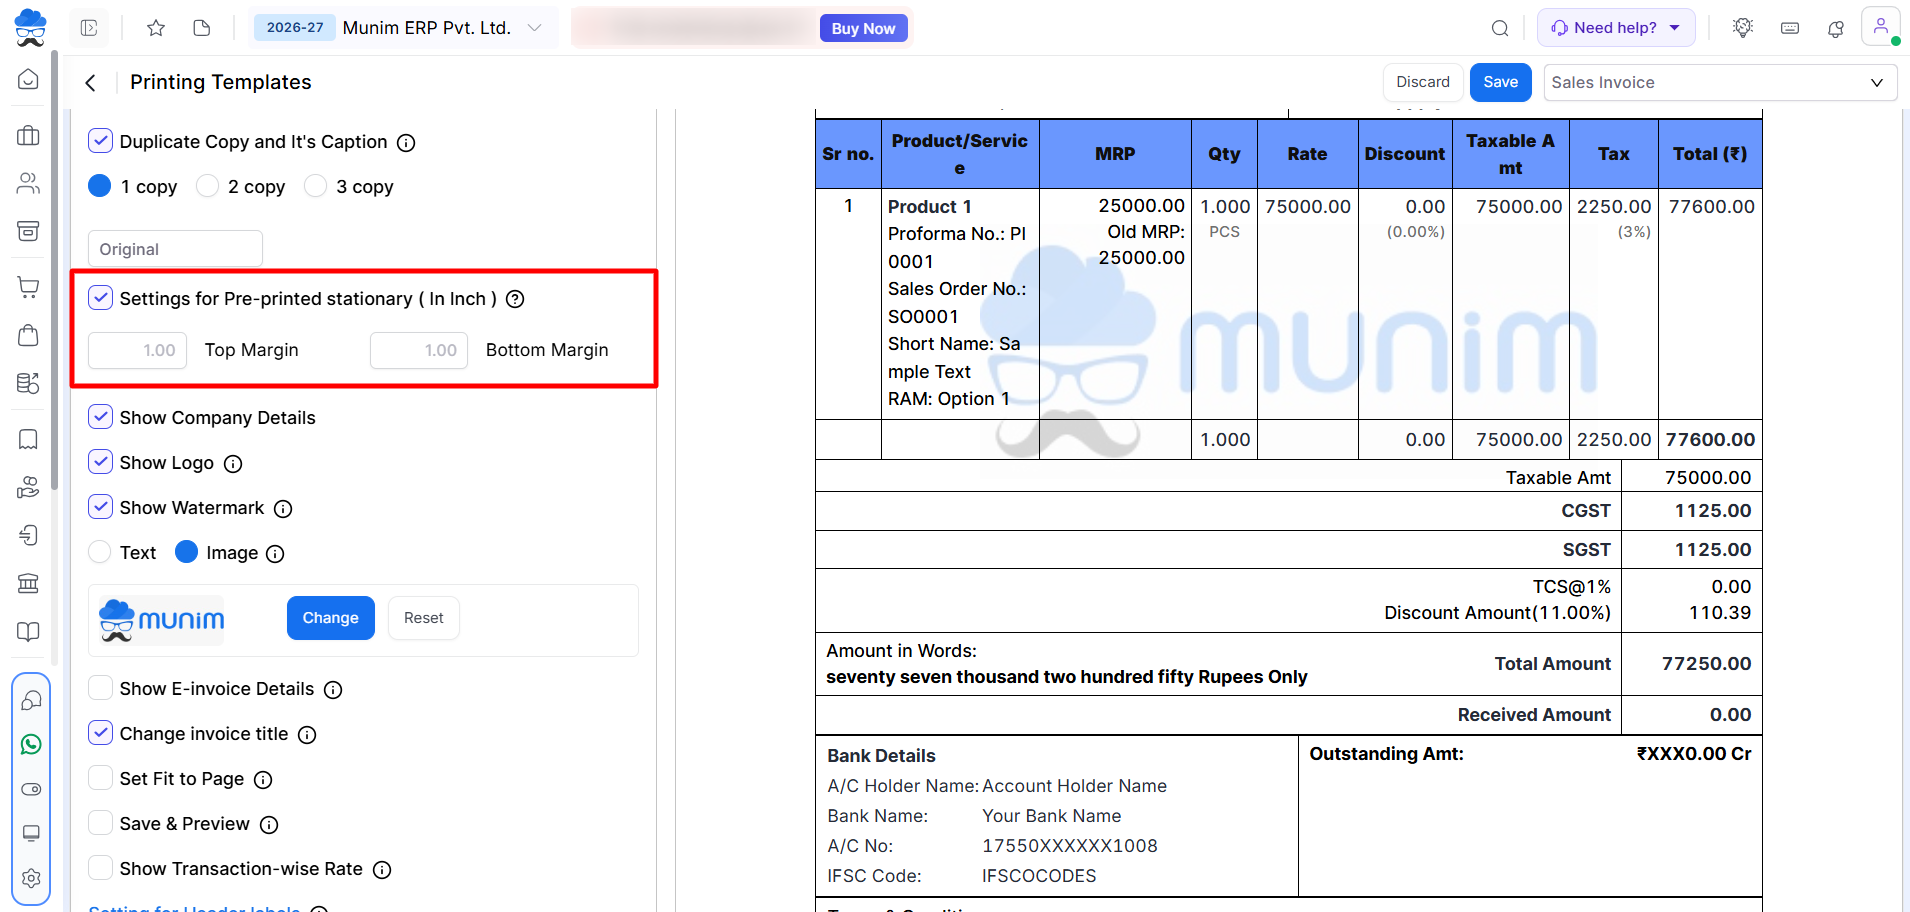
Step 1: Open Printing Templates
- Go to Settings.
- Click Printing Templates.
- Open the required invoice template.
+−⟲
Step 2: Enable Pre-printed Stationery
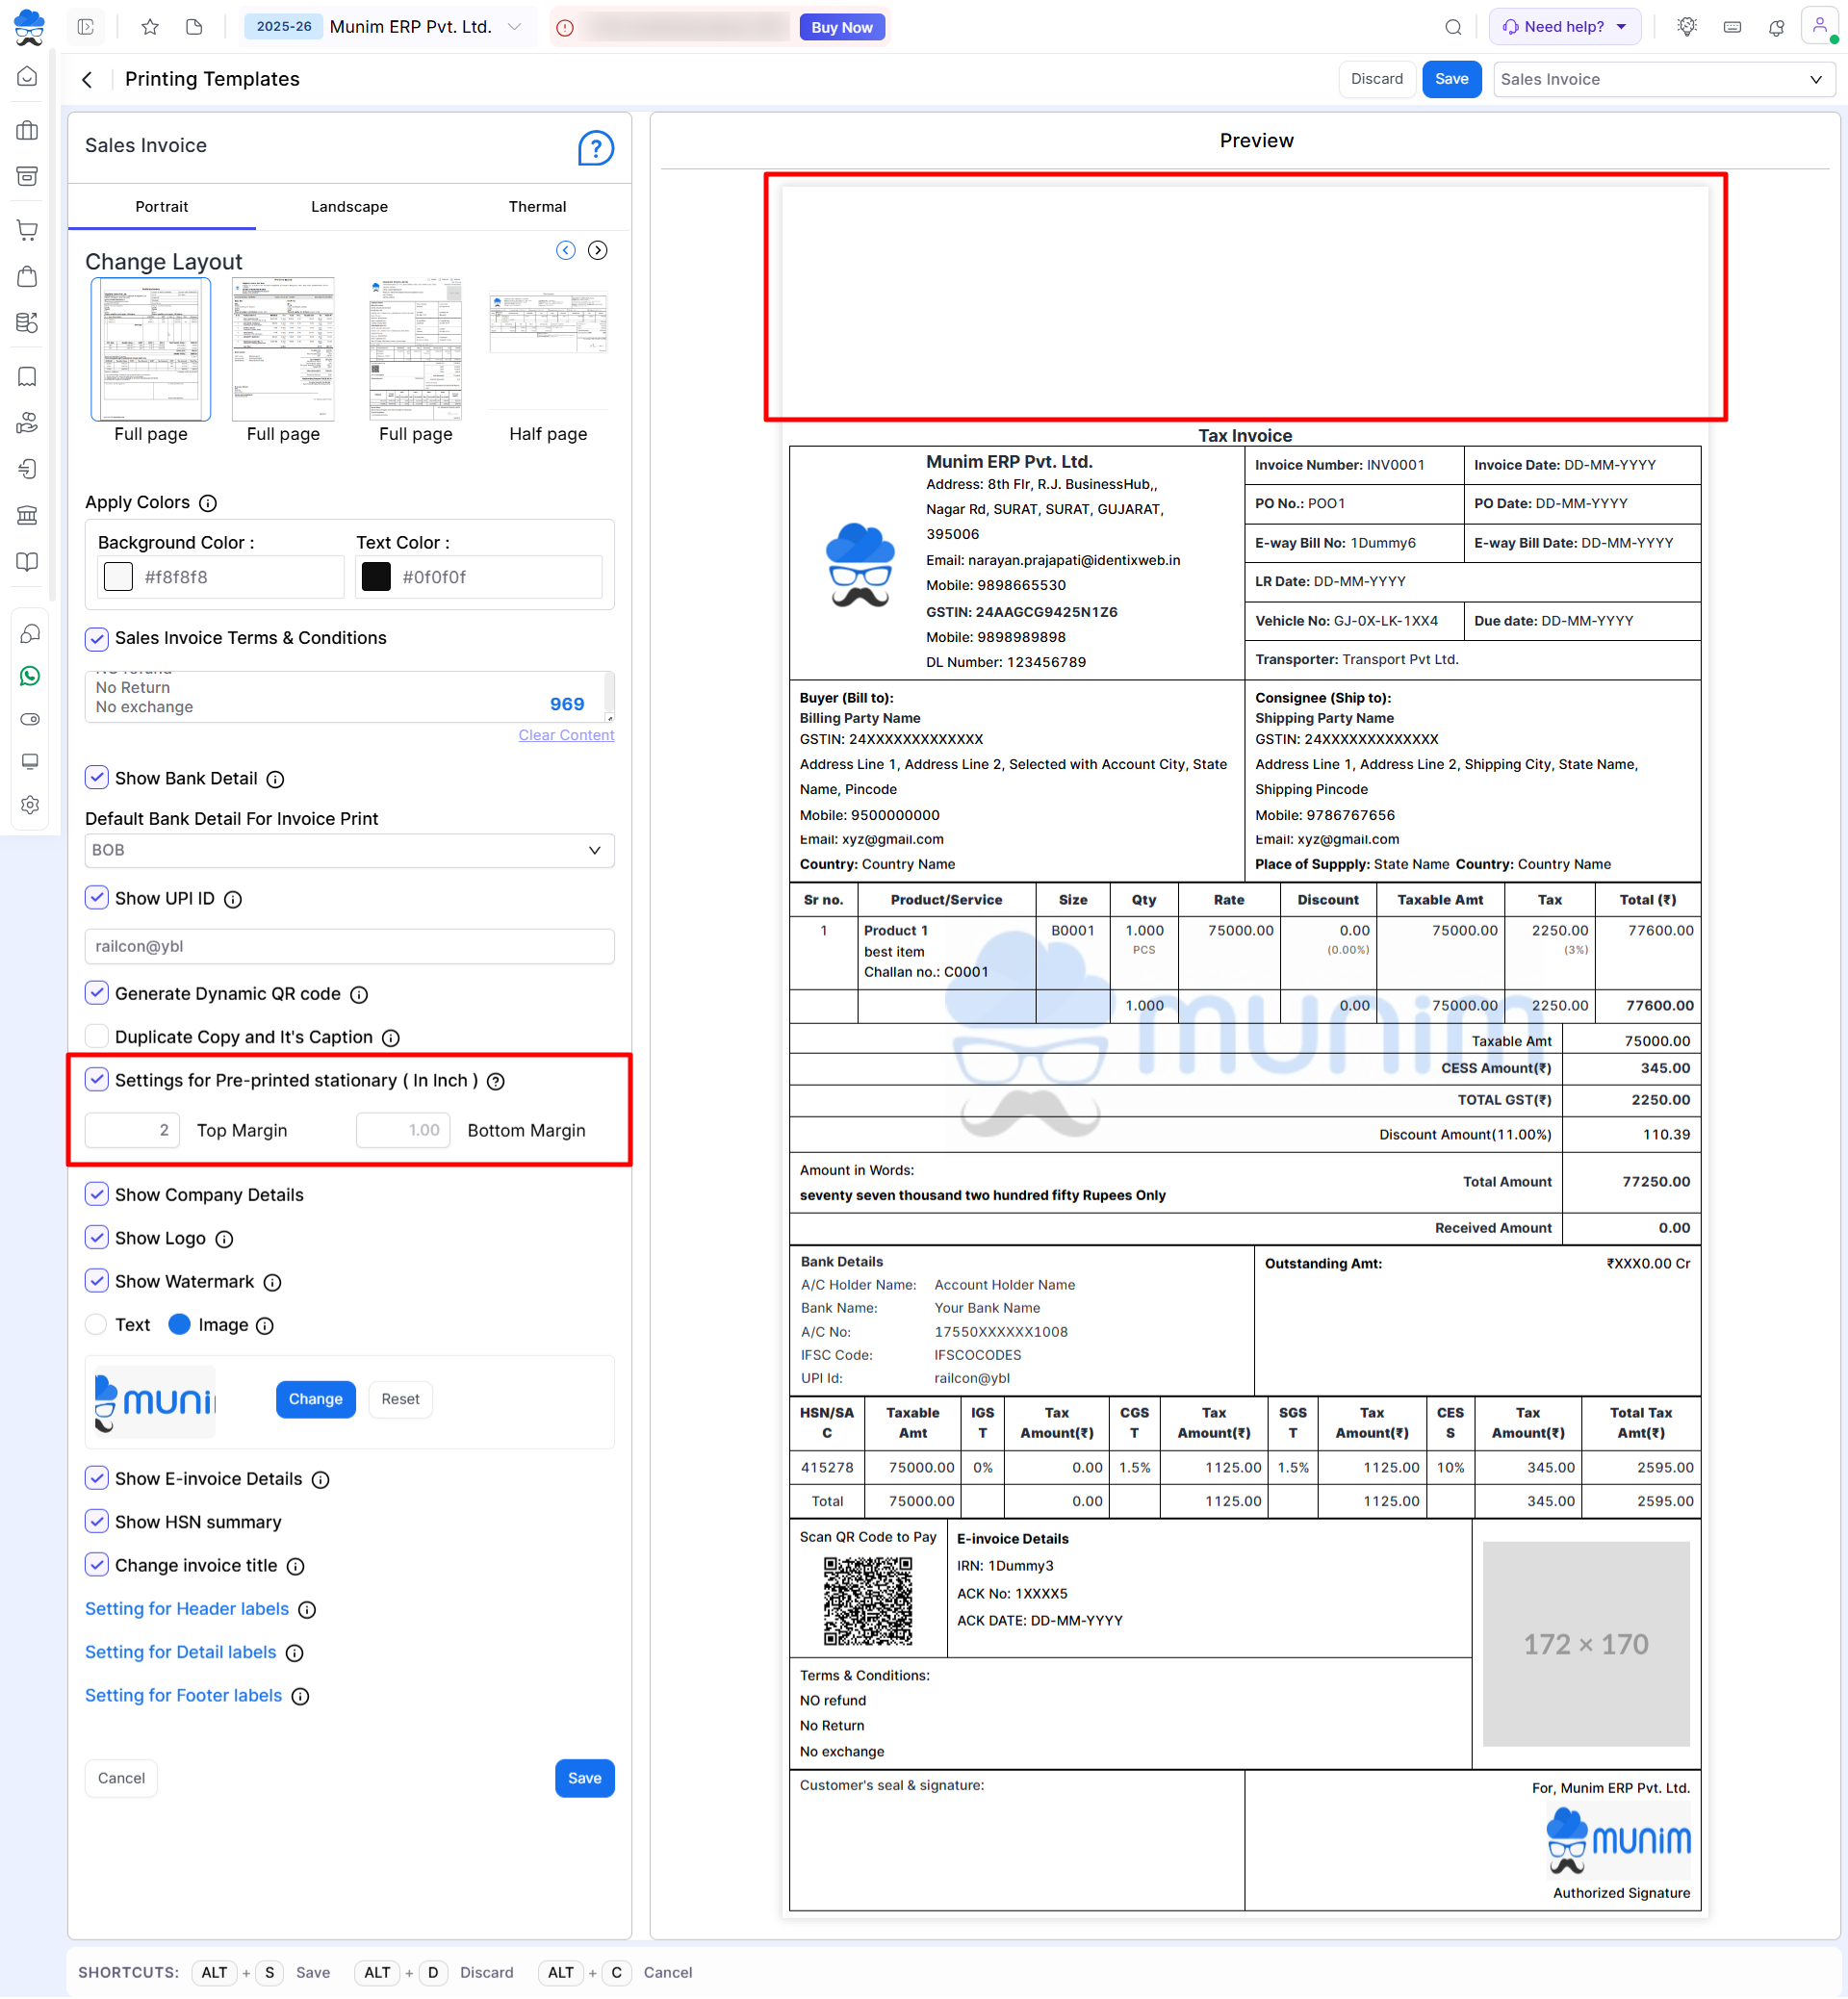
- Enable Settings for Pre-printed Stationery (in Inch).
- Enter the required:
- Top Margin
- Bottom Margin
- Click Save.
+−⟲
Step 3: Customise Invoice Elements
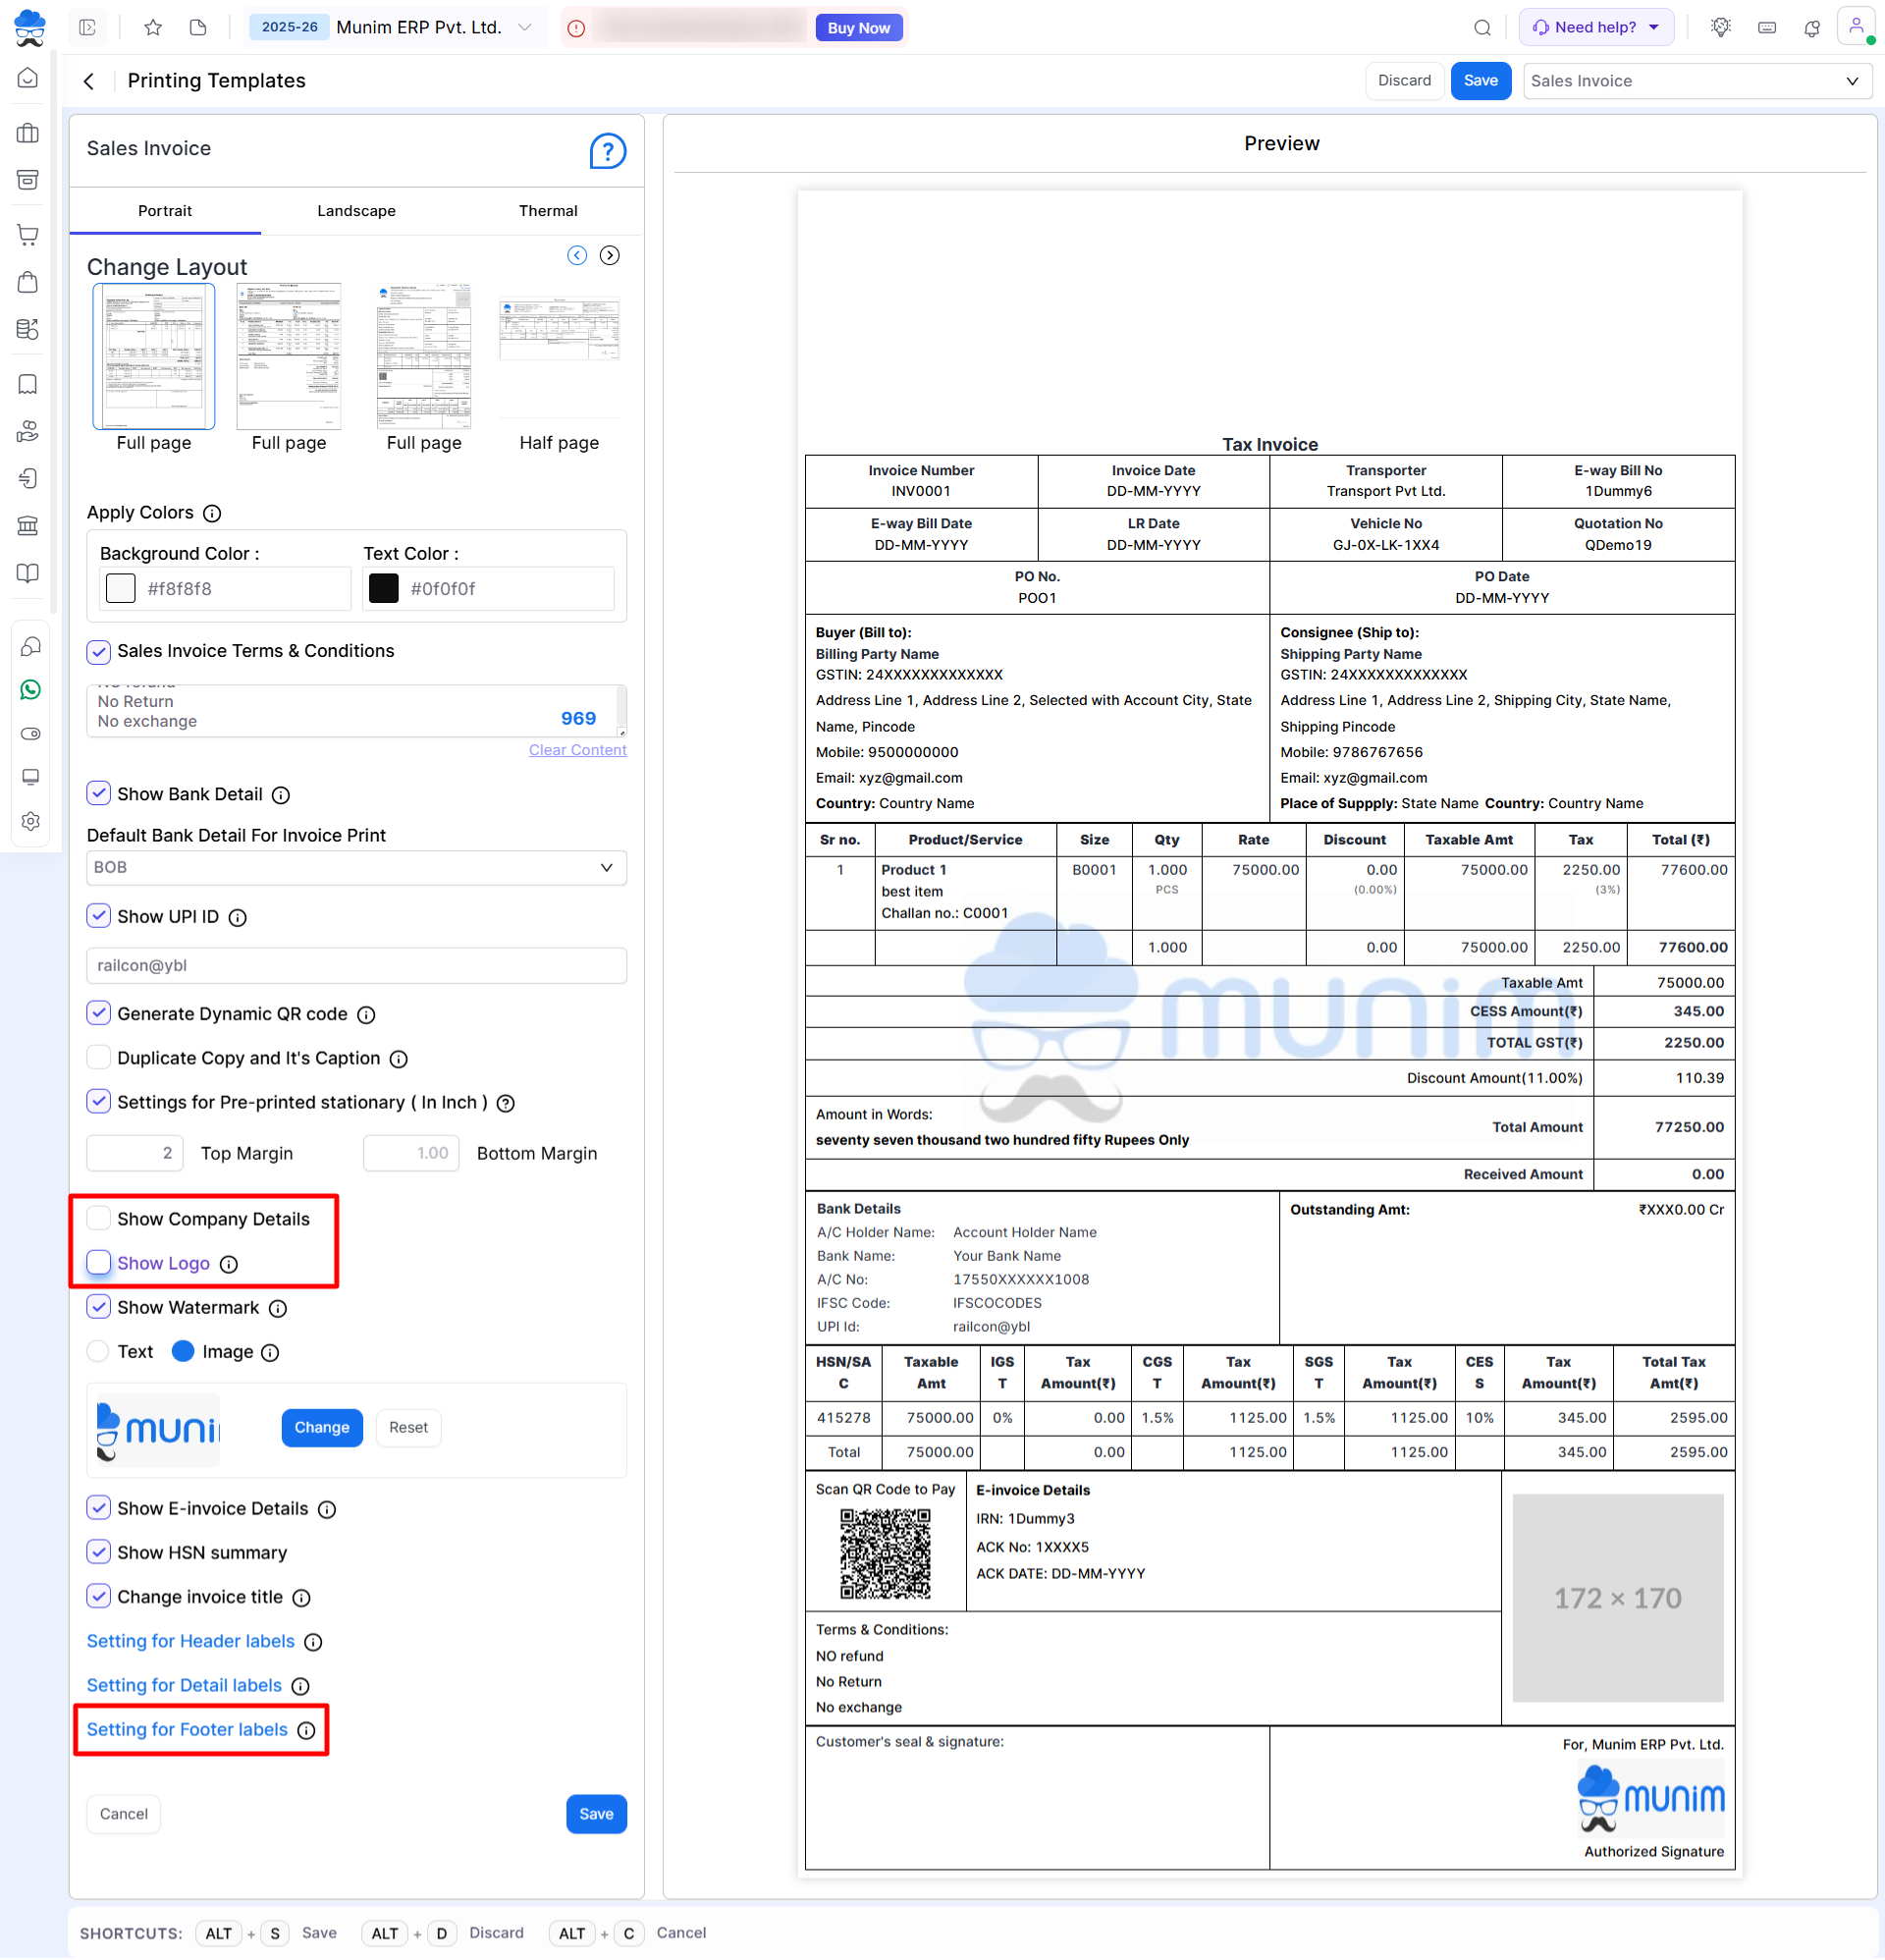
Based on your pre-printed stationery, you can enable or disable the following options:
- Show Company Details
- Show Logo
- Show Watermark
- Signature (from Footer Labels settings)
This ensures only the required information is printed on the invoice.
+−⟲
Step 4: Preview the Invoice
- Click Preview to verify the alignment.
- If required, adjust the margins again until the print matches your stationery.
Important Notes
- Margin values are measured in inches.
- Always preview the invoice before taking a final print.
- If your company logo or details are already printed on the stationery, disable those options to avoid duplicate printing.
Need Assistance?
If the invoice is not aligned correctly after configuring the margins, contact the Munim Support Team for assistance.


