 3796 views
 Here’s a guide for importing data to Munim Accounting & Billing software. Here we have explained how to easily import your Account, Item, Sales Invoice and Purchase Bill data into the Munim software.
Note: Account and Item data should be uploaded/added first before uploading Sales/Purchase data.
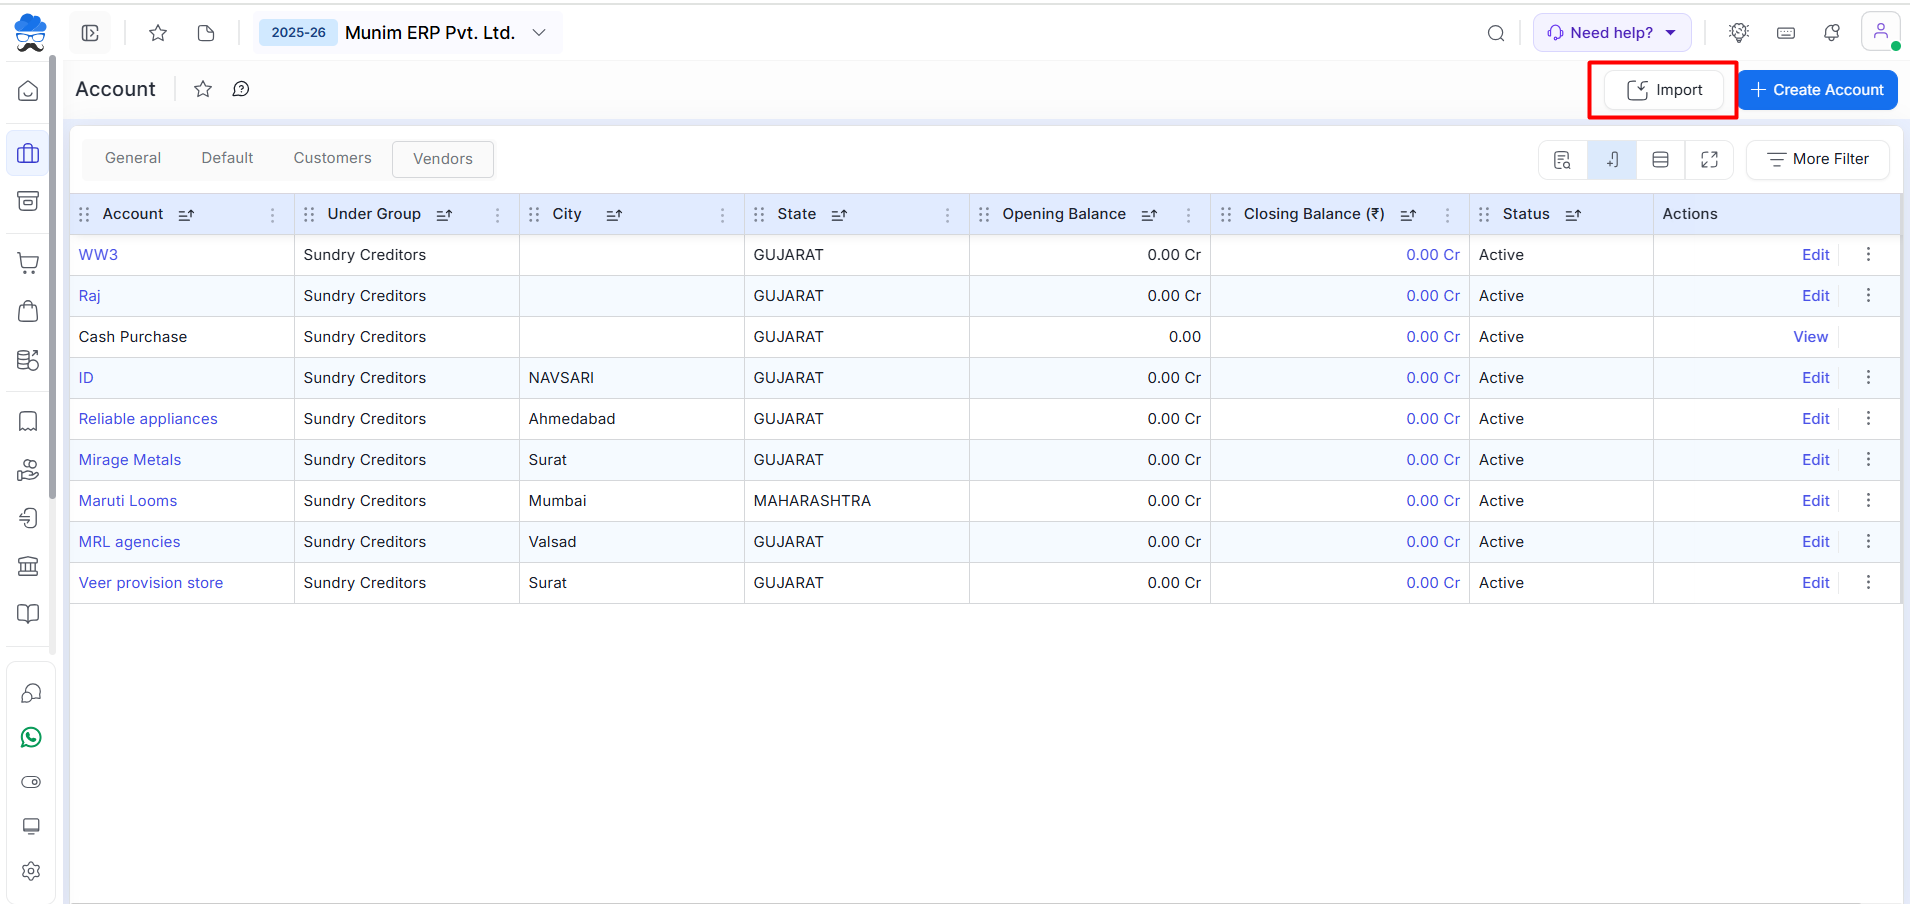
Step 1: Locate the Import option
- Go to the page for which you want to import data, like Account, Item, Sales Invoice or Purchase Bill.
- Click the Import option located at the top right corner of the page.
+−⟲
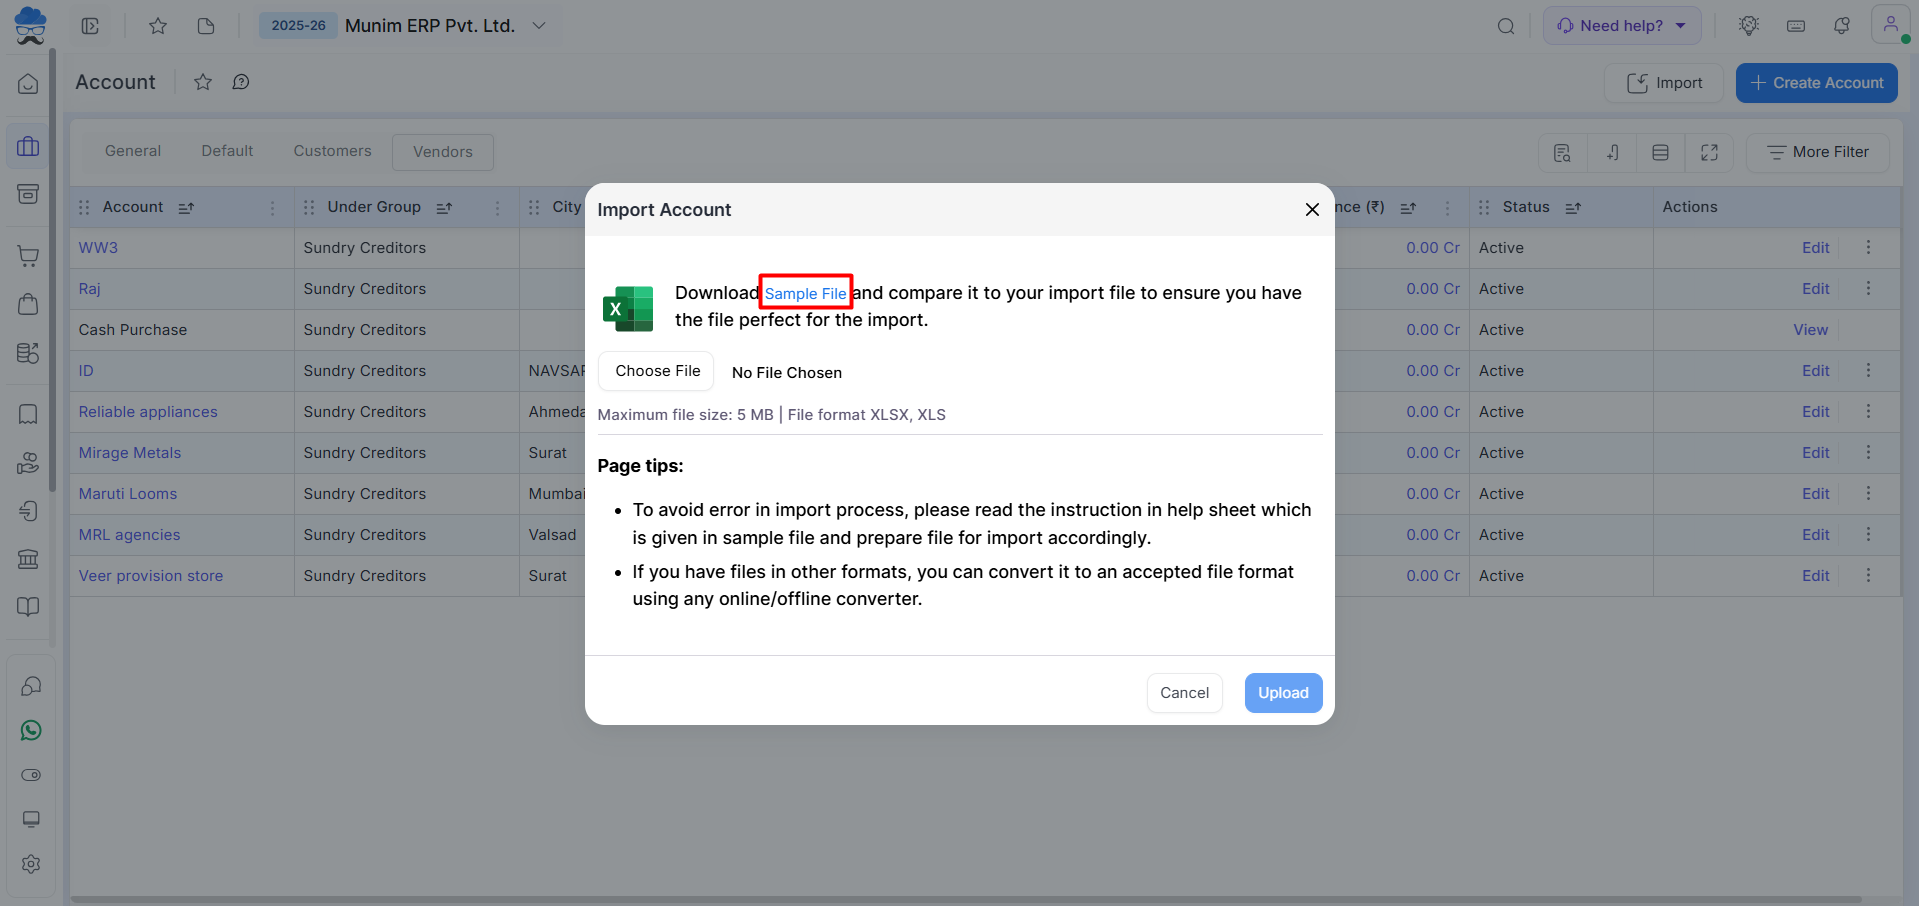
Step 2: Download Sample Files
- After clicking the Import option, a Pop-Up opens. Click “Sample file” to download the provided Excel Sample file.
- Separate sample files are available for each module: Account, Item, Sales Invoice, and Purchase Bill.
+−⟲
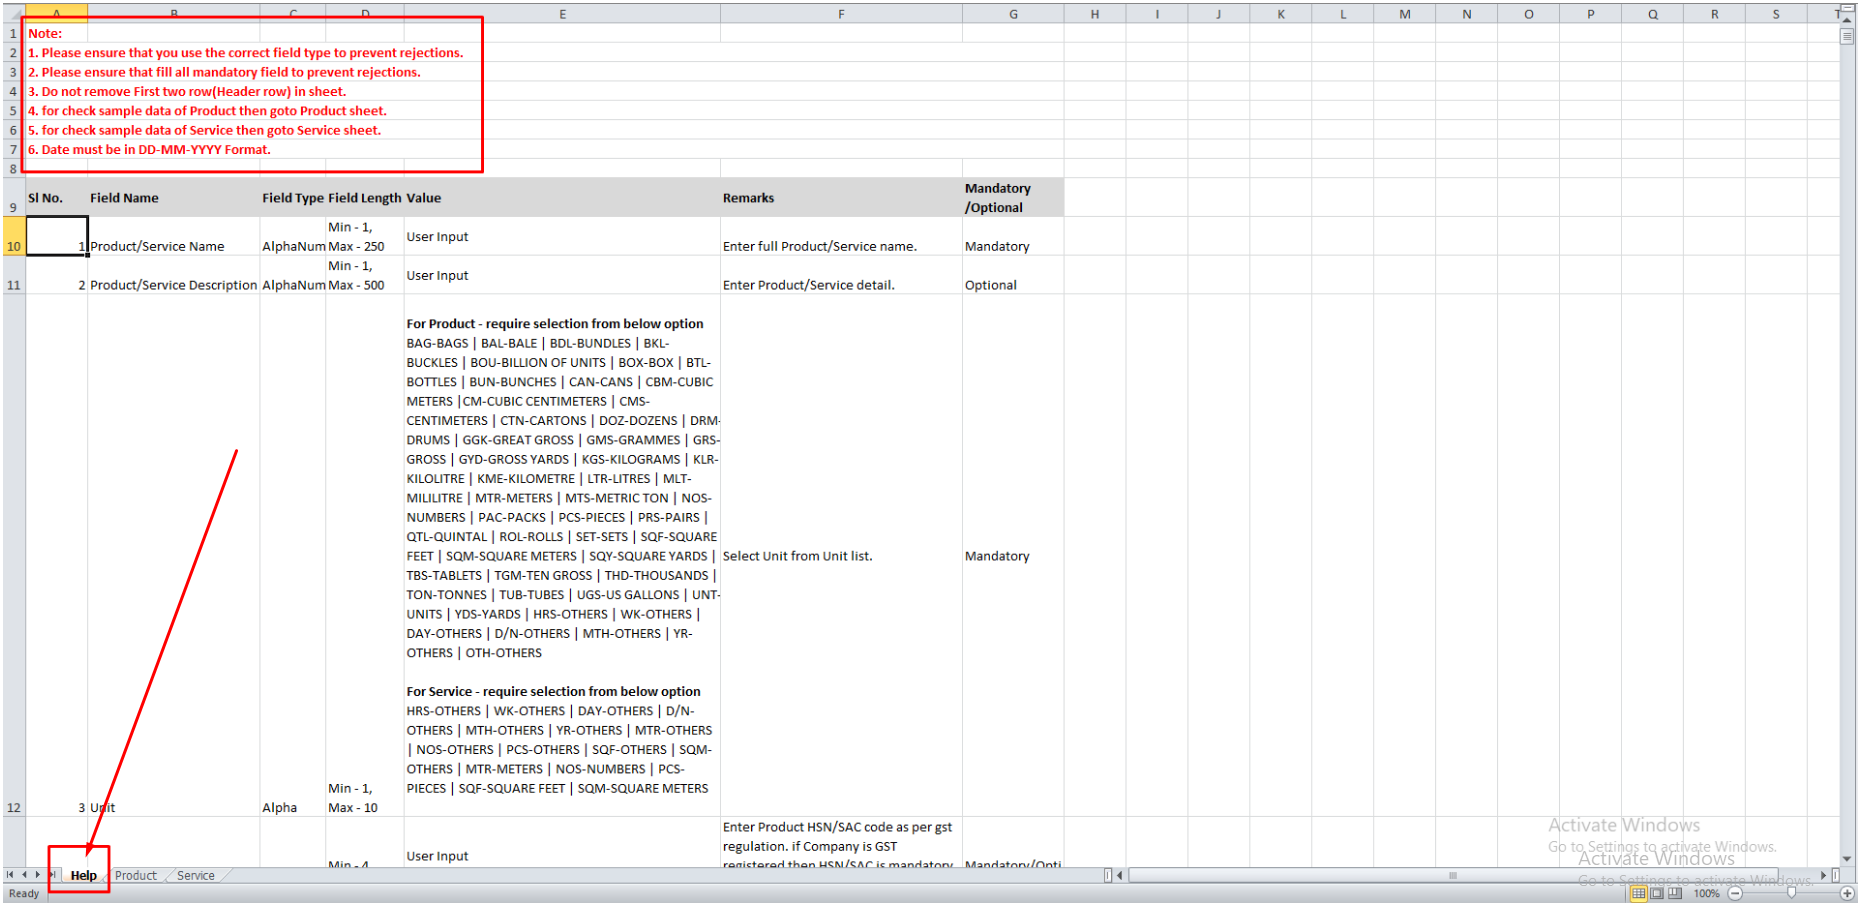
Step 3: Review and Prepare Data
- Open the sample file and read the instructions on the help sheet provided.
- After checking all instructions, now switch to other tabs, copy your Old Software data into the Excel sample file, and prepare it for import according to the instructions.
+−⟲
Step 4: Upload Prepared File
- After preparing the file, go to the Import pop-up again in the software. Click on “Choose file” to select the file you’ve just prepared.
- Click “Upload” to initiate the data import process.
Step 5: Check errors and Re-upload Your Import File Easily
- Once your file is uploaded, you can monitor its import status by navigating to Settings > Imported Data, or you can check the Dashboard page for progress.
- If the import encounters any issues, simply download the Error File in Excel format to review the specific rows with missing or incorrect data showing at the end of the row of each entry.
+−⟲
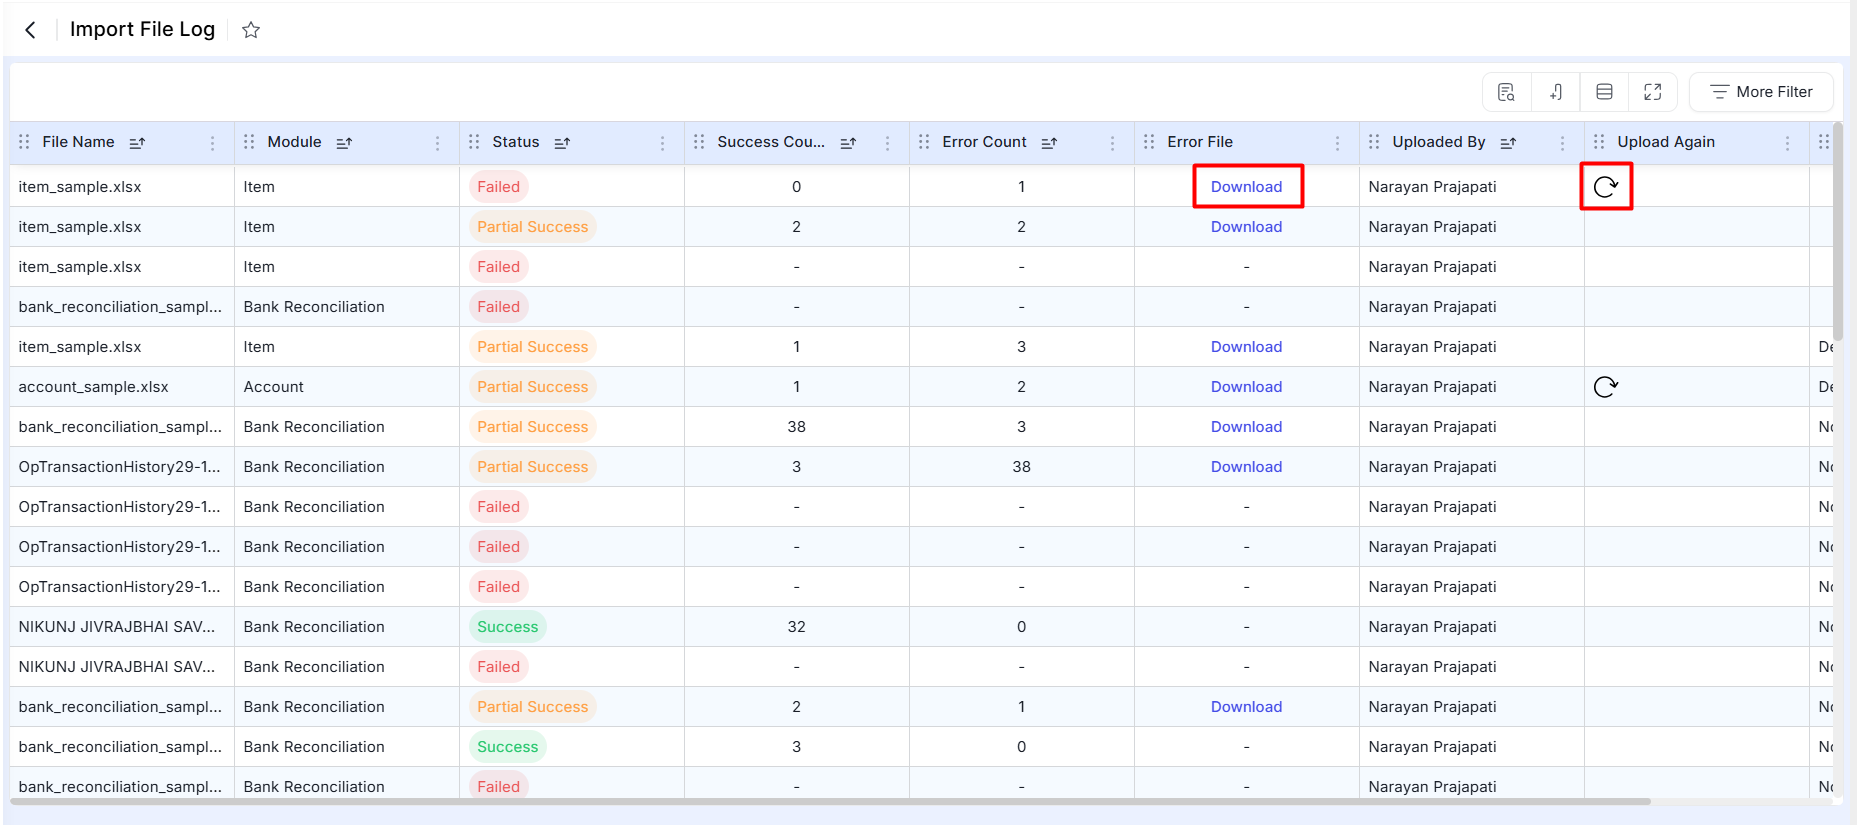
- After making the necessary corrections, you can re-upload the file using the Upload Again option to complete the import process smoothly.
Congratulations! You’ve successfully imported your data into Munim accounting & Billing software. If you encounter any issues or have questions, refer to the provided instructions in the help sheet or contact Munim support for further assistance.


