
 4577 views
 Overview
The E-Way Bill feature in Munim allows you to generate E-Way Bills directly from your Sales Invoices. Once the E-Way Bill API credentials are configured, you can create, print, and manage E-Way Bills without visiting the E-Way portal separately.
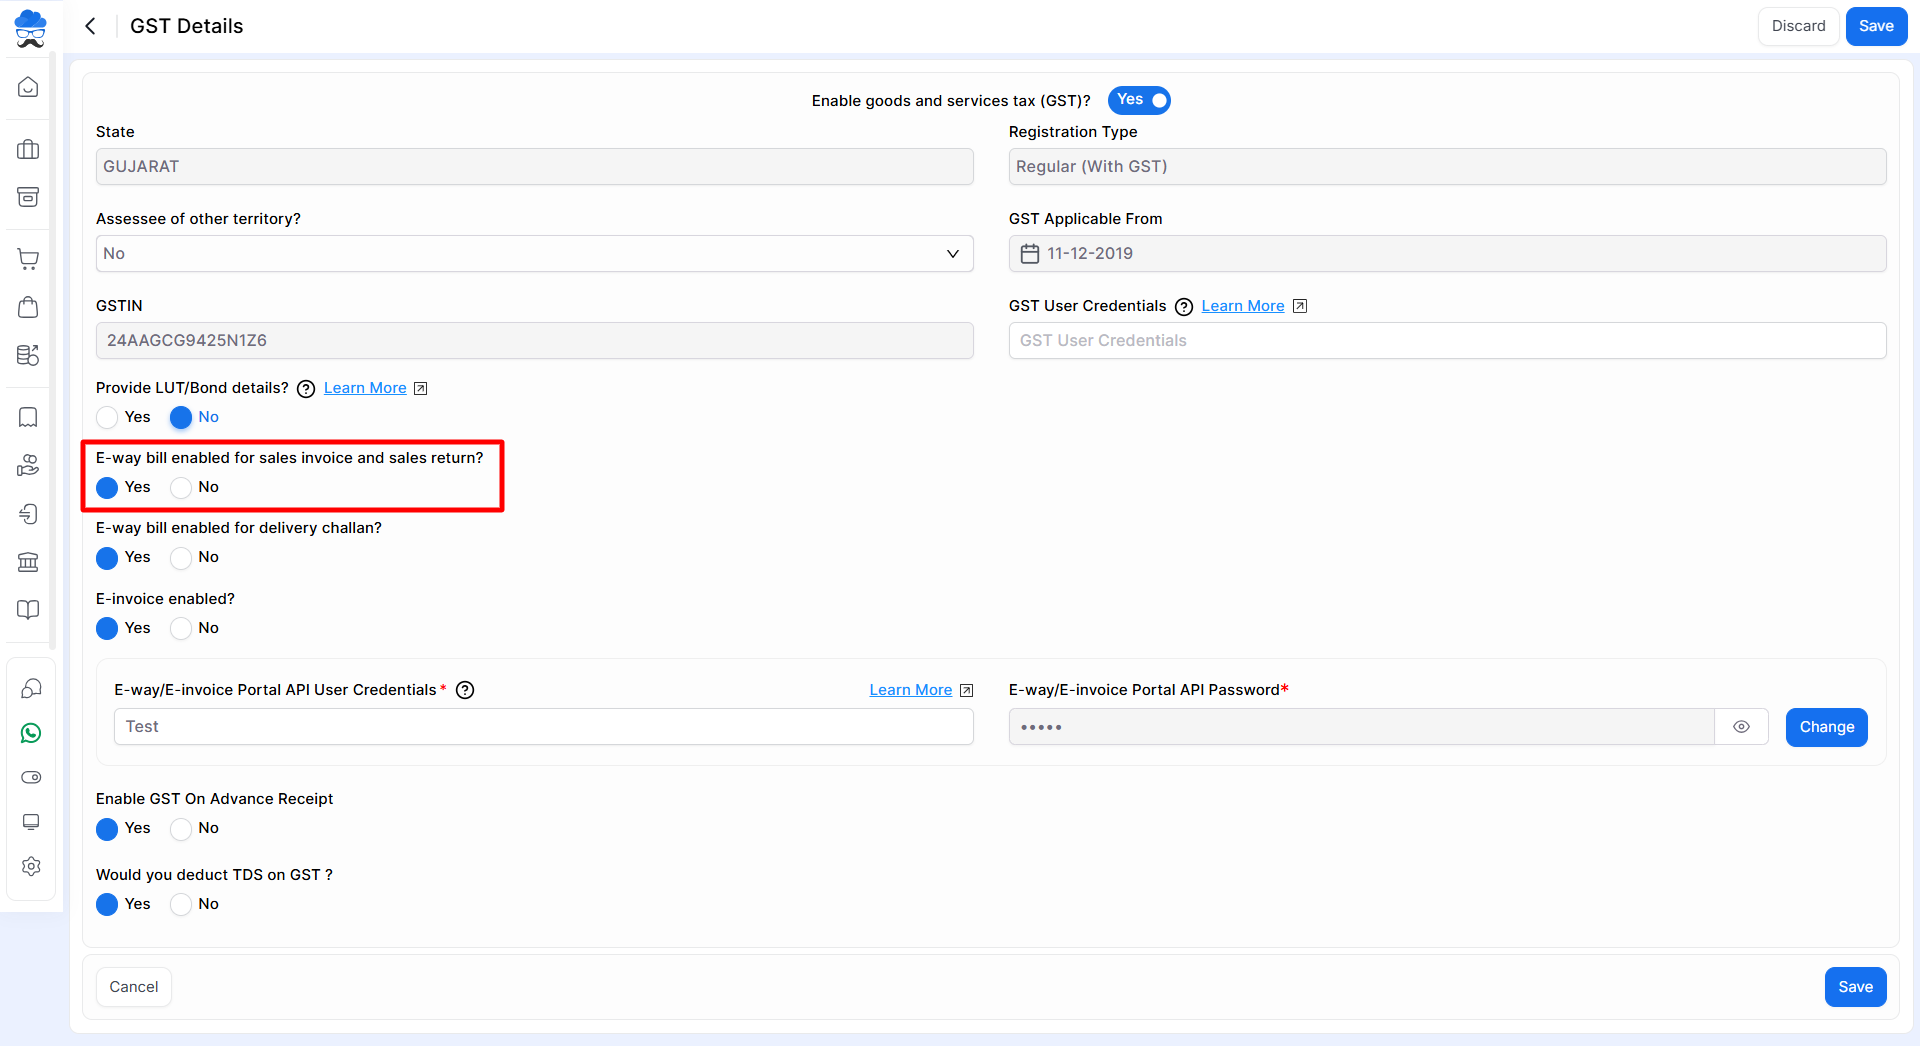
Step 1: Enable the E-Way Bill Feature
- Navigate to Settings → Statutory Information → GST Details.
- Click Edit in the GST Details section.
- Change the Is E-way bill enabled? Option from No to Yes.
Step 2: Generate E-Way Bill API Username and Password
After enabling the feature, the system will prompt you to enter the E-Way Bill API credentials.
Note: If you have not created the API credentials yet, refer to the helpdesk: How to Generate E-Way Bill API Username and Password
Step 3: Enter API Credentials
- Enter the generated:
- E-Way Bill API Username
- E-Way Bill API Password
- Save the settings.

Step 4: Create a Sales Invoice with E-Way Details
- Create a Sales Invoice as usual.
- Enable Transporter Details for E-Way Bill.

You can generate E-Way Bills using one of the following options:
- Without an E-Way Bill – Add transportation details only for reference. No E-way generation.
- With Part-A E-Way Generate – Generate E-Way Bill with limited information.
- With Part-A and Part-B E-Way Generate – Generate a complete E-Way Bill with all required details.
Enter the required transportation details and proceed.
Step 5: Save the Invoice
- Verify that all mandatory E-Way Bill details are entered.
- Click Save.
Your E-Way Bill will be generated successfully for the selected invoice.
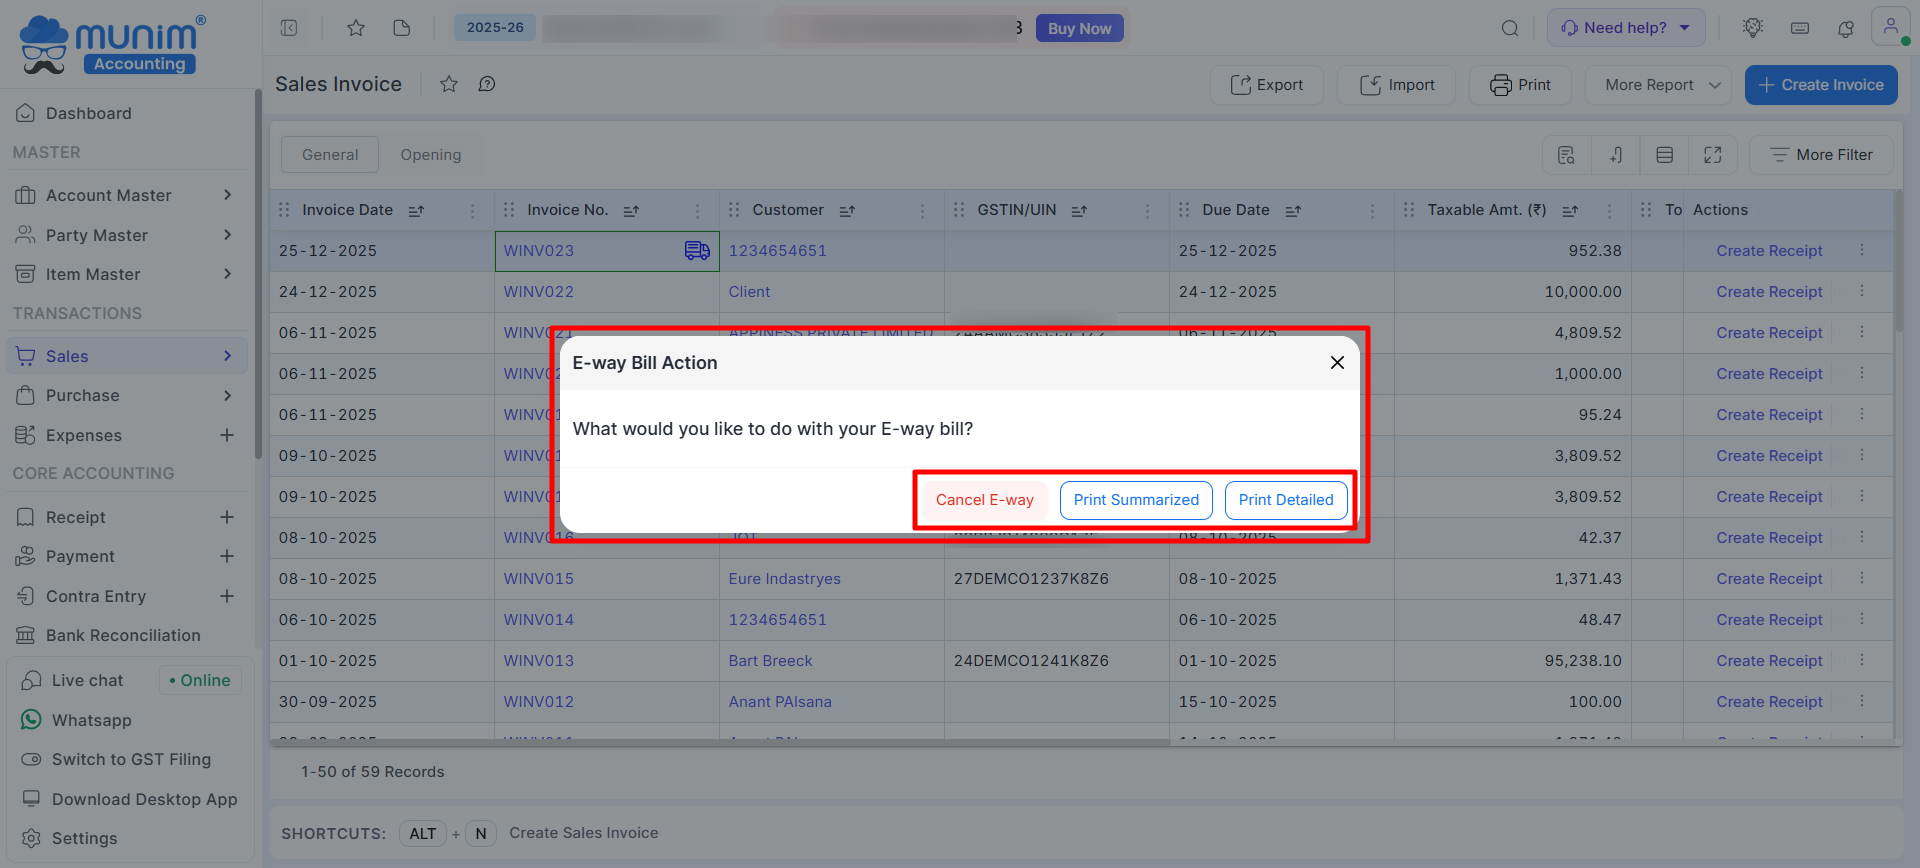
Step 6: Check E-Way Bill Status and Print
After successful generation:
- A truck icon will appear against the invoice in the Sales Invoice list.
Click the icon to:
- Print Summarized E-Way Bill
- Print Detailed E-Way Bill
- Cancel the E-Way Bill (within the permitted time frame)
Important Note
- E-Way Bill generation requires valid API credentials.
- Ensure transporter and vehicle details are entered correctly before generating the E-Way Bill.
- E-Way Bills can only be cancelled within the time limit prescribed by the GST portal.
- Incorrect or incomplete transportation details may cause E-Way Bill generation to fail.
Result
The E-Way Bill is generated successfully and linked with the Sales Invoice, allowing you to print or manage it directly from Munim.
Need Assistance?
If you face any issues while generating an E-Way Bill, please contact the Munim Support Team.


