
 3179 views
 This feature allows you to print invoices on a thermal printer. We have provided quick and effective settings for users. Users can make changes in invoice template design and make invoices as per their needs. Here below mentioned major settings for it, which users can use.:
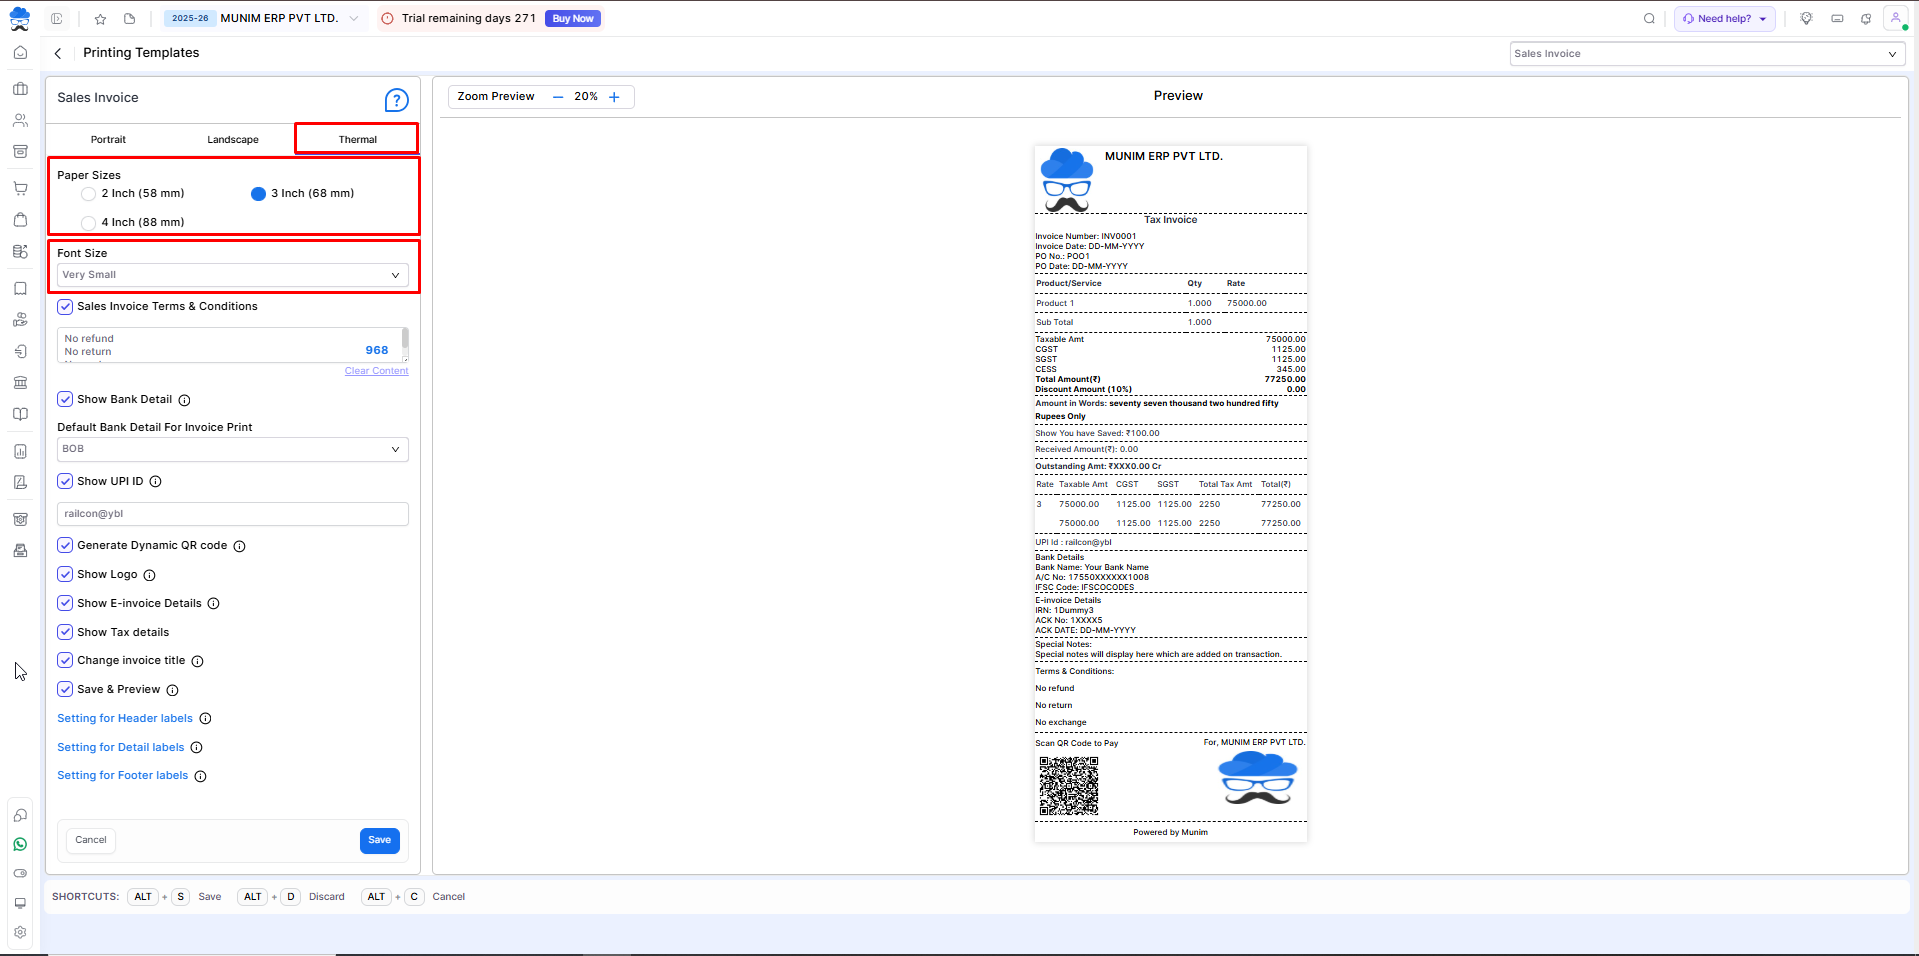
- Access Thermal Print Settings:
- Go to Settings, then Printing Templates, and select the Thermal Tab.
- Select Paper Size:
- Choose from three available paper sizes: 2 inches (58 mm), 3 inches (68 mm), or 4 inches (88 mm). Select the size that best fits your printing needs.
- Choose from four available font size options: Very Small, Small, Medium, Large or Extra Large. Select the font size that best matches your invoice layout and printing requirements.
| Options | Description |
|---|---|
| Paper Sizes | Here you can use this option to show or hide the Logo of your company. |
| Font Size | Here you can select the Size of print according to your Thermal printer size, from 2,3 and 4 inches. |
| Terms and Conditions | Here you can add the Terms and Conditions you want to show on print. |
| Show Bank Detail | Here you can select your Bank details to show on the Print. |
| Show UPI ID | Here you can add your UPI ID for payment and show it on print. |
| Dynamic QR Code | Here you can generate a QR code of your UPI ID to show it on print so customers can scan it to pay. |
| Show Logo | Here you can select the Size of print according to your Thermal printer size, from 2,3 and 4 inches. |
| Show E-Invoice Details | Here you can use this option to show or hide the Tax details table on Invoice print. |
| Show Tax Details | Here, you can use this option to show or hide the Tax details table on Invoice print. |
| Show You Have Saved | Here you can use this option to show or hide the details of How much you have saved on this transaction. |
| Change Invoice Title | This option makes the invoice title dynamic, changing based on the GST rate applied to the invoice. |
| Setting for Header Labels | Here you can Show/Hide or Rename Header labels like Tax Invoice, Address etc. |
| Setting for Detail Labels | Here you can Show/Hide or Rename Detail labels like Rate, GST, Name, Discount etc. |
| Setting for Footer Labels | Here you can Show/Hide or Rename Footer labels Signature, Special note, Total amount etc. |
- Enable/Disable Print Options:
- Customize your thermal prints by enabling or disabling various options to show in the print. This allows you to tailor the printout to your specific requirements.
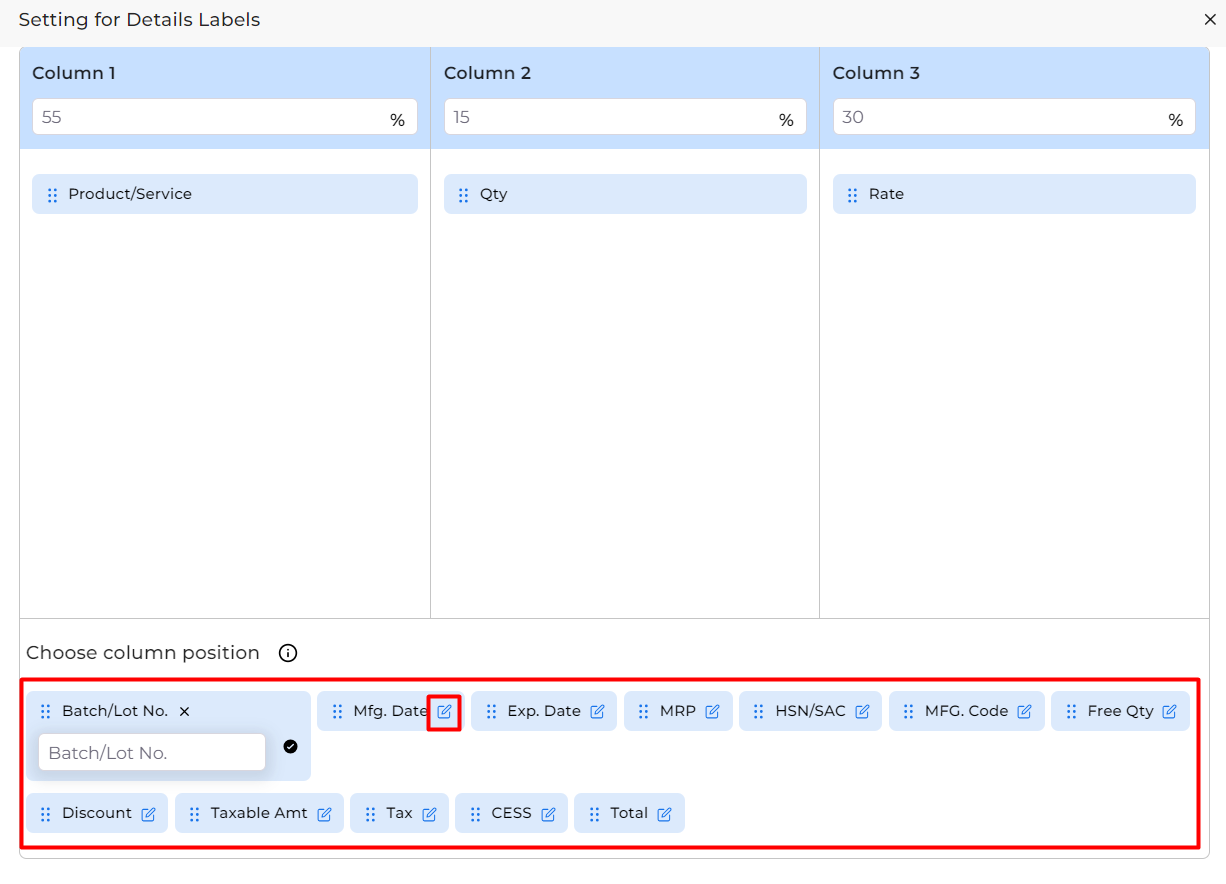
- Configure Detail Labels:
- In the Setting for Detail Labels option, you can arrange which details to show in the print.
- The total percentage of all columns should be 100. Like in the image, Column 1 has 35%, 2 has 15%, 3 has 30% and 4 has 20% = 100%
- Also, this feature allows you to set the column width in percentage, giving you control over the layout of your printouts.

Note: As shown in the above image.
In 4-inch format, You can add a maximum of 6 Columns.
In 3-inch format, You can add a maximum of 5 Columns.
In 2-inch format, You can add a maximum of 3 Columns.
- Configure Column Labels:
- You can also Edit Column labels to rename them by clicking the Edit option icon next to every column label.
With these easy-to-use settings, you can now produce professional-looking thermal prints directly from Munim. This feature is perfect for businesses that need quick and reliable printing solutions.
Start using the Thermal Print feature today and enhance your printing efficiency with Munim!


