2597 views
 Barcode functionality in accounting software revolutionizes inventory management and transaction processes. By generating and scanning barcodes, businesses effortlessly identify products, update inventory levels, and expedite transactions.
This seamless integration enhances accuracy, streamlines operations, and offers real-time insights into stock movements. With barcode functionality, businesses can optimize efficiency, minimize errors, and enhance overall productivity in their accounting workflows.
How to use Barcode Printing:
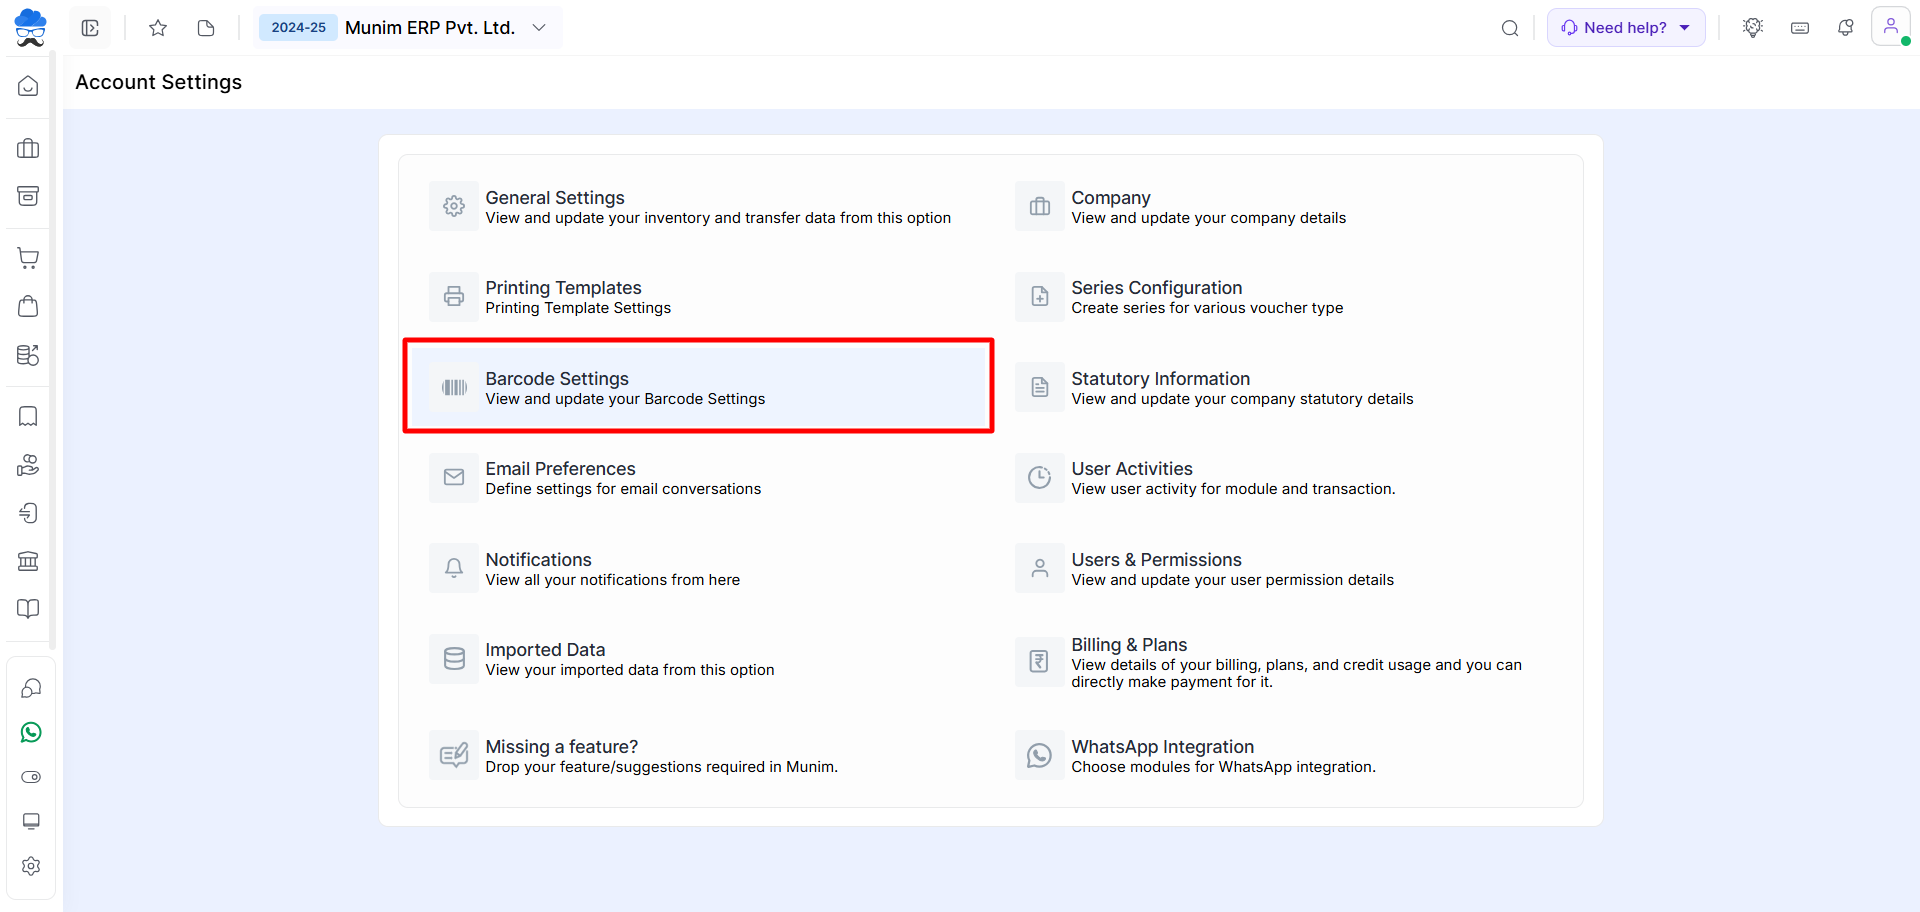
- First Go to the Settings module and click on the Barcode Settings button.
+−⟲
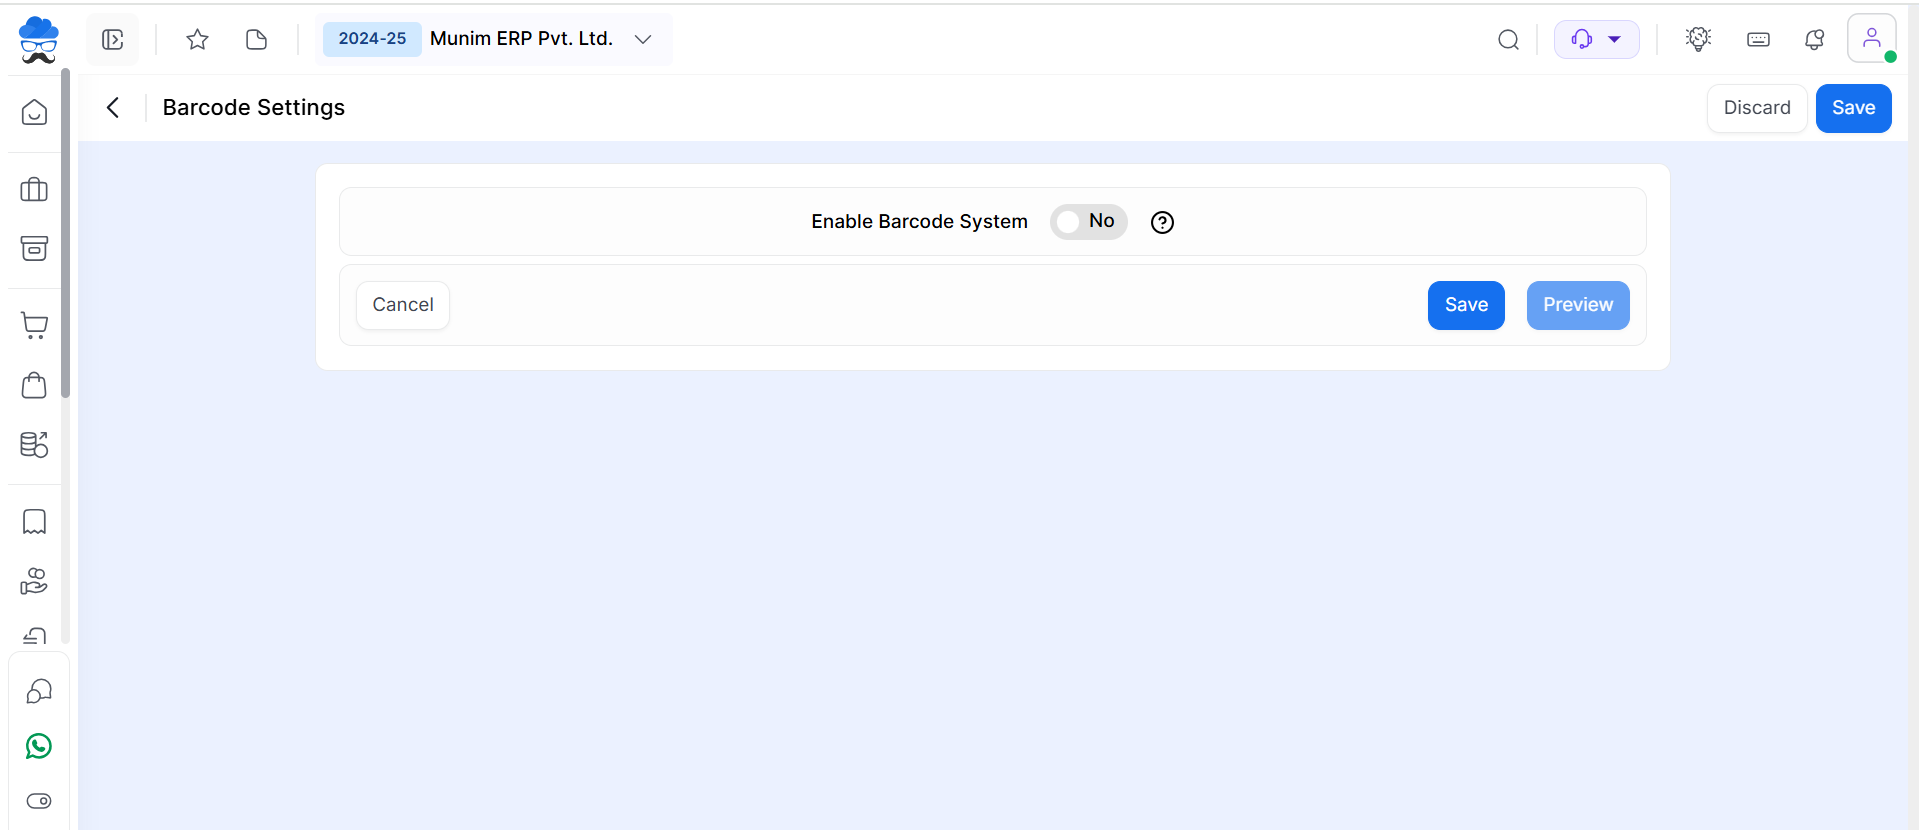
- Now click on the toggle button to Yes to Start the Barcode System.
+−⟲
- Now, set the proper barcode size and other settings depending on your barcode sticker height and width, Label paper type, Label, etc.
+−⟲
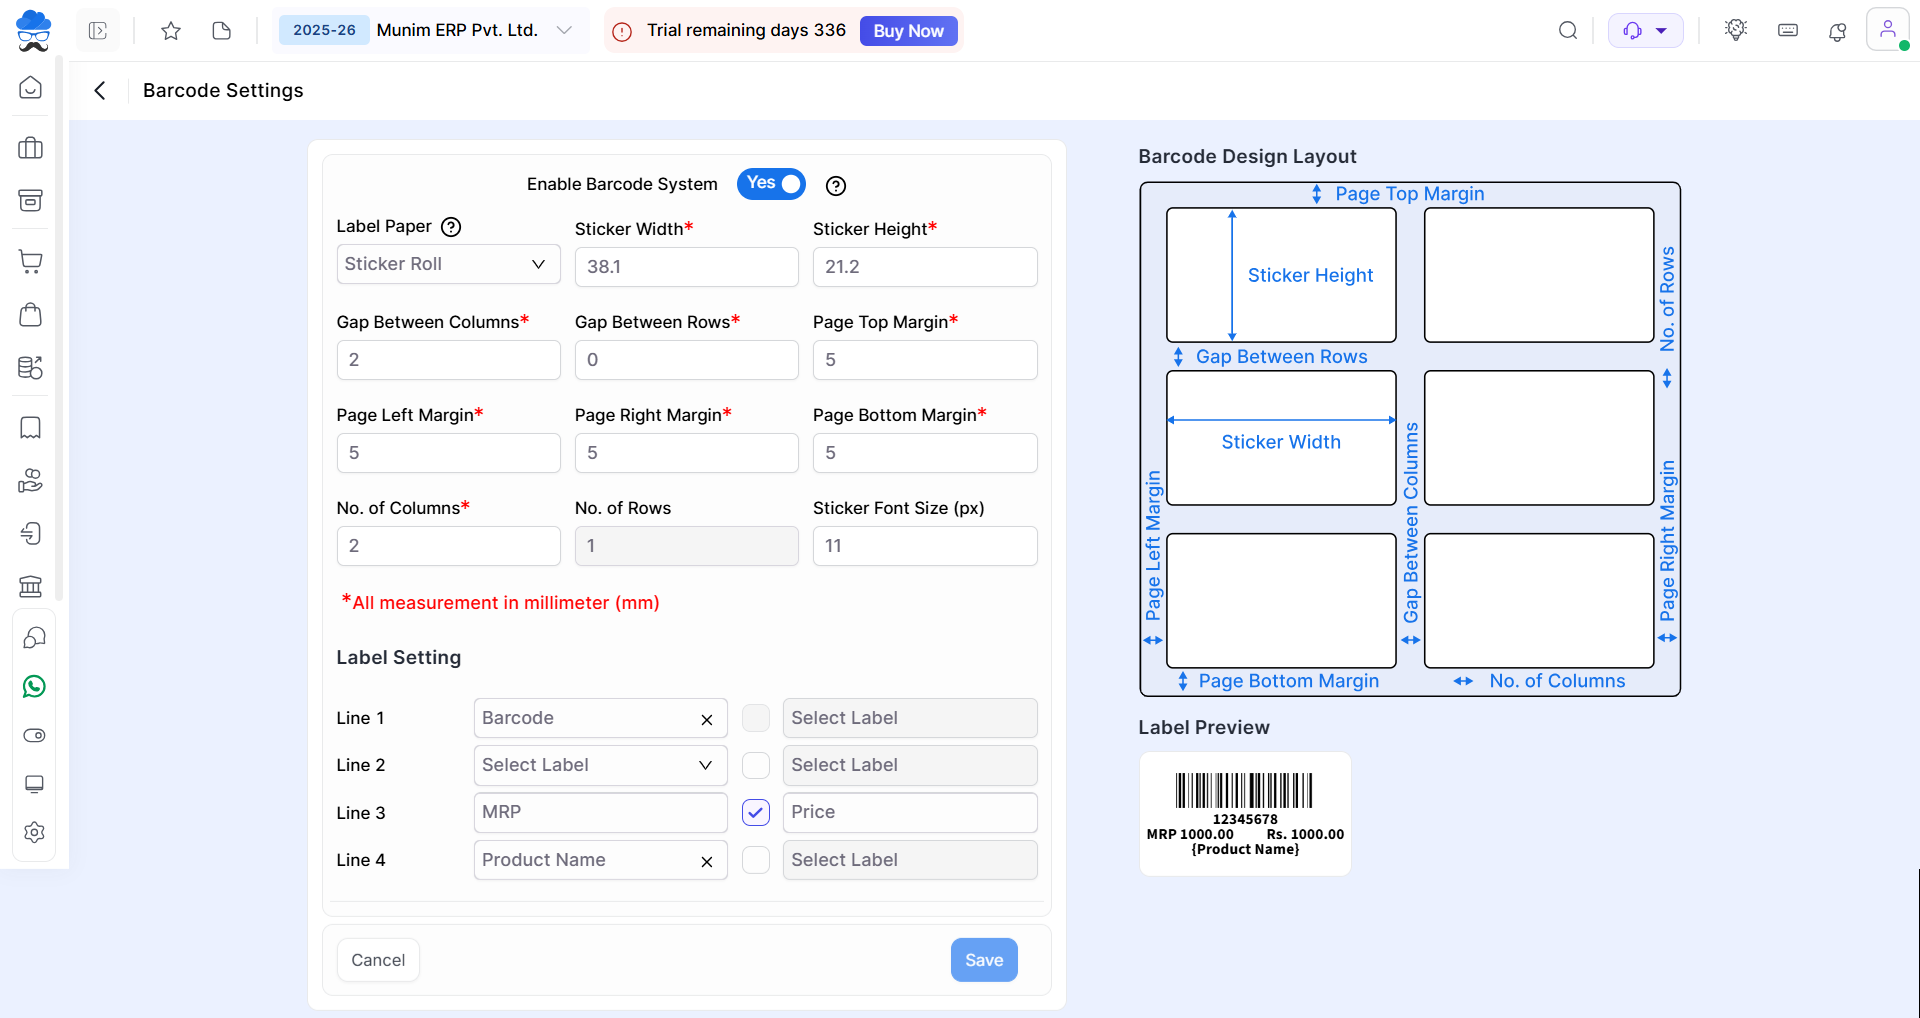
Field Information for Barcode Setting:
| Field | Description |
|---|---|
| Label Paper | Here you can select your available printing paper type from A4 Sticker Sheet or Sticker Roll (1,2,3, or 4 Sticker rolls) |
| Sticker Width | Check your sticker width and enter the sticker width size in mm. |
| Sticker Height | Check your sticker height and enter the sticker height size in mm. |
| Gap Between Columns | Check the gap between two sticker columns and enter the gap size in mm. |
| Gap Between Row | Check the gap between two sticker rows and enter the gap size in mm. |
| Page Top Margin | Check the A4 sticker sheet and measure the top margin between the sheet and the sticker. enter the top margin in mm. |
| Page Left Margin | Check the A4 sticker sheet and measure the left margin between the sheet and the sticker. enter the left margin in mm. |
| Page Right Margin | Check the A4 sticker sheet and measure the right margin between the sheet and the sticker. enter the right margin in mm. |
| Page Bottom Margin | Check the A4 sticker sheet and measure the bottom margin between the sheet and the sticker. enter the bottom margin in mm. |
| No.of Columns | Check how many columns are available on your A4 sticker sheet and enter the number of columns. |
| No.of Rows | Check how many rows are available on your A4 sticker sheet and enter the number of rows. |
| Sticker Font Size | Here, you can set the font size to be displayed on the barcode sticker print. |
| Label Setting | Here, users can customise the label by selecting any label type across the four available lines and arranging them in any desired sequence, either ascending or descending. |
| Company Name | Enter your company name as it should appear on the barcode. For better display, use a short name. |
- Check the Label Preview of the barcode sticker while adjusting label settings.
- Click on the Save button to save the setting.
How to Assign Barcode to the Item:
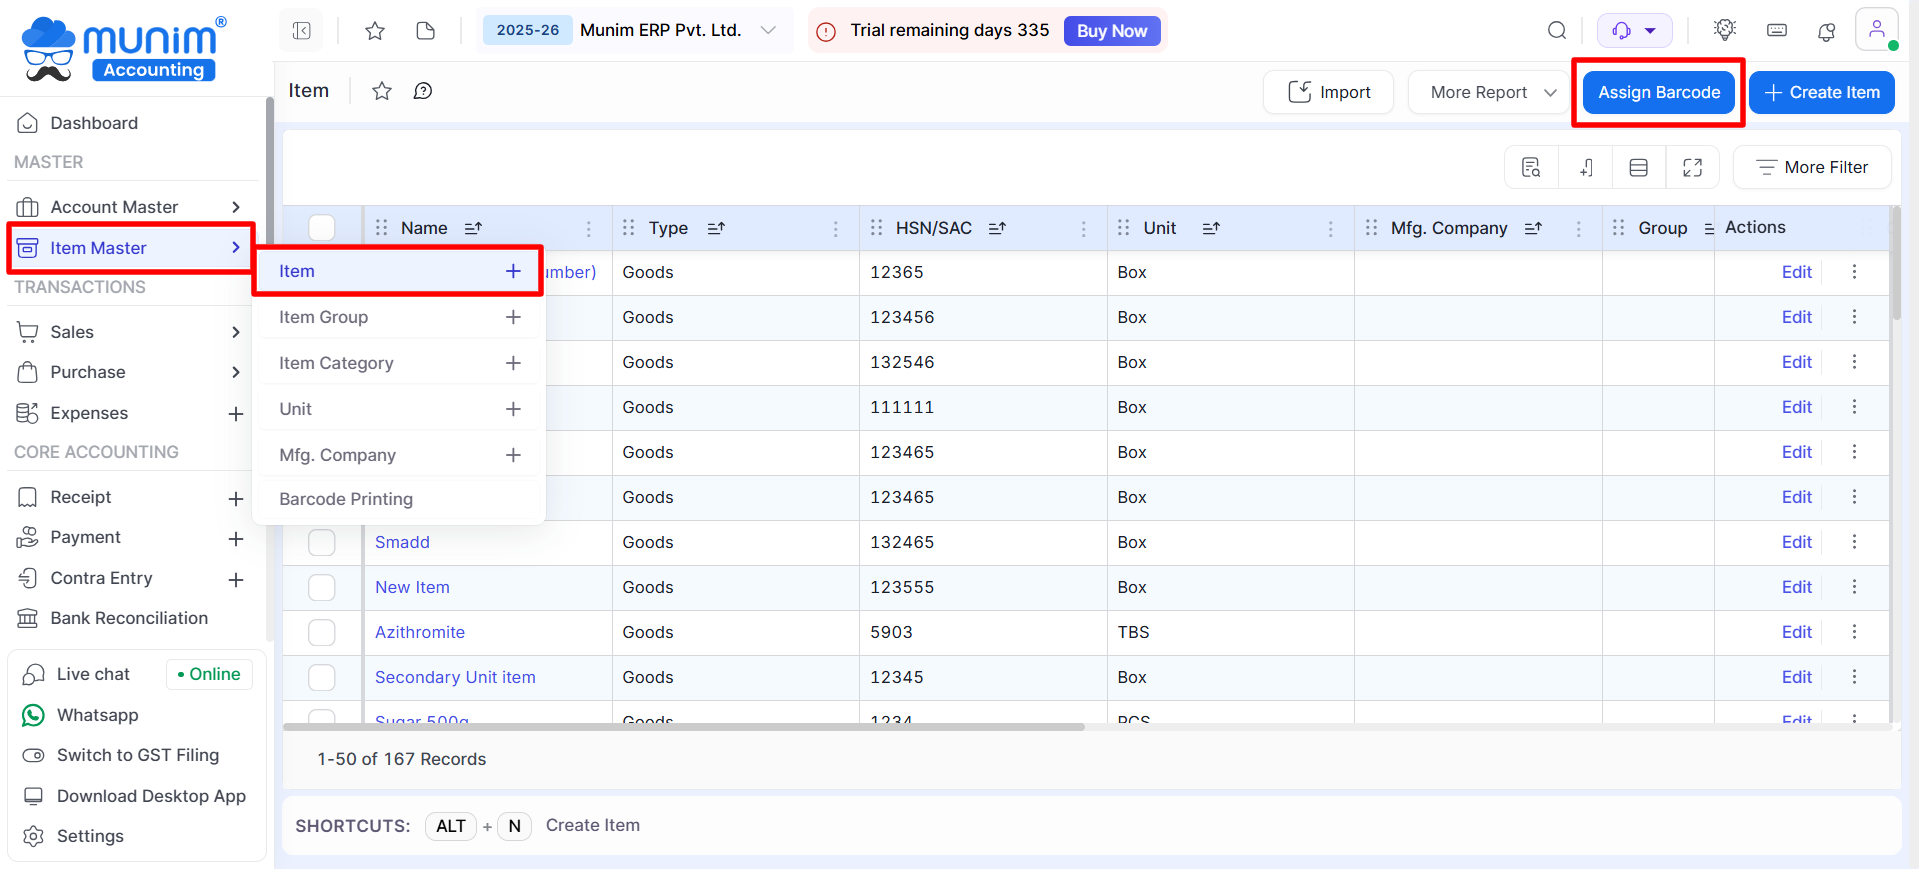
- Go to the Item Master module and click Item option.
- Click on the Assign Barcode button located in the top right corner.
+−⟲
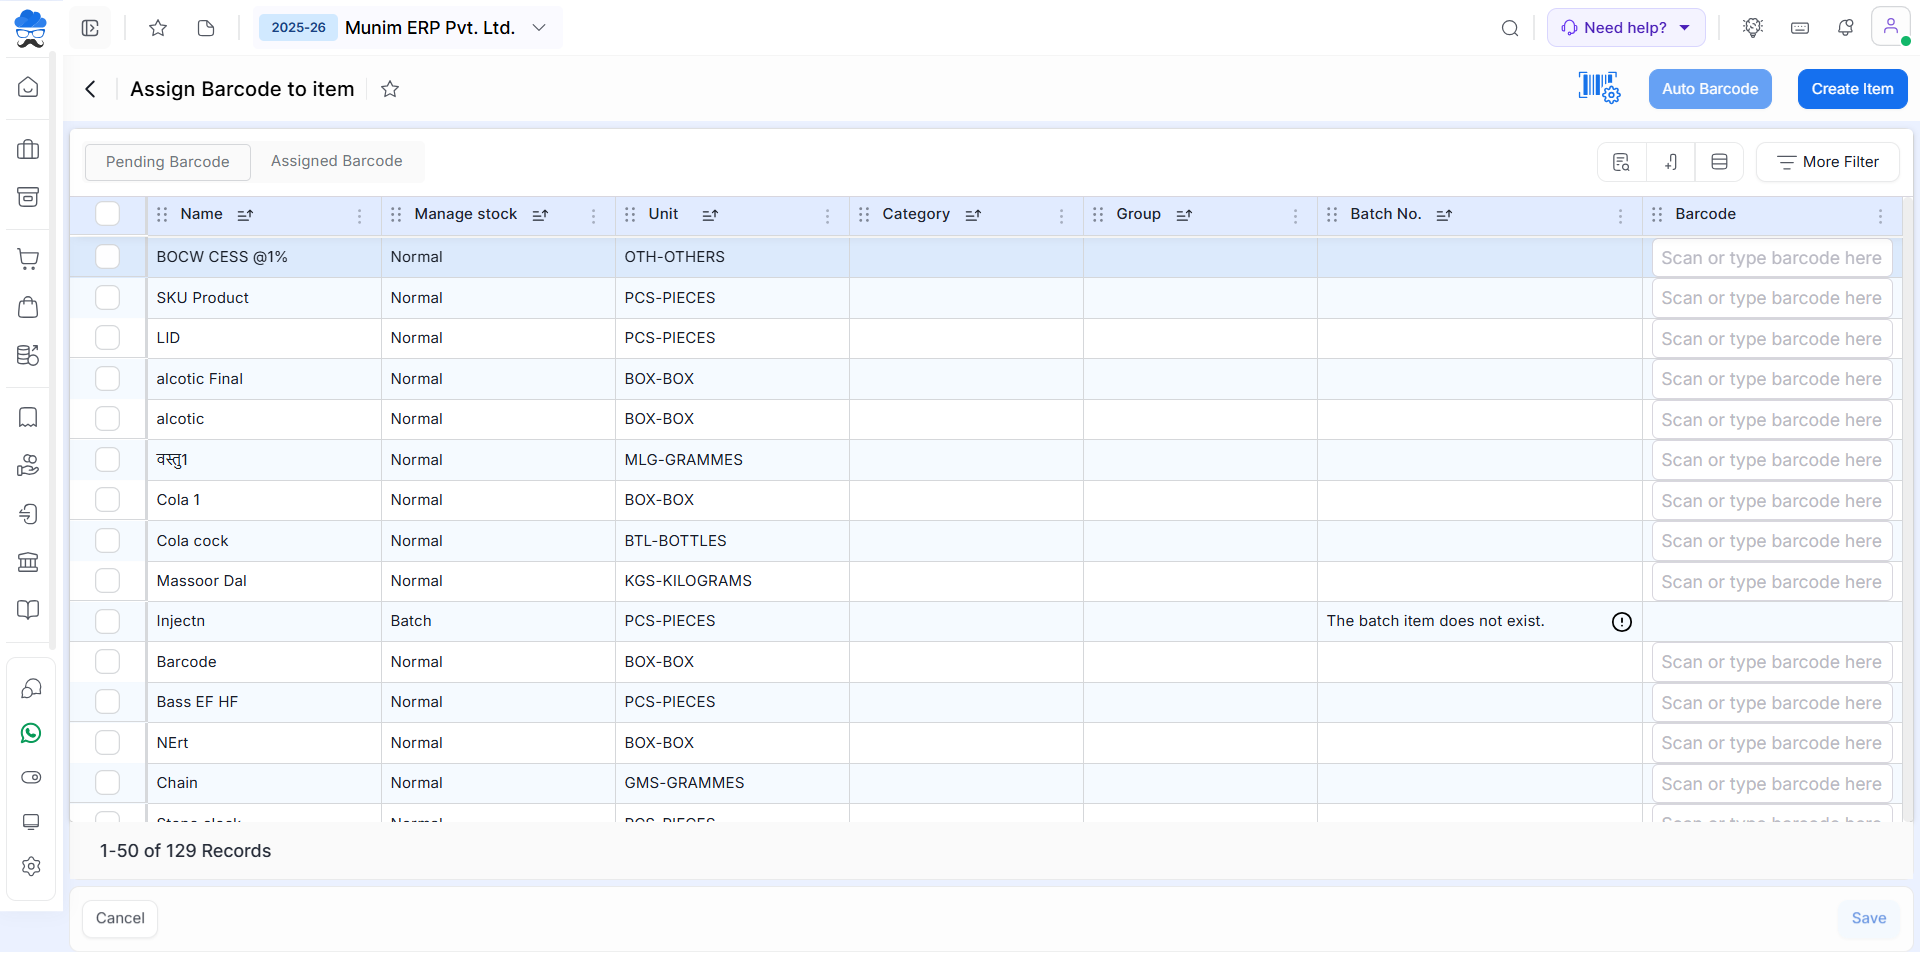
- Now showing the pending barcode item list on the Pending Barcode tab.
- On this page, the user can assign barcodes manually and Auto.
+−⟲
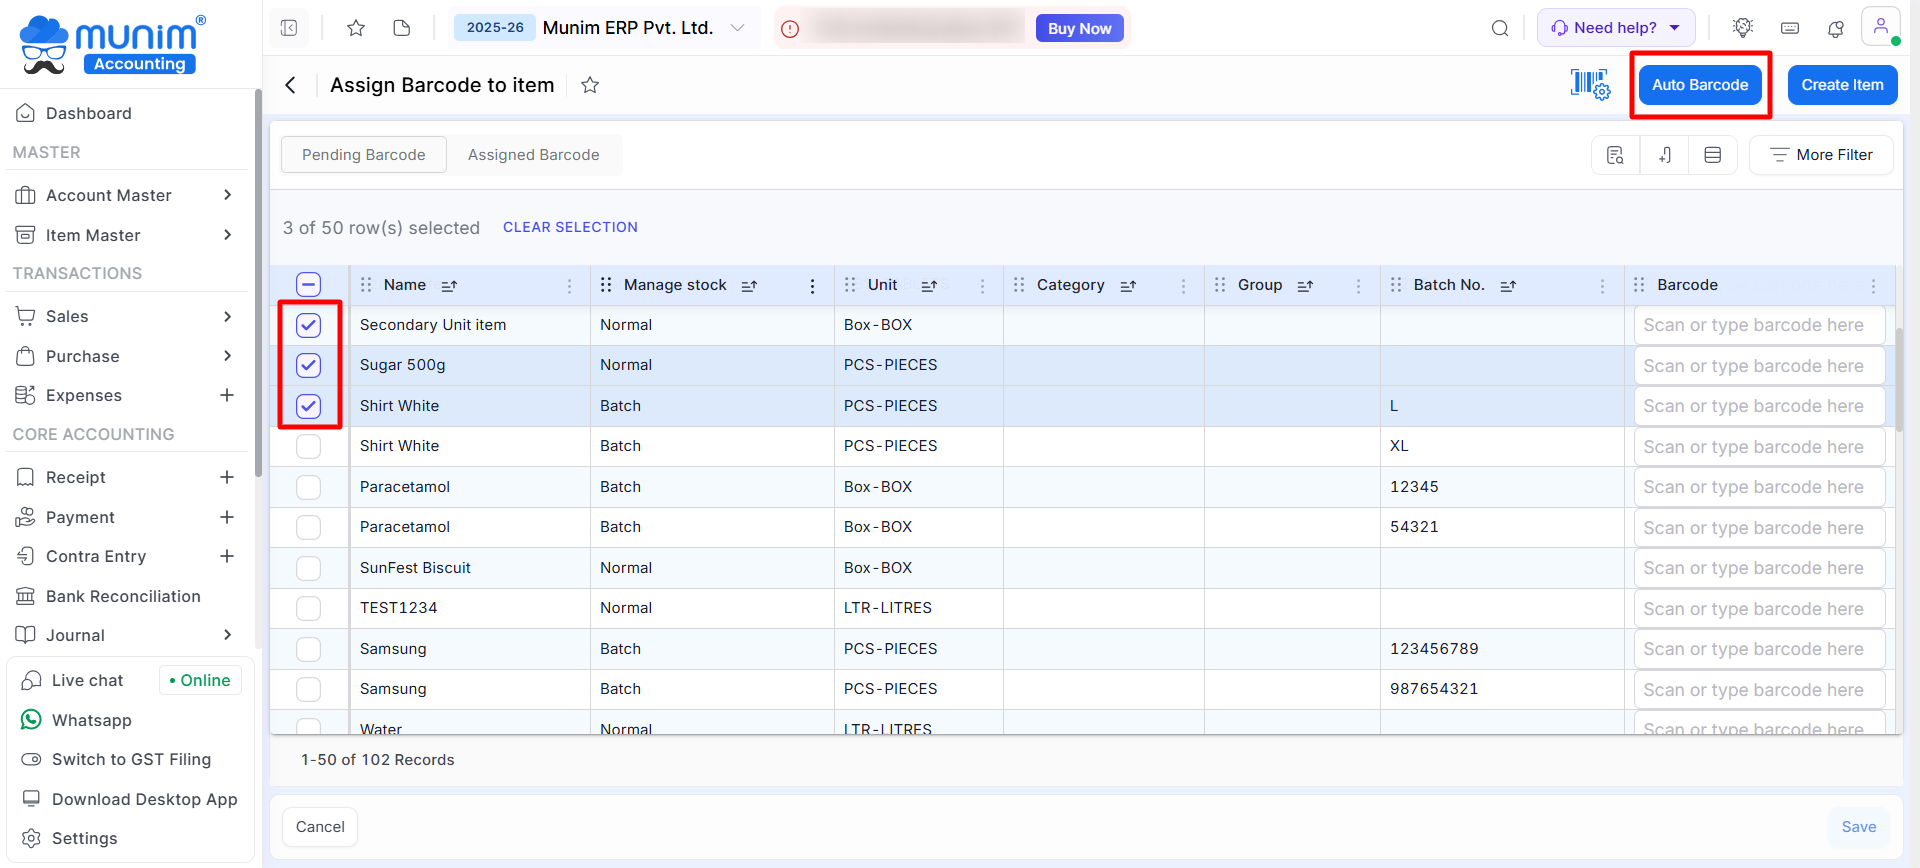
How to auto-generate barcode:
- Choose the item from the left-hand selection to which you wish to assign the barcode, and then click the “Auto Barcode” button, which is situated in the top right-hand corner.
- click on the Save button to save it.
+−⟲
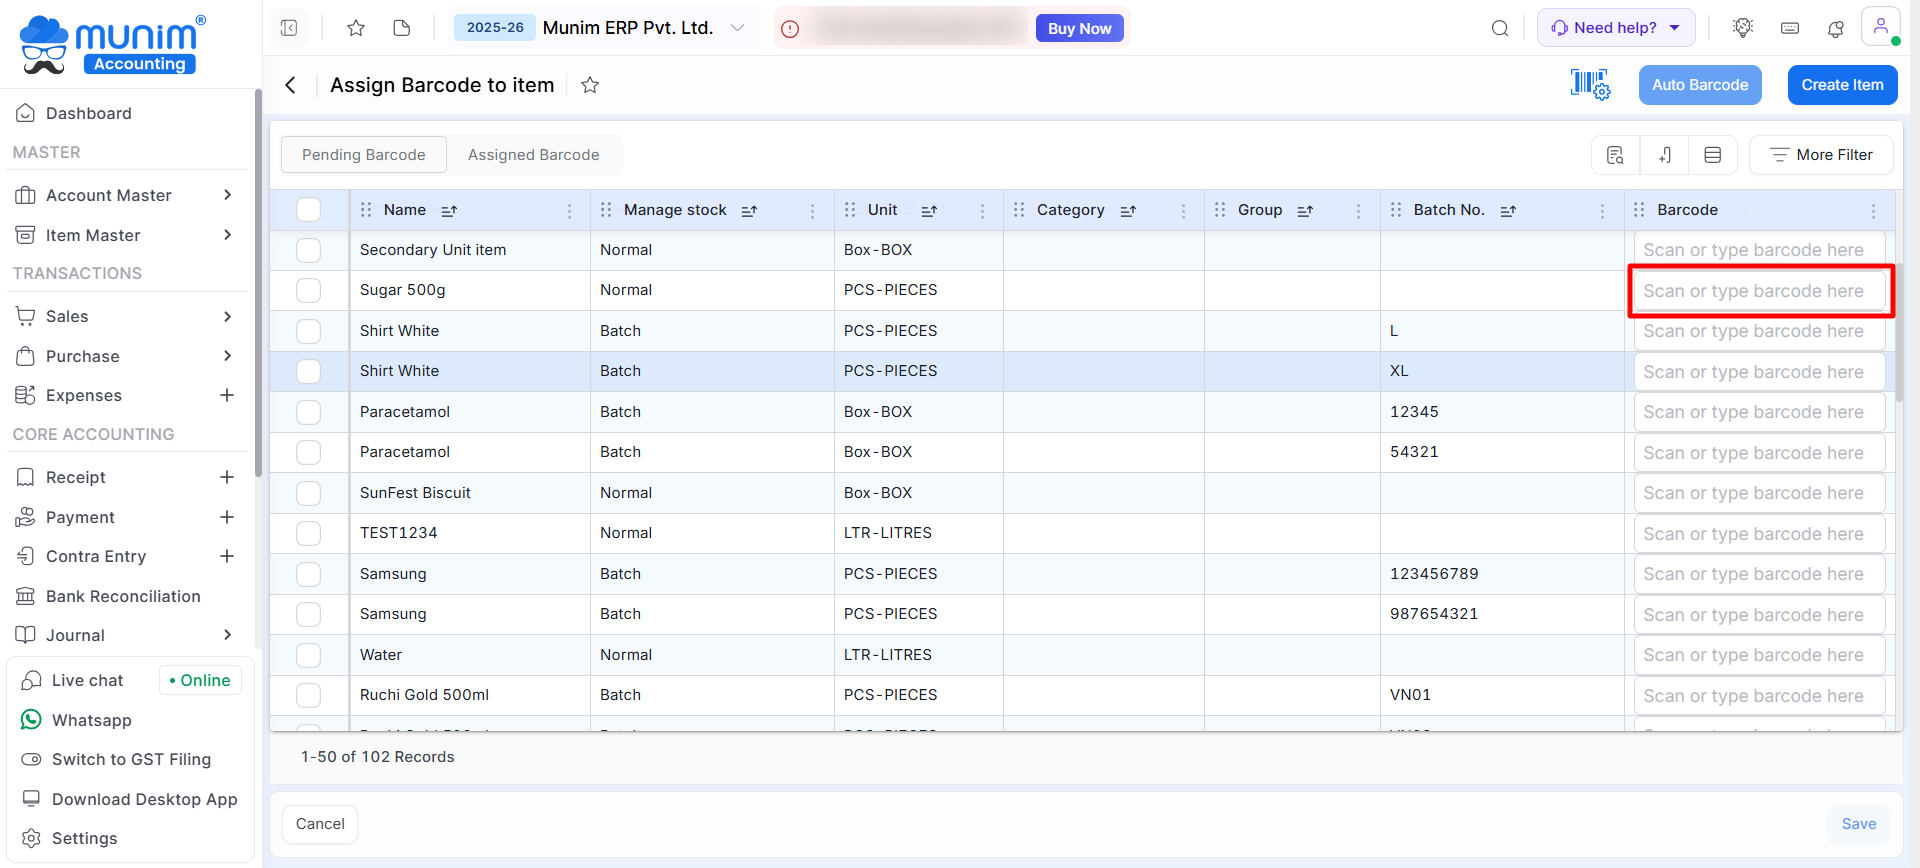
How to manually generate the Barcode:
- Simply write the barcode on the Barcode field and click on the Save button.
+−⟲
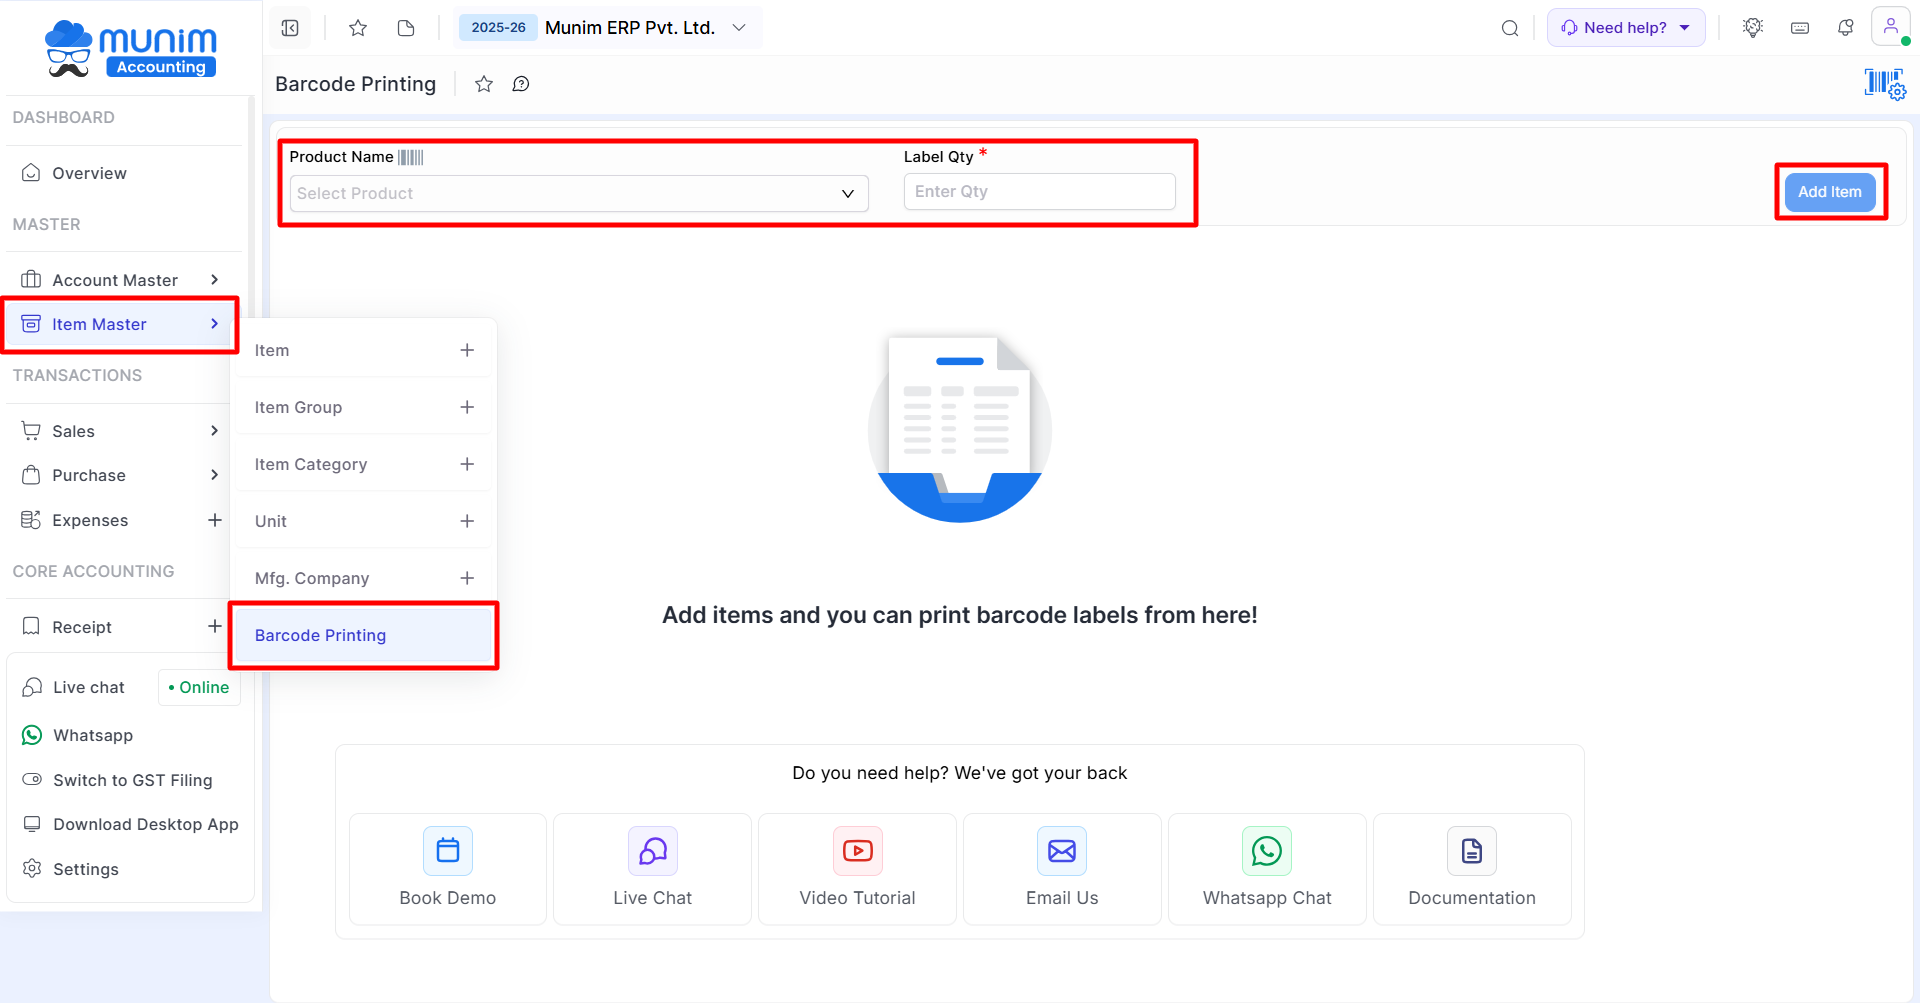
How to print Barcode:
- Go to the Item Master module and click the Barcode Printing option on the left menu.
- Select a product on the Product Name drop-down list.
- Select Batch/Lot No. on the batch drop-down list. (If the product is managed batch-wise, then only show the batch drop-down list.)
- Enter the Label Quantity, and click on the “Add Item” button.
+−⟲
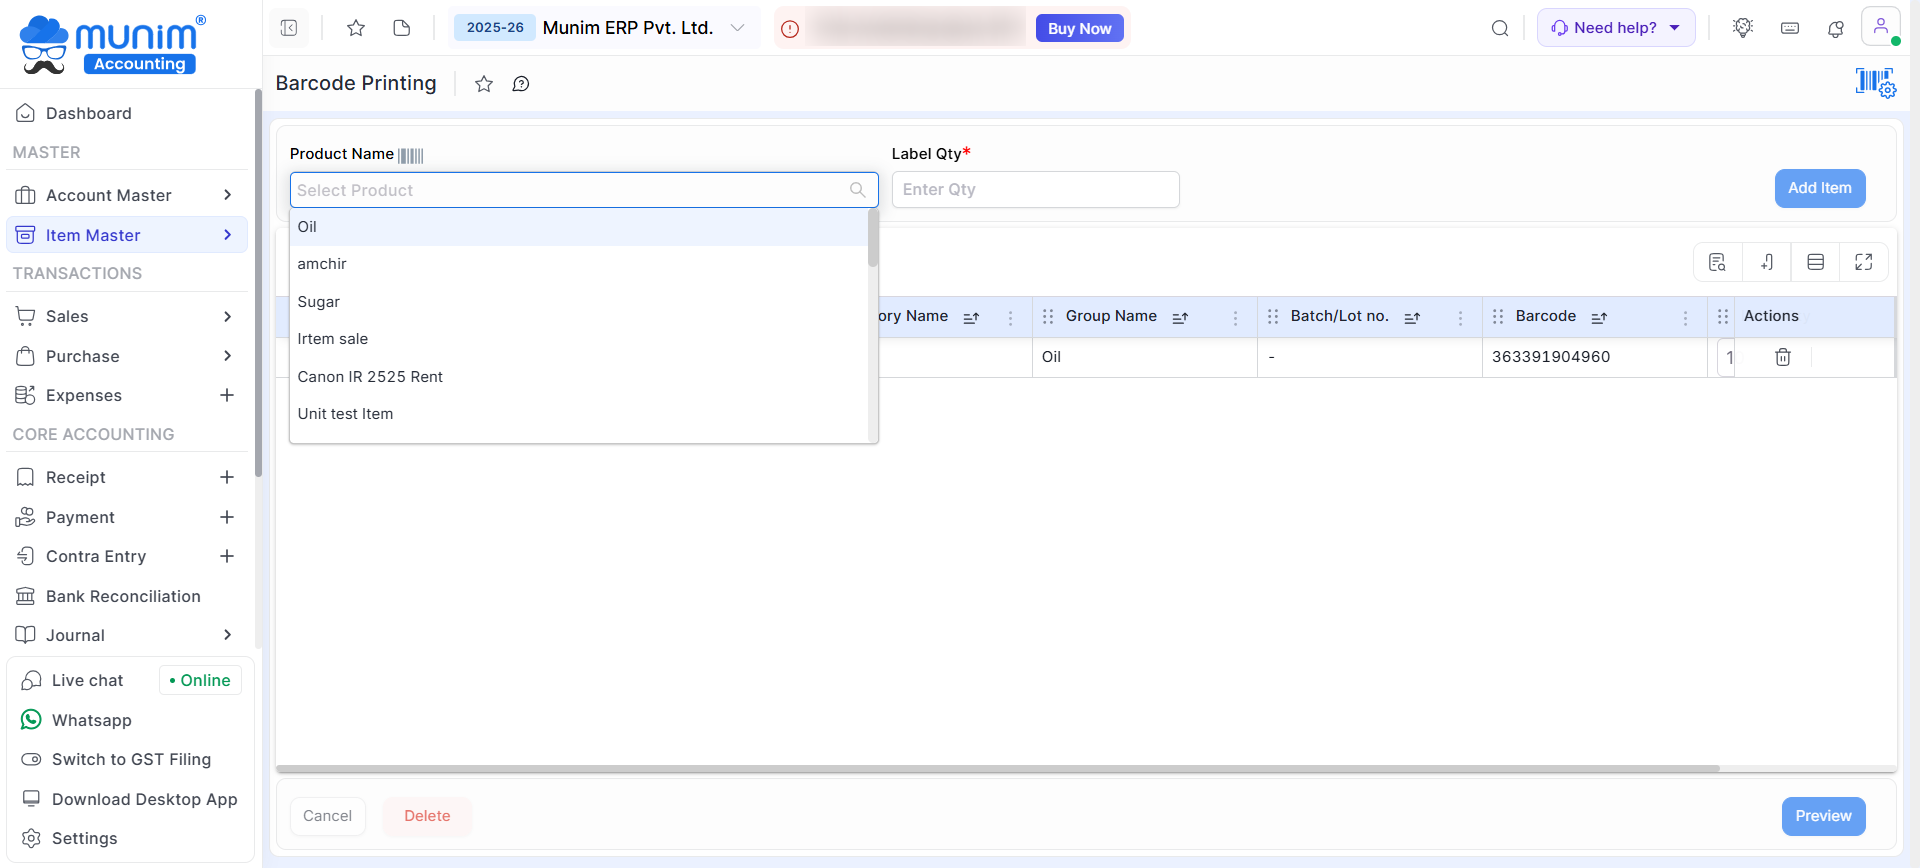
- On this page, select the product within the Product Name field, input the Label Quantity, and then click the Add Item button.
+−⟲
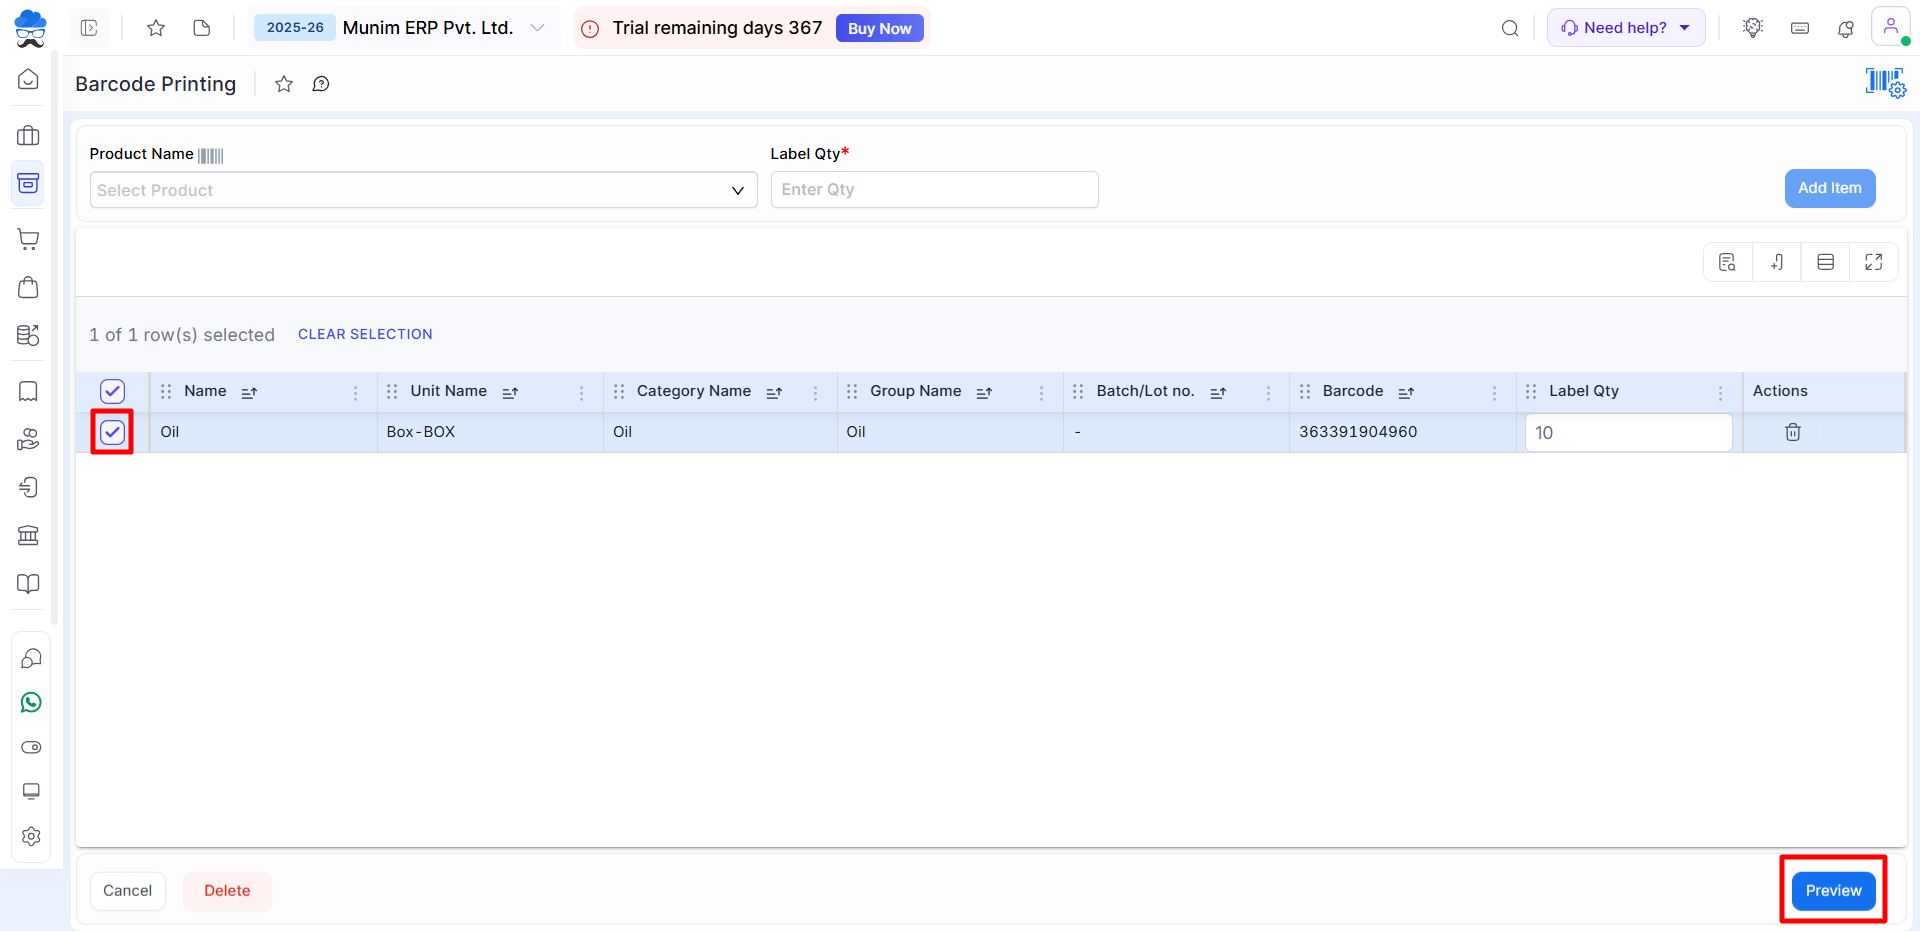
- Now select a product and click on the Preview button.
+−⟲
- Click on the Print Barcode button.
+−⟲
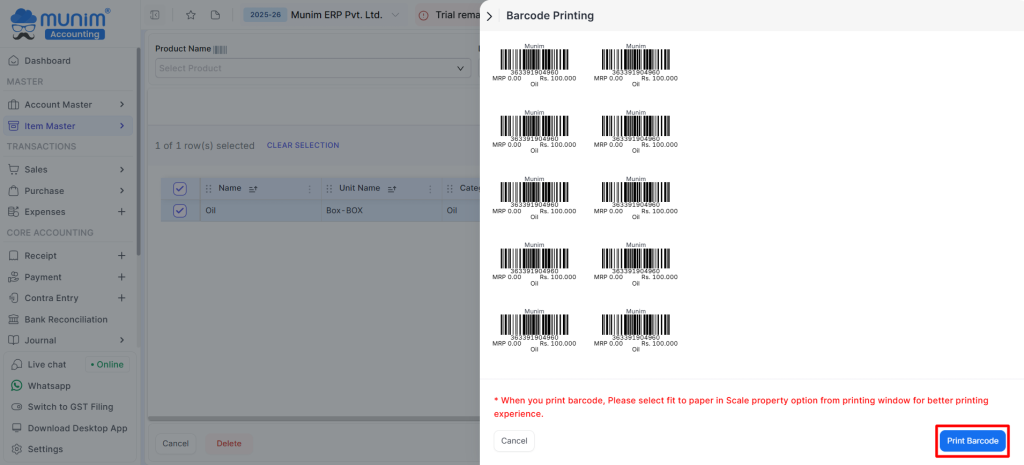
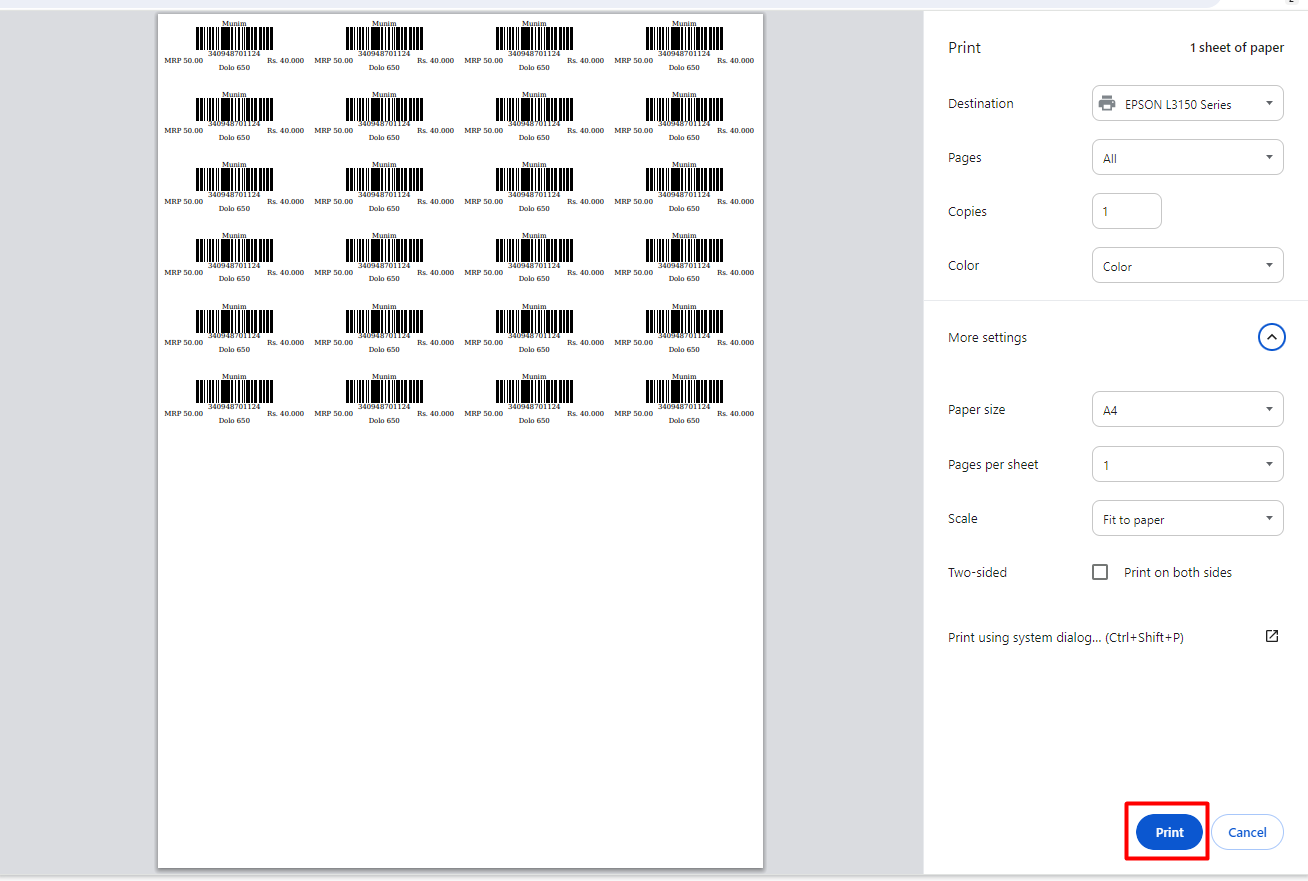
- Now showing a print preview, set the proper settings for print and click on the Print button.
+−⟲